Other controls, Setting blade speed, Raising/lowering the saw head – Jet Tools J-7060 User Manual
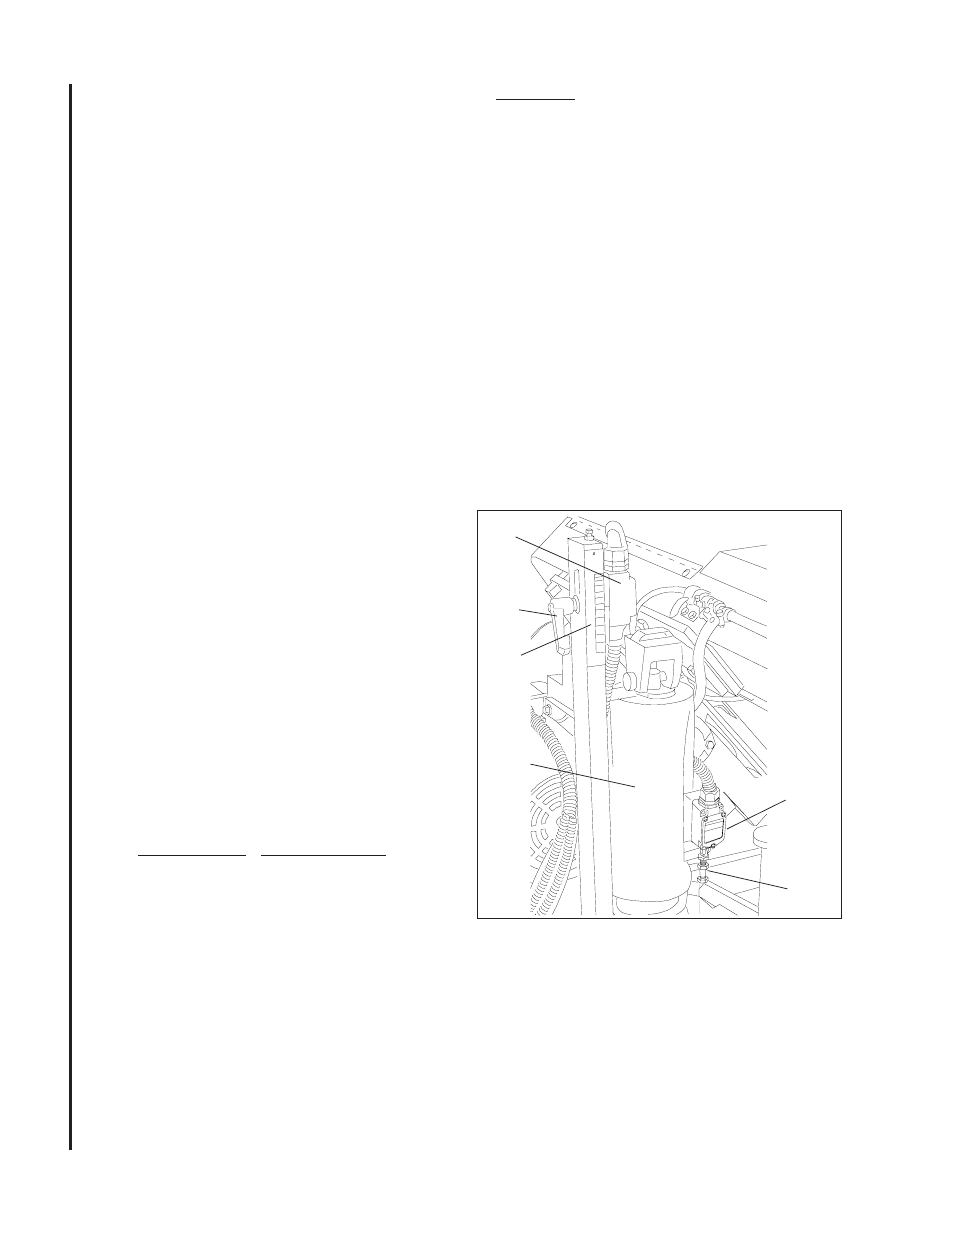
Page 8: Figure 4: limit switches
8
(FT)
12
11
10
9
8
7
6
5
4
3
2
1
0
The bottom row of controls include the following:
1. Stop pushbutton is used to stop the saw blade
drive motor.
2. Emergency stop pushbutton is used to quickly
disconnect electrical power to the machine.
3. Coolant On/Off selector switch is used to start
and stop the coolant pump motor.
Other Controls
Refer to Figures 1 and 2 for location of the following
controls:
1. Drive motor speed control: used to set drive
motor speed in meters per minute.
2. Blade guide support adjustment: used to set
distance between the saw blade guide bearing as
required by the size of the workpiece.
3. Blade tensioning hand wheel: use to tighten the
saw blade on the drive and idler wheels.
4. Vise clamping hand wheel: used to tighten the
vise jaws against the workpiece.
Setting Blade Speed
1. The blade speed is controlled by an adjustment
mechanism on the right end of the saw. Speed
increases when the adjustment knob is turned
counterclockwise. Speed decreases when the
knob is turned clockwise.
2. A placard on the drive belt guard (shown below)
provides recommended speeds for various
materials.
3. A speed indicator is provided on the barrel of the
adjustment mechanism. The indicator provides
speed indications in feet per minute and meters
per minute. (The meters per minute values are
shown in parenthesis on the indicator.) The
graduations are:
4. The feed rates on the placard are expressed in
meters per minute. The feed rate graduations
available on the indicator may not match the
recommended feed rate. An approximate speed
may therefore be required. For example, to set a
speed rate of 25 meters per minute, the indicator
would be set about midway between 21 meters-
per-minute and the 30 meters-per-minute gradu-
ations.
Feet per Minute Meters per Minute
70
(21)
100
(30)
130
(40)
160
(48)
WARNING: TO CHANGE SPEED, THE SAW
MOTOR MUST BE OPERATING.
5. Turn the speed adjustment knob to the desired
rate setting as determined by the material being
cut.
Raising/Lowering the Saw
Head
1. To raise the saw head, press the Saw Head Up
pushbutton. The saw head will raise until the
upper limit switch (refer to Figure 4) trips.
2. To lower the saw head, press the Saw Head
Down pushbutton. The saw head will lower until
the lower limit switch trips.
3. When the saw head is being lowered to cut a
workpiece, the saw blade drive motor must be
started before lowering the blade against the
workpiece. Set the coolant pump selector to the
on ( I ) position If coolant is required by the
material being cut.
Upper
Limit
Switch
Lock
Handle
Scale
Hydraulic
Cylinder
Lower
Limit
Switch
Lower
Limit
Stop
Figure 4: Limit Switches