Installation – John Deere AC-6000SB User Manual
Page 10
10
Toolbox Installation Instructions
Installation
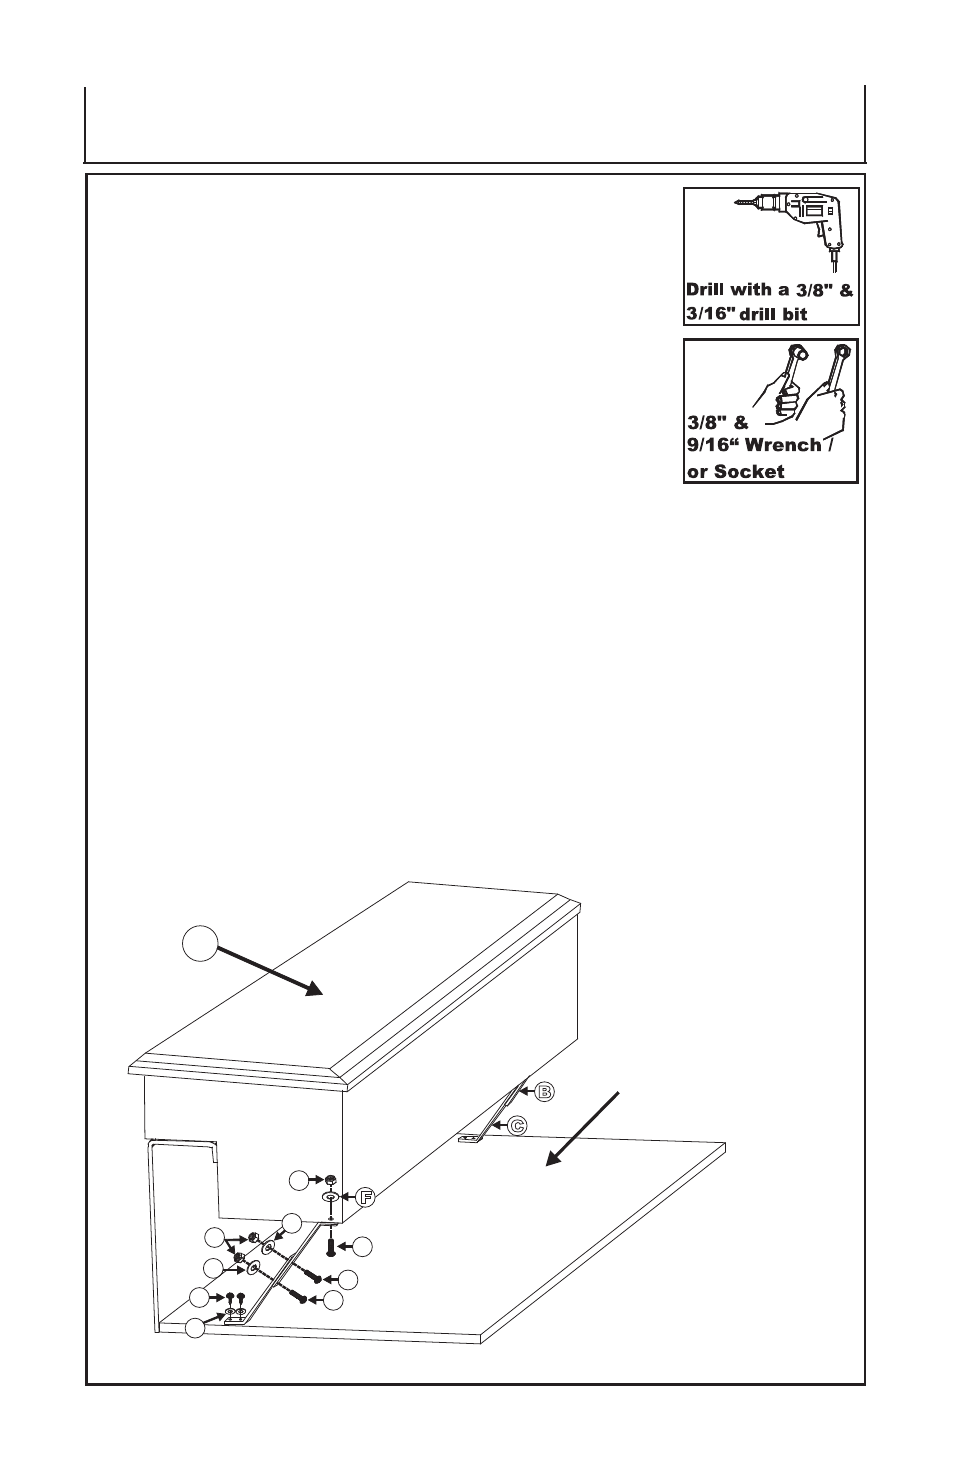
INSTALLATION INSTRUCTIONS (CONTINUED):
5. Hold the side mount toolbox (A) level while positioning
mounting brackets (B / C) as shown below. Once the side
mount toolbox (A) is level and the mounting brackets (B /C)
are in the desired position, use a pair of vise-grips to hold them
together. Now use the existing holes in mounting bracket (B)
as a guide to drill two 3/8“ holes through mounting bracket (C).
Secure both mounting brackets (B / C) together using a 3/8 x
1“ button head bolt (I), 3/8” flat washer (F), and 3/8” hex nut (J)
at each location. Tighten the 3/8“ hex nut (J) until snug using a
9/16” wrench / or socket.
Reposition mounting brackets (B / C) and then re-check the
side mount toolbox (A) to make sure that it is level. Use the
existing holes in the bottom of mounting bracket (C) and
mark the vehicle floor. Drill two 3/16“ holes in the vehicle
floor at the marked locations. Secure mounting brackets (C)
to the vehicle floor using 1/4 x 1“ black sheet metal screws
(G) and 1/4“ black flat washers (E). Tighten into place using a
3/8“ wrench / or socket.
Now use the existing hole in the top of mounting bracket (B) as
a guide to drill a 3/8“ hole through the bottom of side mount
toolbox (A). Secure the top of mounting bracket (B) to the side
mount toolbox using a 3/8 x 1“ button head bolt (I), 3/8“ flat
washer (F), and 3/8” hex nut (J). Tighten into place using a 3/8”
wrench / or socket.
6. Place plastic plugs into the holes in the bottom of the toolbox.
(Fig. 5)
Vehicle Floor
G
E
J
F
I
I
I
J
F
F
A
C
B