Editing, Edit from camcorder, Various connection for editing tapes – JVC SR-VDA300U User Manual
Page 56
56
EN
S-VIDEO
VIDEO
MENU
(MONO) L
R
AUDIO
REC LINC
POWER
IN F-1
TIMER
STOP/EJECT
HS
/STD/LS3
SP/EP
PLAY
REC
PAUSE
PRO HD
REW
FF
3DNR
CH
S-ET
DIGITAL 3-D NR
S-VHS ET
ASI-IN
ASI-REC
POWER
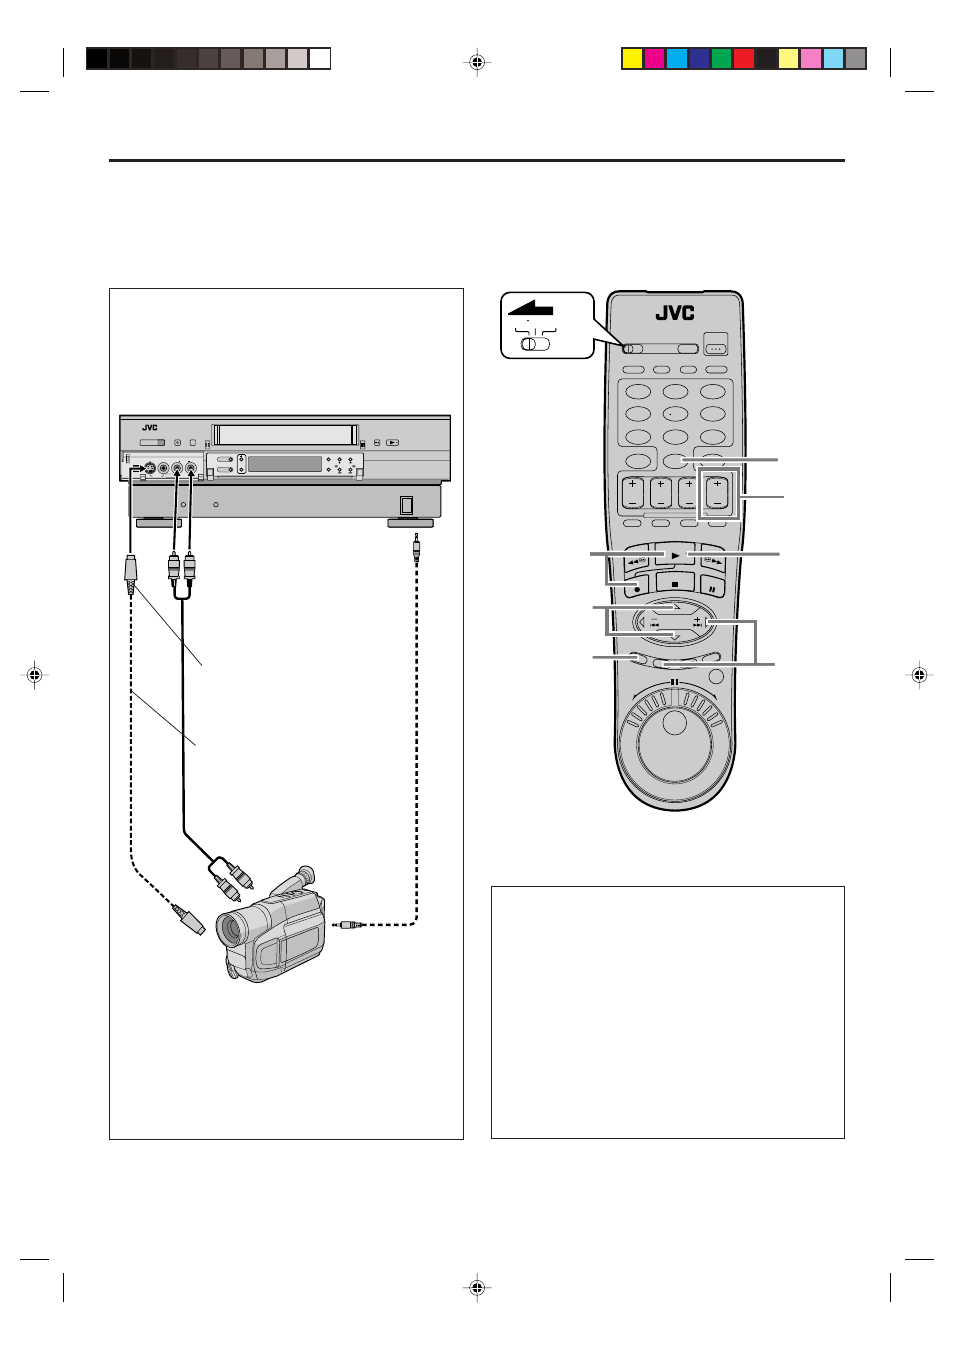
Edit From
Camcorder
To rear panel
REMOTE PAUSE/
AV COMPULINK
connector
Mini-plug cable
(not supplied)
(JVC camcorder
only)
Audio cable
(supplied)
Camcorder
(for playback)
To Audio output
To EDIT
This VCR (for recording)
To AUDIO
Input
EDITING
S-video cable
(supplied)
To S-video
output
Various connection for editing tapes
The following three methods can be used for editing tapes.
●
VHS to S-VHS editing (VIDEO-VIDEO connection):
Although the picture quality is inherently limited by the
original VHS quality, the edited tape has better picture
quality than those made by VHS-to-VHS editing.
●
S-VHS to VHS editing (VIDEO-VIDEO connection):
Since the original source is recorded in S-VHS mode, the
edited tape has better picture quality than those made by
VHS-to-VHS editing.
●
S-VHS to S-VHS editing (S-VIDEO connection): Original
picture quality of S-VHS made can be duplicated with
minimal picture degradation. This is the best editing
method you can use on S-VHS VCRs.
To S-VIDEO
Input
1
2
3
4
5
6
7
8
9
0
VCR TV CABLE/DBS
4 7
4 – 6
4 – 6
9
3
3
8
VDA300U-EN56-63
03.3.12, 4:28 PM
56