Tuner set, Auto channel set – JVC HR-XVC24S User Manual
Page 24
Filename [XVC24S_06Index.fm]
Masterpage:Left+
24
EN
Page 24
28 February 2005 9:11 am
INITIAL SETTINGS (cont.)
Tuner Set
Auto Channel Set
Perform Auto Channel Set only if channels have not been set
correctly by the Plug&Play setting.
A
Turn on the unit.
Press POWER.
B
Select the VCR deck.
On the unit
Press VCR/DVD repeatedly so that the VHS indicator
lights up on the front display panel.
On the Remote
Press VCR so that the VHS indicator lights up on the front
display panel.
C
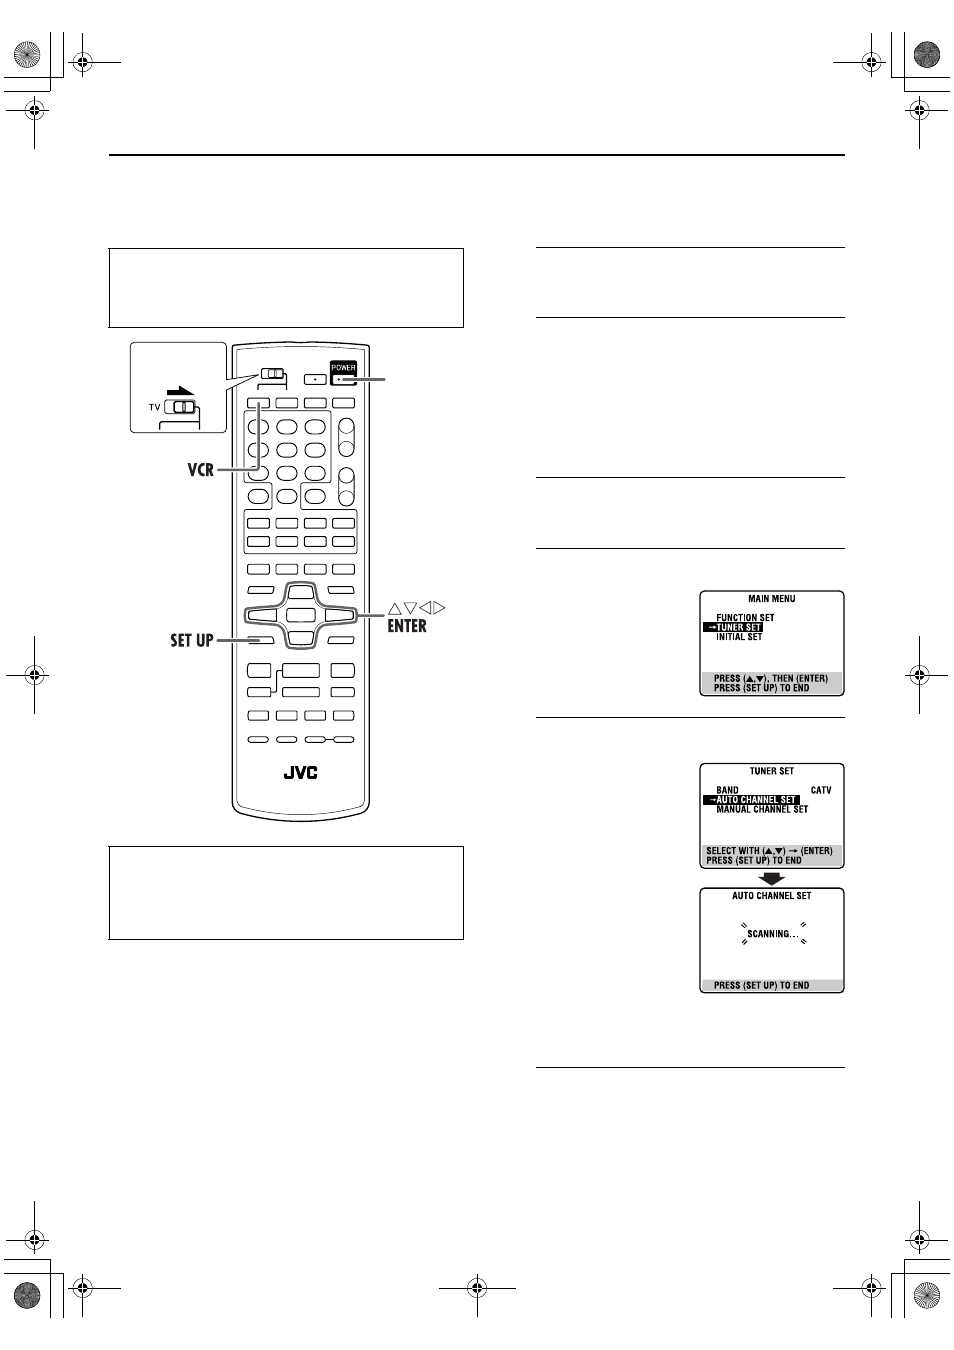
Access the Main Menu screen.
Press SET UP.
D
Access the Tuner Set screen.
E
Perform Auto Channel Set.
Press rt to move the
highlight bar (arrow) to
“AUTO CHANNEL SET,” then
press ENTER or e. You can
automatically set the
receivable channels in your
area in the order of their
frequencies.
● As Auto Set Up progresses, the
“q” mark on the TV screen
moves from left to right.
● When Auto Channel Set is
complete, “SCAN
COMPLETED” appears on the
TV screen.
● If the scan was unsuccessful,
“SCAN COMPLETED–NO
SIGNAL–” appears on screen. Check the connections and start
again.
F
Return to the normal screen.
Press SET UP.
● Turn on the TV and select the VCR channel (or AV
mode).
● Slide the TV/VCR/DVD switch on the Remote to the
right.
INFORMATION
The unit selects the correct band (TV or CATV) automatically
during Auto Channel Set. The selected band will be
displayed on the right side of “BAND” on the Tuner Set
screen.
POWER
Slide to the
right.
Press rt to move the
highlight bar (arrow) to
“TUNER SET,” then press
ENTER or e.
❚ ❚ ❚ ❚ ❚ ❚ ❚ ❚ ❚ ❚ ❚ ❚
– – – – – – –
XVC24S_01.book Page 24 Monday, February 28, 2005 9:24 AM