JVC VR-N1600U User Manual
Page 33
25
C
Use the [7/
B](5/B) button to display the list of cameras
`
D
Use the [10/0/
E](8/E) button to select a camera
`
E
Use the [SKIP] button to select [Settings...], followed by
pressing the [16/ENTER](ZOOM IN/ENTER) button
`
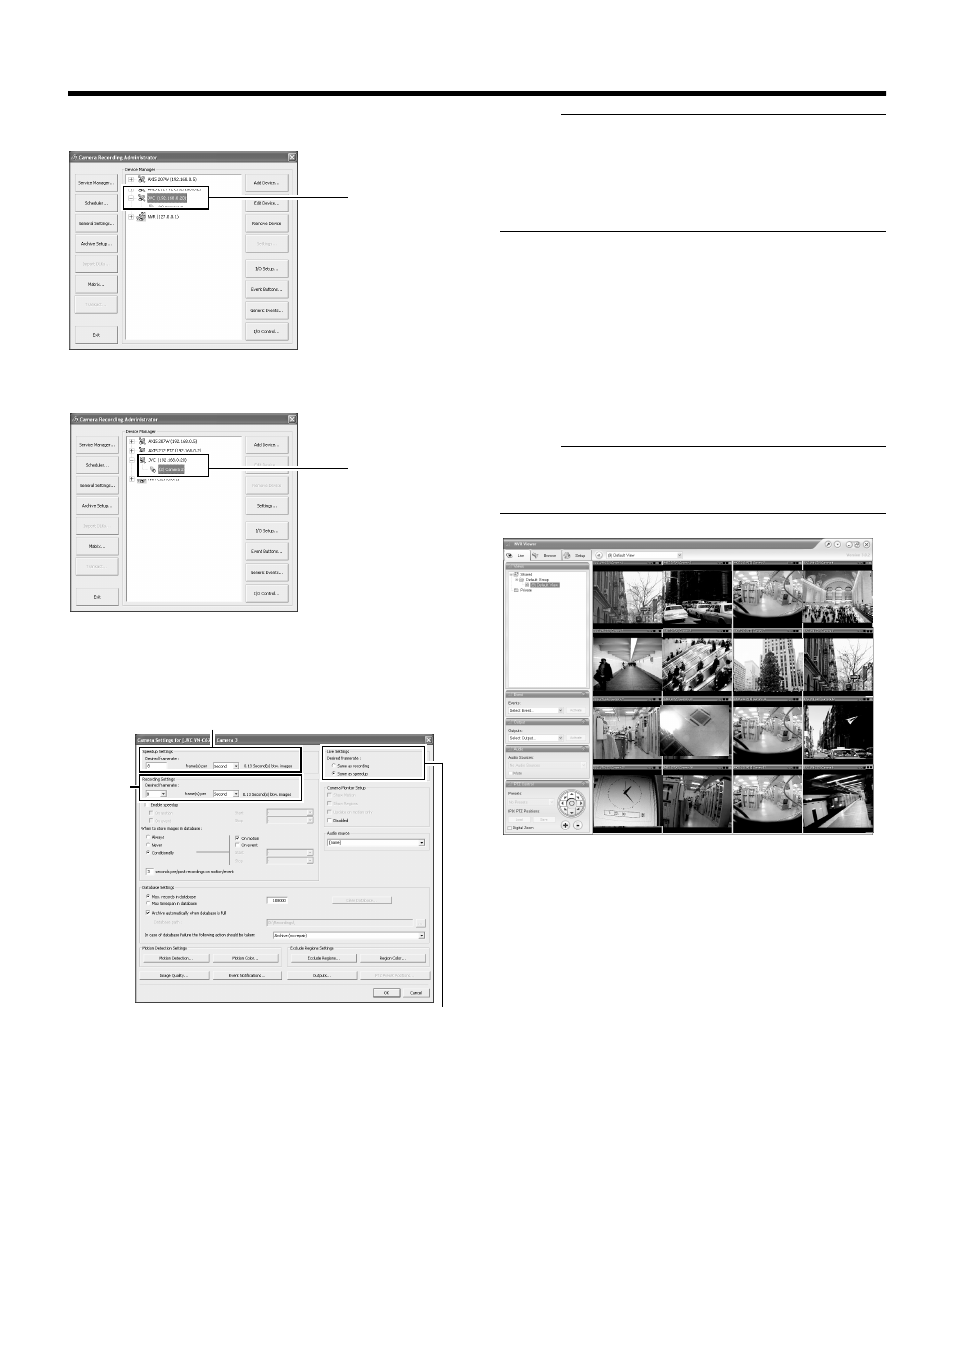
●The [Camera Settings] screen appears.
F
Set the display rate for live images
●Set the display rate for live images to ASame as
recording
B or ASame sa speedupB under [Live
Settings].
●When ASame sa speedupB is selected, the [Frame
Rate] specified under [Speedup Settings] is used as
the display rate for live images.
●When ASame as recordingB is selected, the [Frame
Rate] specified under [Recording Settings] is used as
the display rate for live images.
Memo :
● Use the [SKIP] to move between the setting items.
● Using the [2/D] or [10/0/E](8/E) button to select a parameter.
`
● To enter numeric characters, press the [SELECT] button to turn
on the [SELECT] indicator. After entering the numeric
characters, press the [PTZ/PRESET] button to turn on the [PTZ/
PRESET] indicator.
G
Use the [SKIP] button to select [OK], followed by
pressing the [16/ENTER](ZOOM IN/ENTER) button
`
12
Repeat Step
10 for each camera
13
Use the [SKIP] button to select [Close],
followed by pressing the [16/ENTER](ZOOM IN/
ENTER) button
`
● Setting is complete and the [Live] screen appears.
● The [REC CONTROL] indicator lights up, and recording
starts in the recording control mode. (
Memo :
● For details on the recording control mode, refer to [Recording
● You can specify decimal values using the software keyboard.
C
D
Speedup Settings
Recording
Settings
Live Settings
[Live] Screen