JL Audio C2-400x-06112008 User Manual
Page 5
4 | JL Audio - C2-400x Owner’s Manual
5
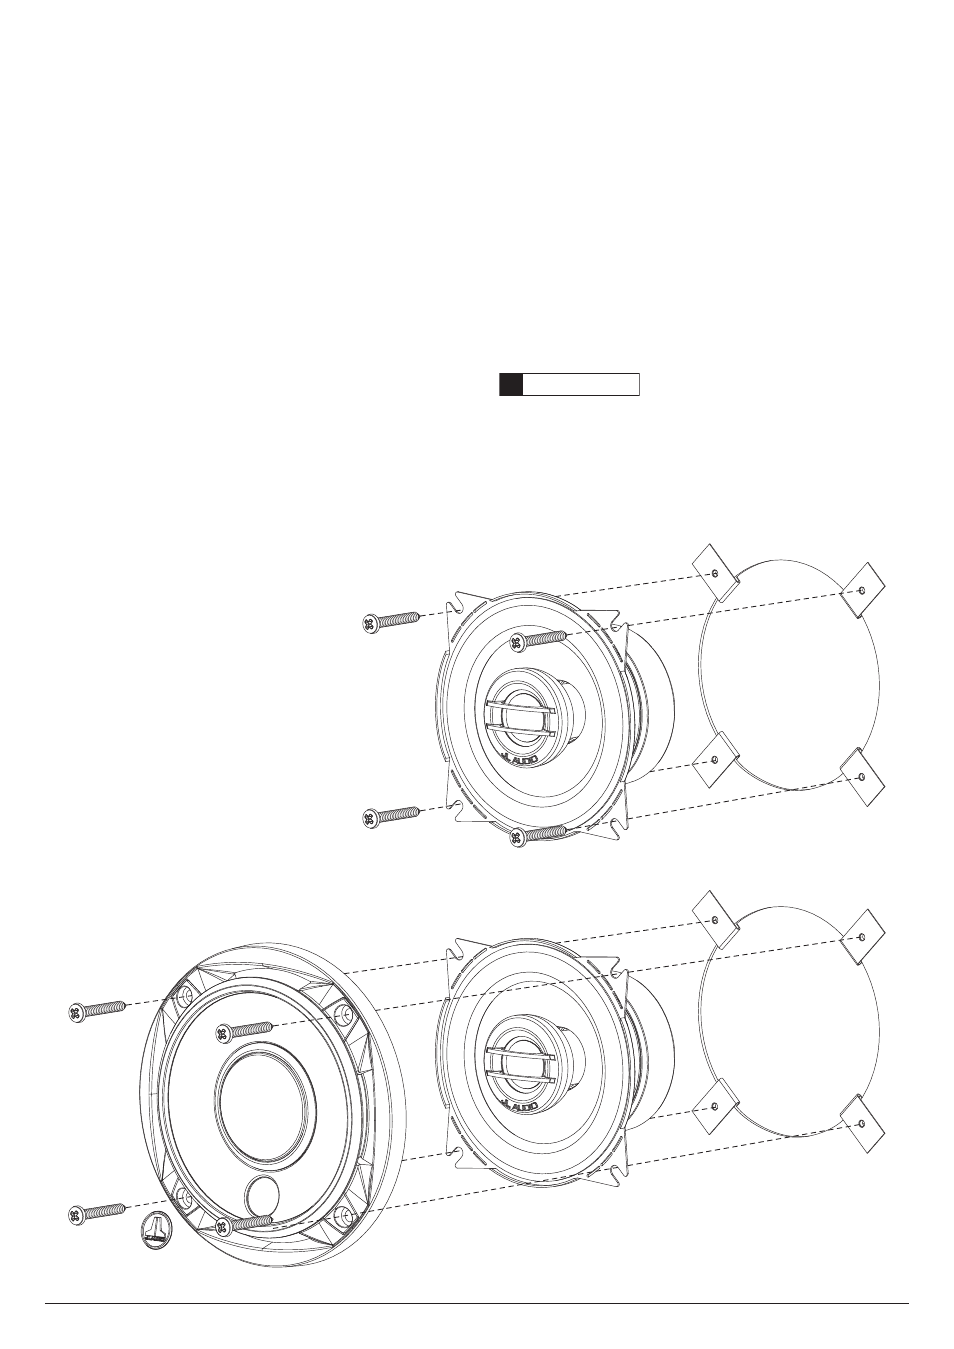
Then,usingasabersaw,makethecircularcutoutfor
thespeaker.Fileanyroughedges.Insertthemounting
clipswiththeflatsidetowardsthespeakerasshownin
DiagramB(below).
Itisabsolutelyvitalthatthespeakerframefitsinto
themountingholecleanly.Thismustbecheckedprior
totighteningthescrews.Donotforcetheframeintoa
holethatistoosmall.Donottightenthespeakeronto
anunevensurface.Thiswilldamageyourspeakers.
Thespeakershouldalsofitsothatairdoesnotleak
aroundthemountingflange.Airleakswillcausea
severedegradationinsoundquality.Sealanyairleaks
withanautomotive-gradesealantmaterial.
Diagram a:
Factory location woofer installation
WARNING
!!
Hand-tighten the screws evenly in a criss-cross
pattern to avoid bending the speaker frame or
stripping the mounting clips.
Connectthespeakerwires,observingcorrect
polarity,andinstallthespeakerandgrilleassembly
asshowninDiagramB(below).Hand-tightenthe
screwsevenlytoavoidbendingthespeakerframe!
TheincludedJLAudiologonamebadgesshould
beaffixedtothecircularindentedareainthelower
partofeachgrilleassembly.Ifthegrilleassemblyis
notused,theJLAudiologobadgescanbeaffixed
elsewhereascreativeadditionstoyourinstallation.
Diagram B:
Custom location woofer installation