Ab c d – Jacuzzi HE96000 User Manual
Page 13
Comfort PLUS Whirlpool Bath
Installation and Operation
www.jacuzzi.com
Page 13
English
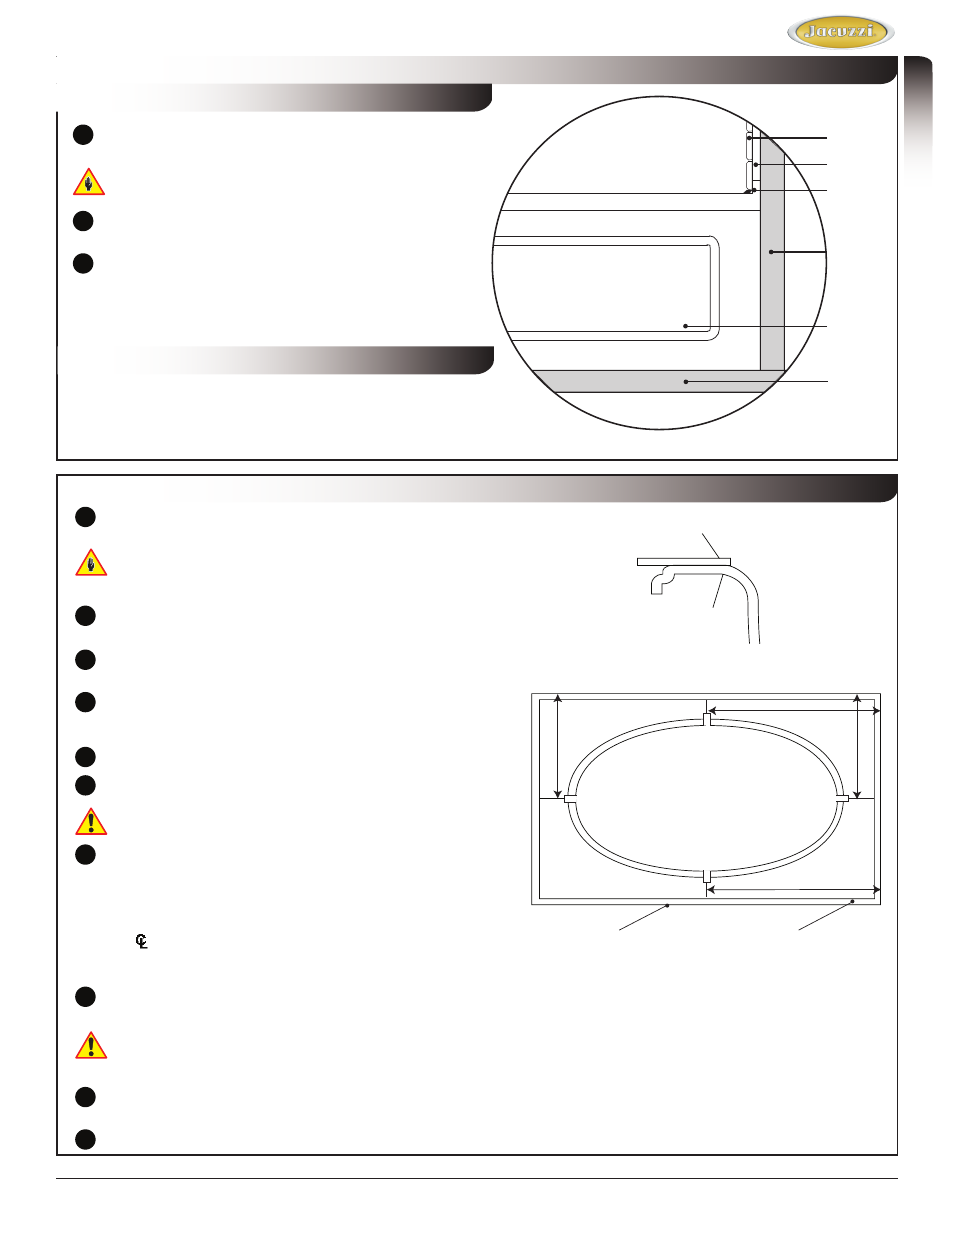
Skirt Installation
Bathtubs with an Integral Skirt
If you are installing a integral skirt, please refer to the Skirt
Installation Guide before proceeding any further. Complete
the installation and assembly steps according to the Skirt
Installation Guide.
Bathtubs with Optional Skirt
1
Screw skirt flanges into wall studs.
It may be necessary to shim the unit to close any
gaps between wall studs and the flanges.
2
Complete finish work over skirt flange.
3
Caulk around the perimeter of the skirt to seal the
space between the skirt and the finished deck.
Finishing
Materials
Caulking Bead
Skirt Panel
Stud
Floor
Green Board
Rim of Bathtub
Undermount Installation
1
Install drain/overflow according to
the manufacturer’s
instructions.
Watertight installation of the drain is the installer’s
responsibility. Drain leakage is excluded from the Jacuzzi
Luxury Bath warranty of this product.
2
Turn off power supply to dedicated GFCI protected
circuits.
3
Install the unit in desired location. DO NOT use plumbing
fixtures or lines to carry or lower the unit.
4
Inspect all fittings, plumbing, and control lines after
inserting to insure the components are not damaged or
disconnected.
5
Align the bathtub and connect the drain.
6
Insulation may be placed within the bathtub surround.
Provide adequate ventilation around the motor/pump to
ensure sufficient air flow and cooling.
7
Cut deck/counter to fit using the undermount template
provided as follows:
•
Position the template so that the desired undermount
guidelines are aligned with the rim edge as shown.
•
Using a grease pencil, mark the center lines (denoted
by on template). Remove template.
•
Measure the distance from the wall, or other fixed point,
to the center lines.
Template
Bathtub Rim
A
B
C
D
Template
Counter
8
Affix counter to bathtub. Clean any dirt or debris from the top of the bathtub rim. Apply a bead of silicone sealant
around the entire rim of bathtub.
Do not use an adhesive or adhesive sealant to secure the counter to the bathtub. If maintenance or remodeling
is required, the counter may have to be removed. Adhesive will permanently bond the counter to the bathtub.
Carefully position the deck/counter over the bathtub. Follow manufacturer’s instructions to determine cure time.
9
Apply a continuous bead of silicone sealant around the entire seam between the counter and the bathtub rim.
Allow sealant to cure according to manufacturer’s instructions.
10
Turn on the power supply to the dedicated GFCI protected circuits and check system operation.
Figure 10
Figure 11
Figure 12