English drop-in installation – Jacuzzi HE96000 User Manual
Page 11
Comfort PLUS Whirlpool Bath
Installation and Operation
www.jacuzzi.com
Page 11
English
Drop-in Installation
Before you begin your installation, please read the following:
•
Observe all local and building codes.
•
Determine which tools will be used during the installation.
•
Additional bathtub drain parts and plumbing are commercially available at plumbing and hardware stores.
•
Drain/Overflow rough-in information is included with your bathtub in the installation instruction manual.
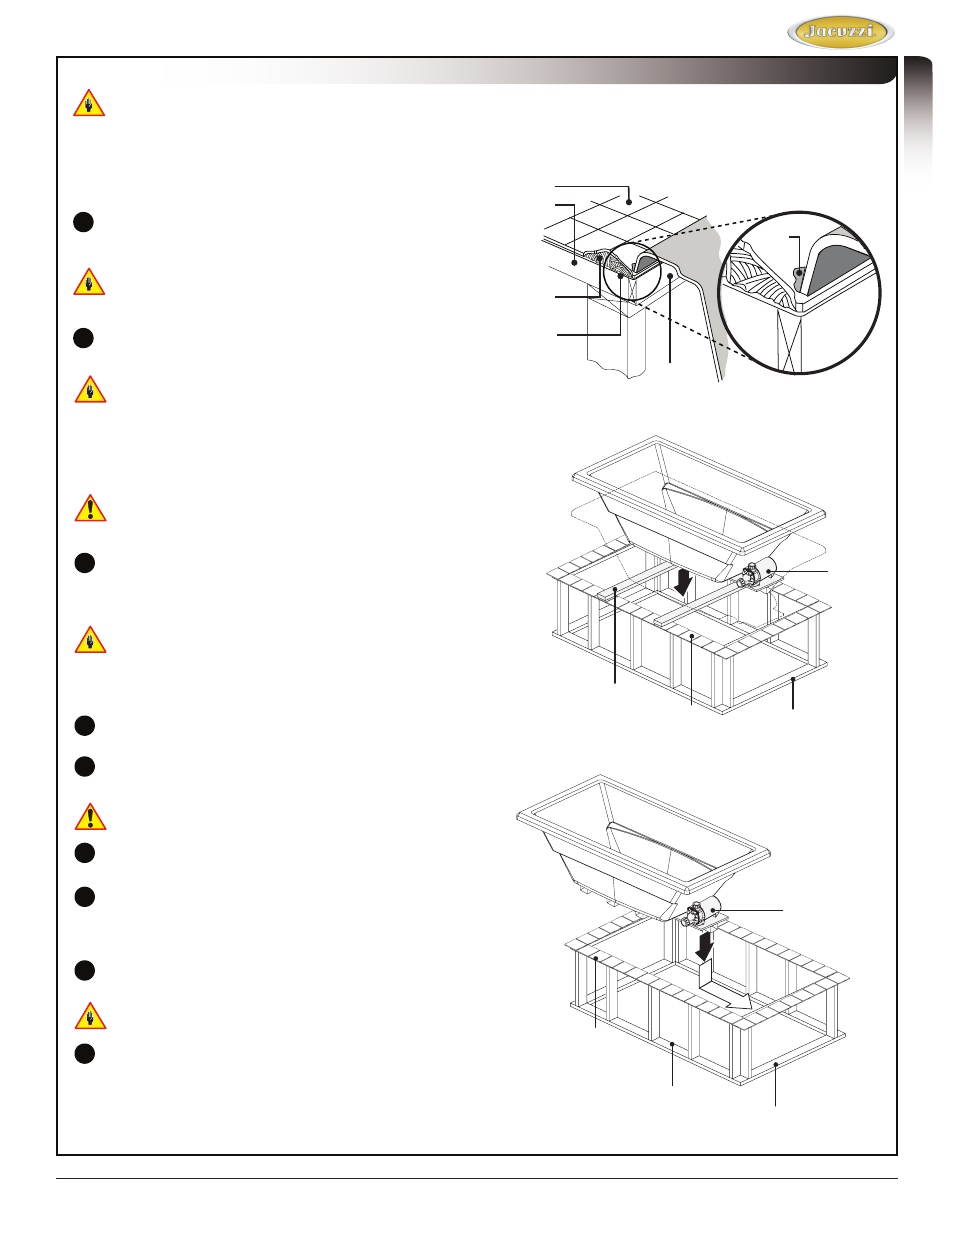
Flashing
Exploded View
1˝ x 4˝
(25mm x 101mm)
Not For Support
Mortar or
Adhesive
Subfloor
Sealant
Tile
Complete the bathtub surround installation.
1
Install drain/overflow according to the manufacturer’s
instructions. Refer also to the Technical
Specifications Manual.
Watertight installation of the drain is the installer’s
responsibility. Drain leakage is excluded from the
Jacuzzi Luxury Bath warranty of this product.
2
Install the faucet at this time. It is recommended that
the faucet be installed by a qualified plumber.
Tile or Finished
Surface
Support Member
Level Subfloor
Scrap Lumber
Motor/Pump
Proper installation of the spout plumbing and
compliance with local codes are the responsibility of
the installer. Jacuzzi Luxury Bath does not warrant
connections of water supply fittings and piping,
fill systems, or drain/overflow systems. Nor is it
responsible for damage to the bathtub which may
occur during installation.
A non-flammable protective barrier must be placed
between the soldering work and the bathtub unit to
prevent damage to the bathtub.
3
Prepare the cut-out hole for the bathtub using either
the provided template or the cutout dimensions
listed in the specifications table in the Technical
Specifications Manual.
The template may show guides for more than one
bathtub, be certain to select the appropriate guide
lines. If under mounting is an option, be careful to
select the guide lines that apply to the installation
that you are performing.
4
Complete all deck finish work. Cover to protect from
damaging while placing the bathtub.
5
Insulation may be placed within the bathtub
surround.
Provide adequate ventilation around the motor/
pump to ensure sufficient airflow and cooling.
6
Turn off power supply to dedicated GFCI protected
circuits.
7
Place a piece of scrap lumber on each of the ends
of the cutout – this will be used as a temporary
support prior to lowering the bathtub fully into the
opening.
8
Connect flex water supply lines to faucet and plug
power cords into GFCI outlets.
DO NOT use plumbing fixtures or lines to lower the
unit. Allow the bathtub to rest on the supports.
9
Install the unit, inserting the motor/pump end first,
lowering the bathtub into the opening as shown in
the illustration.
Tile or Finished
Surface
Motor/Pump
Support Member
Figure 4
Figure 5
Figure 6