Receiving radio broadcasts, English, Using preset tuning – JVC RX-8012VSL User Manual
Page 25: Setting the am tuner interval spacing, Tuning in stations manually, Press fm/am to select the band (fm or am)
English
22
Receiving Radio Broadcasts
You can browse through all the stations or use the preset function to go immediately to a particular station.
Notes:
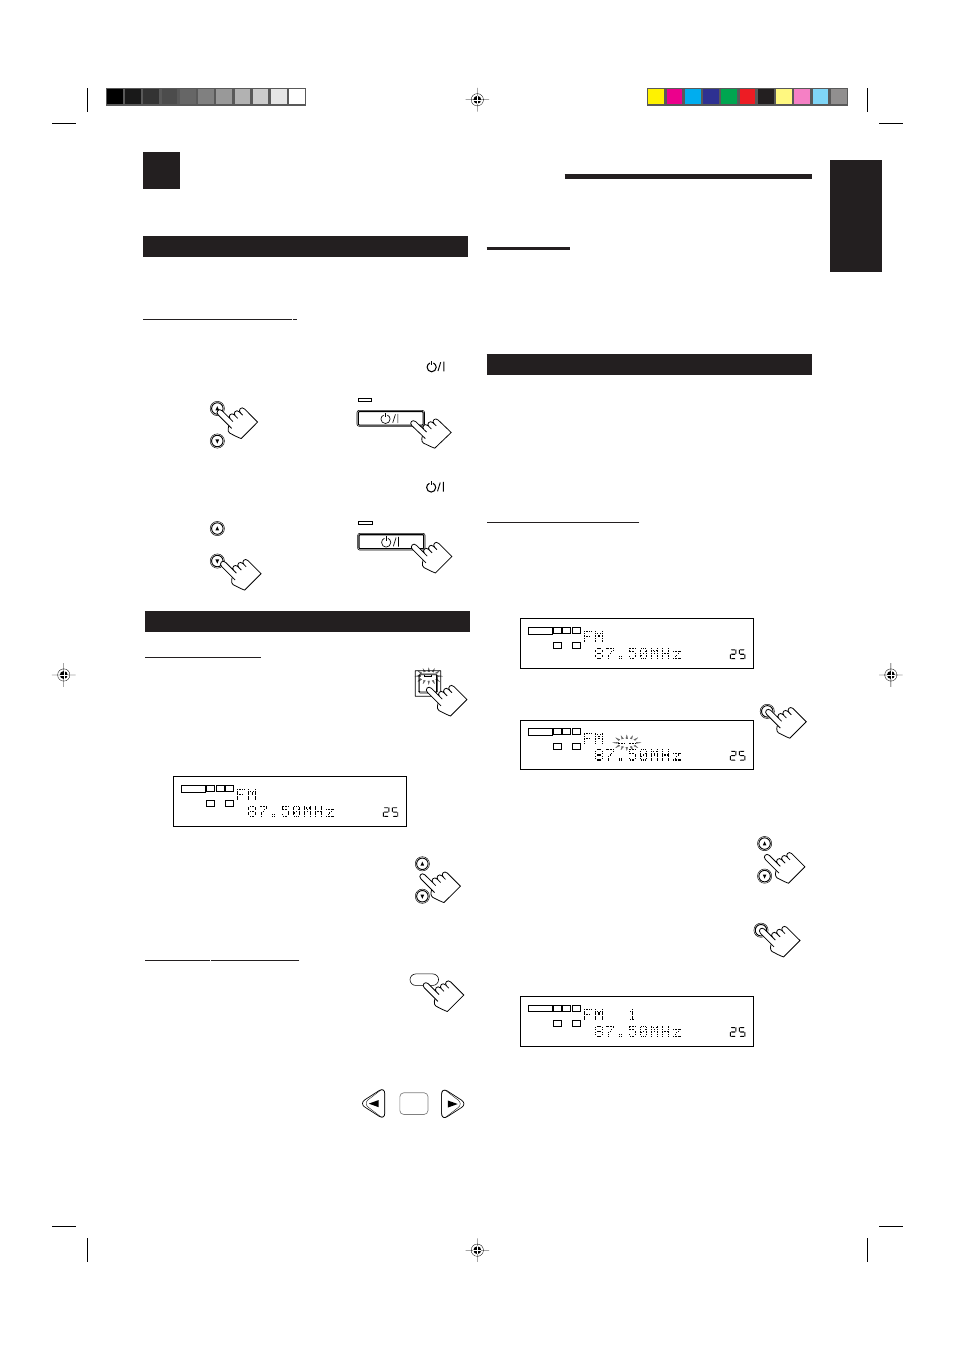
• When a station of sufficient signal strength is tuned in, the TUNED
indicator lights up on the display.
• When an FM stereo program is received, the STEREO indicator
also lights up.
• When you hold the button (and release it) in step 2, the frequency
keeps changing until a station is tuned in.
Using Preset Tuning
Once a station is assigned to a channel number, the station can be
quickly tuned. You can preset up to 30 FM and 15 AM stations.
To store the preset stations
Before you start, remember...
• There is a time limit in doing the following steps. If the setting is
canceled before you finish, start from step 1 again.
On the front panel ONLY:
1. Tune in the station you want to preset (see
“Tuning in Stations Manually” on the left).
• If you want to store the FM reception mode for this station,
select the FM reception mode you want. See “Selecting the
FM Reception Mode” on page 23.
2. Press MEMORY.
The channel number position starts flashing on the display for
about 10 seconds.
3. Press FM/AM PRESET
5/∞ to
select a channel number while the
channel number position is
flashing.
4. Press MEMORY again while the
selected channel number is
flashing on the display.
The selected channel number stops flashing.
The station is assigned to the selected channel number.
5. Repeat steps 1 to 4 until you store all the stations
you want.
To erase a stored preset station
Storing a new station on a used number erases the previously stored
one.
ANALOG
VOLUME
TUNED STEREO
L
R
SPEAKERS
1
ANALOG
VOLUME
TUNED STEREO
L
R
SPEAKERS
1
MEMORY
FM/AM PRESET
MEMORY
ANALOG
VOLUME
TUNED STEREO
L
R
SPEAKERS
1
Setting the AM Tuner Interval Spacing
Some countries space AM stations 9 kHz apart, and other countries
use 10 kHz spacing.
On the front panel ONLY:
To select the 10 kHz interval:
Be sure the receiver is turned off, but is plugged into an AC outlet.
Hold down FM/AM TUNING
5 and press STANDBY/ON
.
Now the 10 kHz interval is selected.
To change back to the 9 kHz interval:
Be sure the receiver is turned off, but is plugged into an AC outlet.
Hold down FM/AM TUNING
∞ and press STANDBY/ON
.
Now the 9 kHz interval is selected.
and
FM/AM TUNING
Tuning in Stations Manually
On the front panel:
1. Press FM/AM to select the band
(FM or AM).
The FM/AM lamp on the front panel button lights
up. The last received station of the selected band is
tuned in.
• Each time you press the button, the band
alternates between FM and AM.
2. Press FM/AM TUNING
5/∞ until
you find the frequency you want.
• Pressing FM/AM TUNING
5 increases
the frequency.
• Pressing FM/AM TUNING
∞ decreases
the frequency.
From the remote control:
1. Press FM/AM to select the band
(FM or AM).
The FM/AM lamp on the front panel button
lights up. The last received station of the
selected band is tuned in.
• Each time you press the button, the band alternates between
FM and AM.
2. Press TUNING UP
3 or
TUNING DOWN
2 until you
find the frequency you want.
• Pressing TUNING UP
3 increases the frequency.
• Pressing TUNING DOWN
2 decreases the frequency.
FM/AM TUNING
FM / AM
STANDBY
STANDBY/ON
and
FM/AM TUNING
STANDBY
STANDBY/ON
FM/AM
ANALOG
VOLUME
TUNED STEREO
L
R
SPEAKERS
1
DOWN – TUNING – UP
SET
EN11_23.RX-8012V[UW]_f
01.2.14, 2:18 PM
22