Menu setup method, Menu operation – JVC RM-LP25U User Manual
Page 30
20
Each menu is displayed on the LCD display and can be set
up using the [MENU] button and the control knob.
The values set in the [4: PROCESS] and [5: OPERATION]
menus can be saved in files A, B, C and D.
Ⅵ Example of changing the camera cable
length from 20 m to 100 m
1
Press and hold the [MENU] button for about 1 second
until the LCD display shows the menu display
The cursor (
J) indicates that the item being pointed to can
be varied.
2
Turn the [SHUTTER] control knob to move the cursor
(
J) to the desired item
3
Press the [SHUTTER] control knob to display the
name and current setting of the next item
4
Press the [SHUTTER] control knob to move the cursor
(
J) to the position of the currently set value
5
Turn the control knob [SHUTTER] to adjust the setting
6
Press the [SHUTTER] control knob to move the cursor
(
J) back to the item
7
Turn the [SHUTTER] control knob to move the cursor
(
J) to
A2Z: BACKB
8
Press the [SHUTTER] control knob to return to the
previous menu
9
After completing the setup, move the cursor (
J) to
A8: EXITB and press the [SHUTTER] control knob to
return to the normal display
Menu Setup Method
M
FULL AUTO
F1
SHUTTER
GAIN
F2
F3
MENU/SHUTTER
GAIN
P
R
STEP
SHUTTER
MENU
PUSH-ON
DOWN
UP
VARIABLE
PUSH-ON
HIGH
LOW
MID
DOWN
UP
F4
BARS
STR
CMP
OFF
+0 dB
ALC
LUX
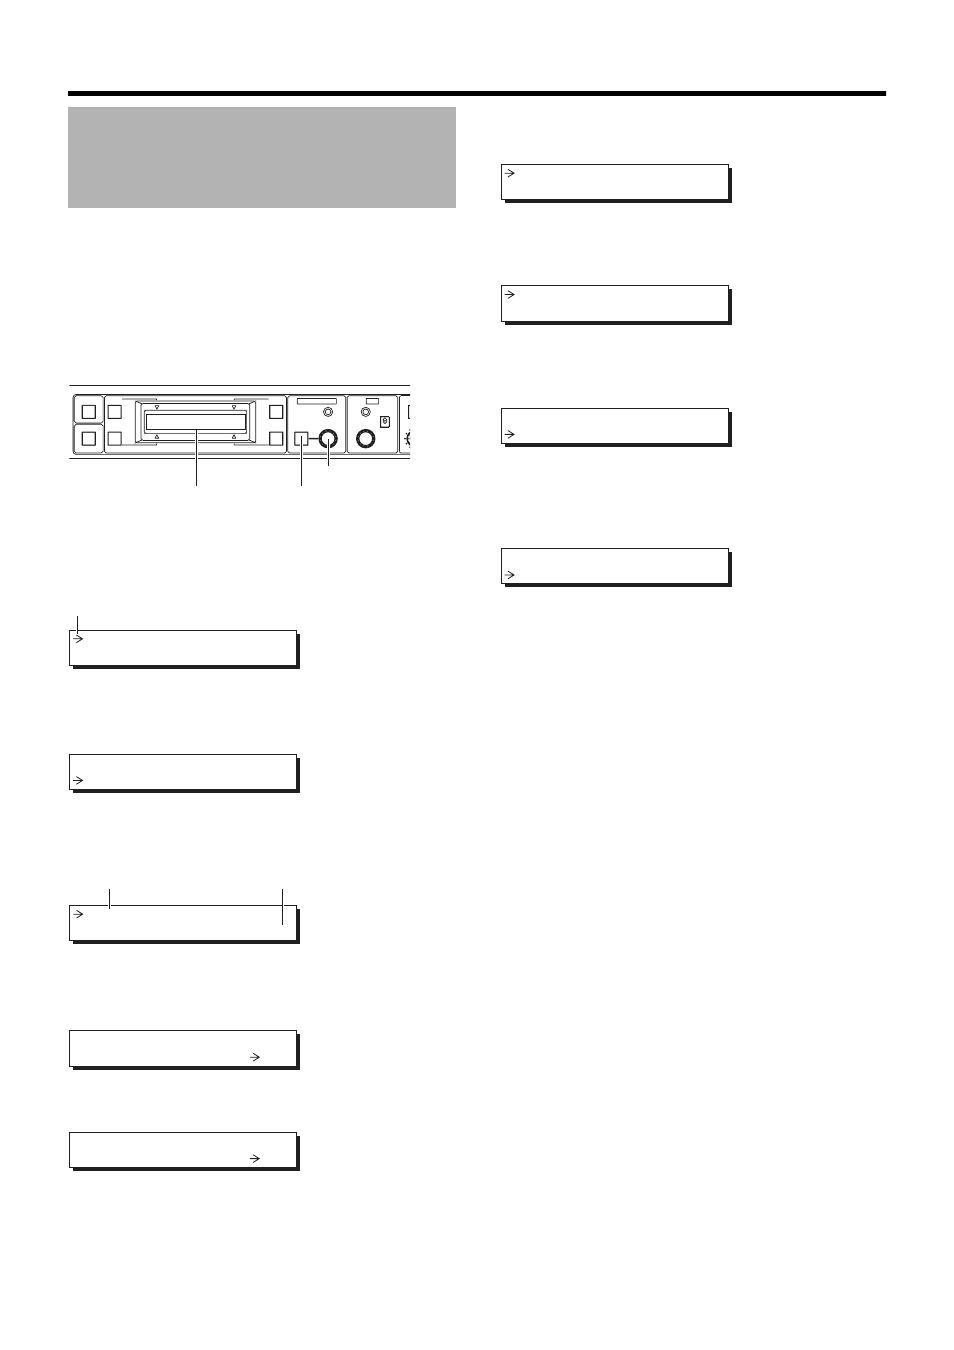
[SHUTTER] control knob
LCD display
[MENU] button
1: GENLOCK
2: CABLE
Cursor
1: GENLOCK
2: CABLE
2A: LENGTH
20M
Setting
Item
2A: LENGTH
20M
2A: LENGTH
100M
2A: LENGTH
100M
2Z: BACK
1: GENLOCK
2: CABLE
7: SYSTEM
8: EXIT