Removing/installing handrims with tabs – Invacare 1144492 User Manual
Page 2
Natural-Fit Handrims
2
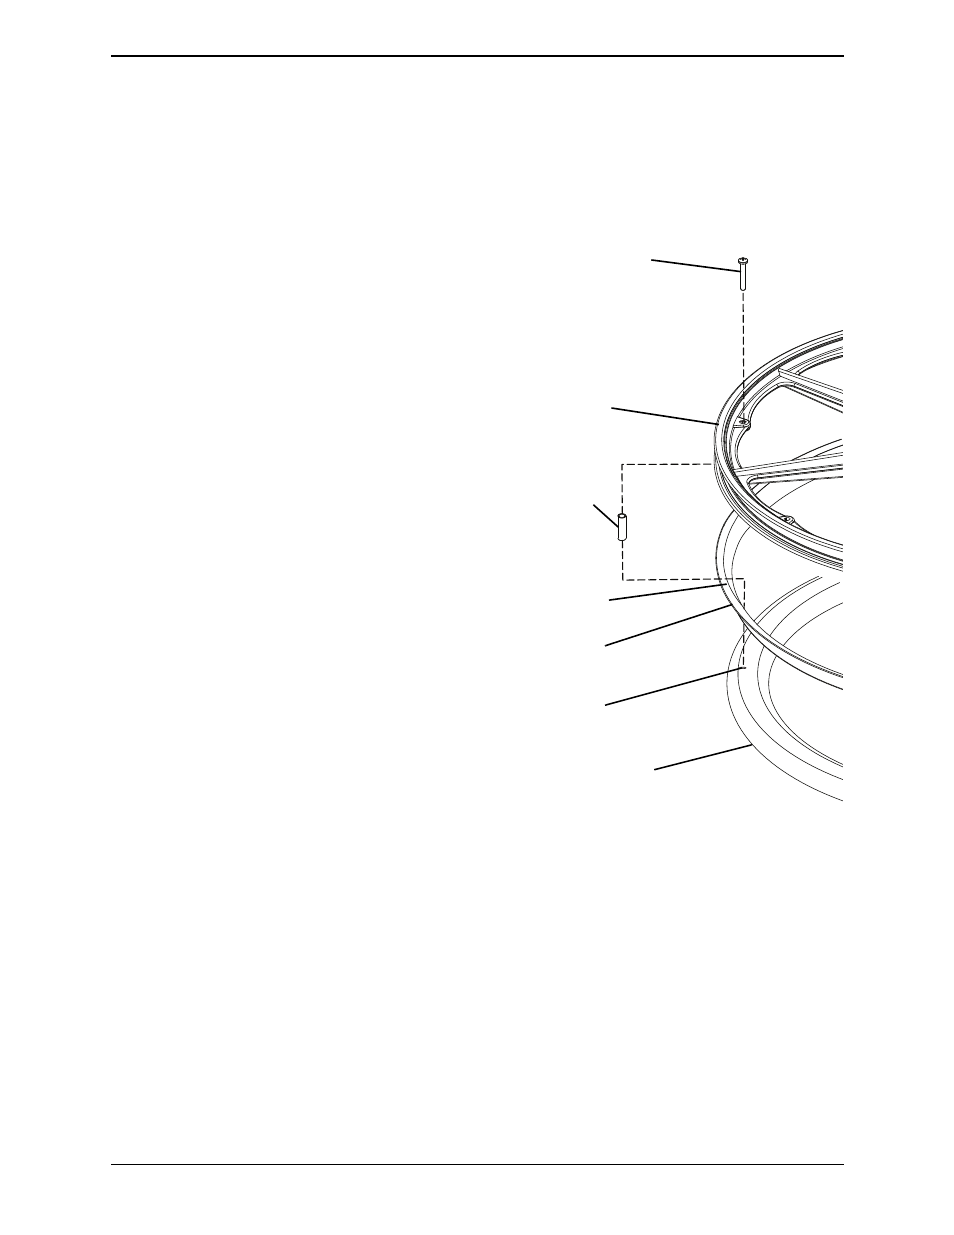
2. Remove the mounting screws that secure the existing handrim to the wheel.
3. Place the Natural Fit handrim on a flat surface with the rivnuts facing up.
4. Place the thumb guard on top of the handrim.
NOTE: The thumb guard is installed on the outside of the wheelchair with wider edge making
contact with the wheel.
5. Place the wheel on top of the thumb
guard and handrim.
NOTE: The outside of the wheel should be
facing down.
6. Insert the new mounting screws
through the wheel and the new spacers.
7. Thread the mounting screw into the
rivnuts on the handrim.
NOTE: DO NOT tighten the screws.
NOTE: Screws and spacers are provided. DO
NOT use the old screws and spacers, you may
damage the thumb guard and void the
warranty.
8. Center the handrim on the wheel.
NOTE: The thumb guard should not spin when
pushed on and should be centered on the wheel.
If the thumb guard tilts to one side, loosen the
mounting screws and readjust the thumb
guard.
9. Secure the handrim to the wheel by
tightening the screws.
10. Reinstall the wheel onto the wheelchair.
Refer to wheelchair owner’s manual.
11. Repeat STEPS 1‐10 for the other wheel.
FIGURE 1 Removing/Installing Handrims
with Rivnuts
®
Removing/Installing Handrims with Tabs
NOTE: For this procedure, refer to FIGURE 2 on page 3.
Tools Needed: Screwdriver, 3/8” wrench, Air pump, Tire irons (tools to remove the tire) ‐
if necessary, Pliers ‐ if necessary
1. Remove the wheel from the wheelchair. Refer to wheelchair owner’s manual.
2. Deflate and remove the tire from the wheel.
3. Using a screwdriver and a 3/8” wrench, remove the six mounting screws and locknuts
that secure the old handrim to the wheel. Discard the old handrim.
Mounting Screw
Wheel
Spacer
Thumb Guard
Handrim
Rivnut
Wider Edge