Installing the module, Cabling – IBM 8271 User Manual
Page 2
Installing the Module
We recommend that you install the Matrix Module into the
unit that will be at the bottom of your stack.
1 Remove the blanking plate from the rear of the Switch. You
should store it carefully for future use.
2 Hold the Matrix Module so that the text on the front panel
reads correctly, and guide it into the slot ensuring it is
located in the rails. See Figure 1.
Ensure that the connector on the Matrix Module engages
with the board inside the Switch. Press the Module fully into
the Switch.
3 Tighten the two captive screws to secure the Matrix Module
into the unit.
Figure 1 Inserting the Matrix Module into the Switch
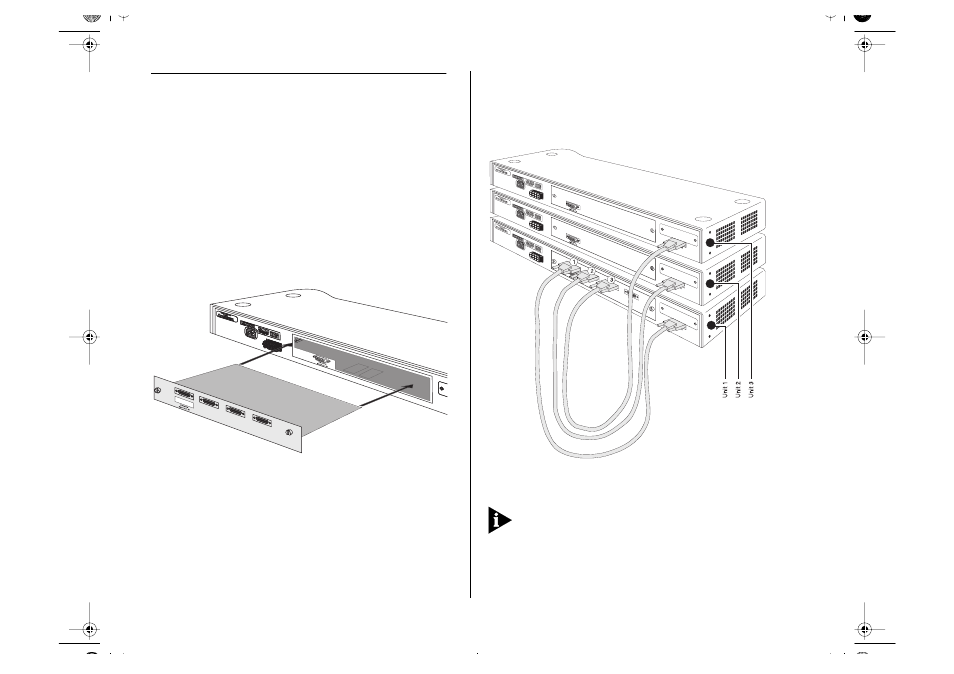
Cabling
With the Matrix Module installed, you can connect up to
four Switches in a stack. A typical configuration is shown in
Figure 2.
Figure 2 A typical stack of switches
You only need one Matrix Module for each stack.
The way in which units in the stack are numbered for man-
agement purposes is determined by the order of port con-
nections to the Matrix Module. The units are numbered 1 to
4 from the bottom unit up.
Usermatrix.fm Page 2 Thursday, June 25, 1998 1:16 PM