Back, Side, Back side – Insignia NS-L42Q-10A User Manual
Page 10
6
www.insigniaproducts.com
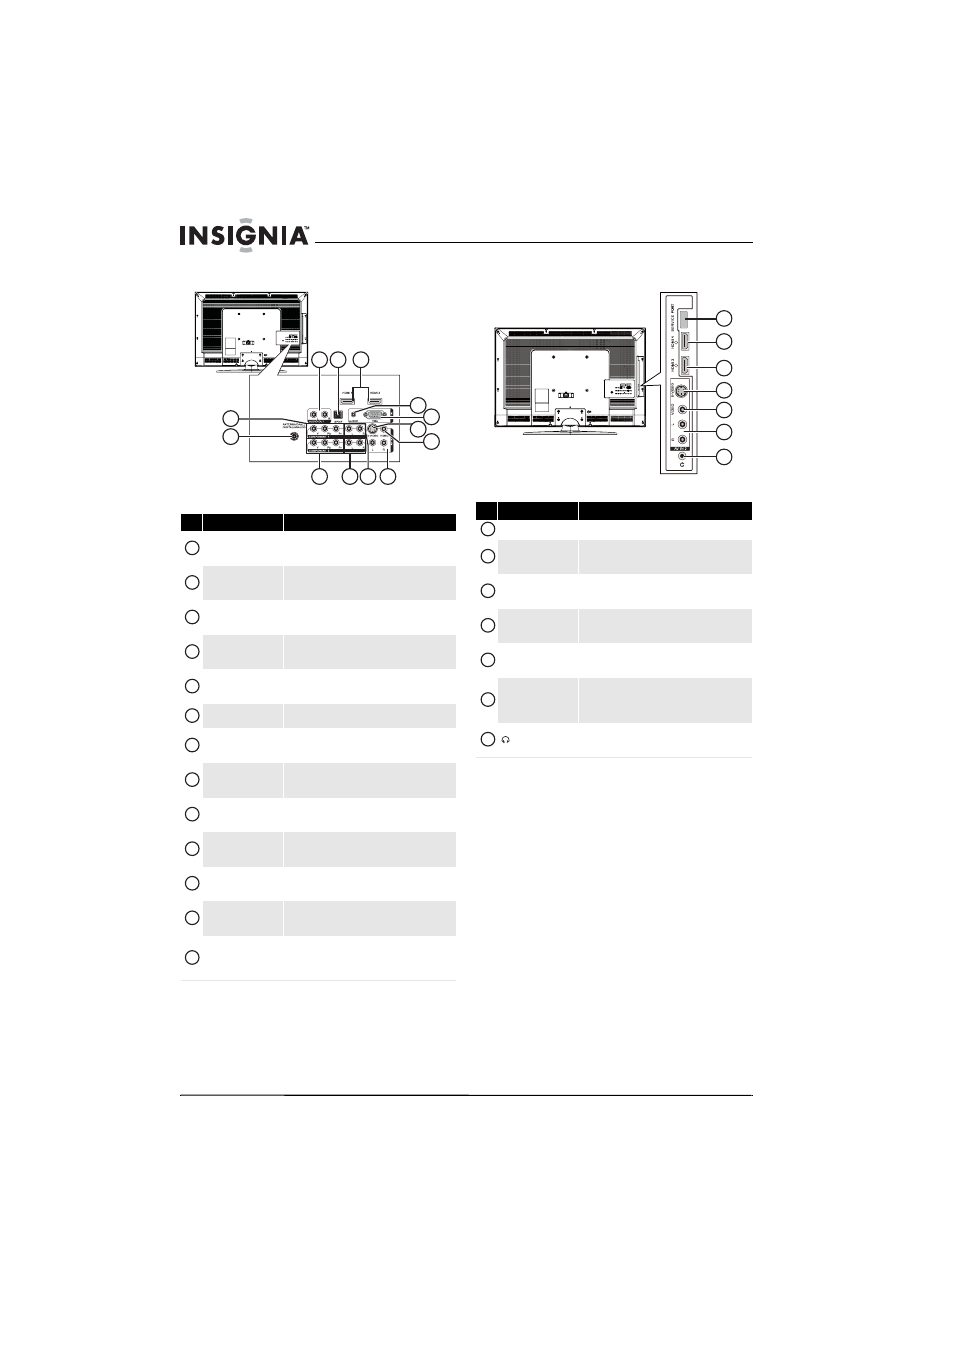
Back
Side
#
Jack
Description
COMPONENT 1 Y/Pb/Pr
Connect the video for a component video device to
these jacks. For more information, see “Connecting a
component video device” on page 13.
ANTENNA/CABLE
DIGITAL/ANALOG
Connect an antenna or cable TV to this jack. For more
information, see “Connecting an outdoor antenna” on
page 9 or “Connecting cable TV” on page 10.
AUDIO OUT R / L
Connect an external sound system to these jacks. For
more information, see “Connecting an analog audio
amplifier” on page 14.
SPDIF
Connect an audio amplifier to this jack. For more
information, see “Connecting a digital audio
amplifier” on page 14.
HDMI 1/HDMI 2
Connect HDMI devices to these jacks. For more
information, see “Connecting an HDMI device” on
page 12.
PC IN AUDIO
Connect the audio for a computer to this jack. For more
information, see “Connecting a computer” on page 13.
PC IN VGA
Connect the video (VGA) for a computer to this jack.
For more information, see “Connecting a computer” on
page 13.
AV IN 1 S-VIDEO
Connect the video for an S-Video device to this jack.
For more information, see “Connecting an S-Video
device” on page 13.
AV IN 1 VIDEO
Connect the video for a standard AV device to this jack.
For more information, see “Connecting a VCR” on
page 11.
COMPONENT 2 Y/Pb/Pr
Connect the video for a component video device to
these jacks. For more information, see “Connecting a
component video device” on page 13.
COMPONENT 2 L/R
Connect the audio for a component video device to
these jacks. For more information, see “Connecting a
component video device” on page 13.
COMPONENT 1 L/R
Connect the audio for a component video device to
these jacks. For more information, see “Connecting a
component video device” on page 13.
AV IN 1 L/R
Connect the audio for an S-Video or standard AV device
to these jacks. For more information, see “Connecting
an S-Video device” on page 13 or “Connecting a VCR”
on page 11.
2
6
8
3
10
4
5
1
11
13
12
7
9
1
2
3
4
5
6
7
8
9
10
11
12
13
#
Jack
Description
SERVICE PORT
For service only.
HDMI 4
Connect an HDMI device to this jack. For more
information, see “Connecting an HDMI device” on
page 12.
HDMI 3
Connect an HDMI device to this jack. For more
information, see “Connecting an HDMI device” on
page 12.
AV IN 2 S-VIDEO
Connect the video for an S-Video device to this jack.
For more information, see “Connecting an S-Video
device” on page 13.
AV IN 2 VIDEO
Connect the video for a standard AV device to this jack.
For more information, see “Connecting a VCR” on
page 11.
AV IN 2 L/R
Connect the audio for an S-Video or standard AV device
to these jacks. For more information, see “Connecting
an S-Video device” on page 13 or “Connecting a VCR”
on page 11.
(headphone)
Connect headphones to this jack. For more
information, see “Connecting headphones” on
page 14.
1
2
3
4
5
6
7
1
2
3
4
5
6
7