Installation – Moffat TURBOFAN E31D4 User Manual
Page 7
Installation
5
Electrical Connection
Each oven should be connected to an adequately protected
power supply and an isolation switch mounted adjacent to,
but not behind the oven and must be readily accessible to
the operator. This switch must be clearly marked and
readily accessible in case of fire.
Check the electricity supply is correct to as shown on the
Technical Data Plate on the front right hand corner of the
oven side panel.
Ensure that the oven is fitted with the appropriate power
cord and plug.
Positioning and Levelling of Oven
1. Correctly locate the oven into its final operating position
and using a spirit level, adjust the oven feet so that the
oven is level and at the correct height.
Initial Start-Up
Before using the new oven;
1. For first time use of the oven, operate the oven for
about 1 hour at 200°C / 400°F to remove any fumes or
odours which may be present.
2. Please refer to the Operation Section of this manual for
details on how to correctly operate and shutdown the
oven.
Commissioning
Before leaving the new installation;
Check the oven functions in accordance with the
operating instructions specified in the ‘Operation’
section of this manual.
Ensure that the operator has been instructed in the areas
of correct operation and shutdown procedure for the
appliance.
NOTE: If for some reason it is not possible to get the
appliance to operate correctly, turn off the
power supply at the mains supply and contact
the supplier of this appliance.
This oven must be earthed / grounded.
If the supply cord is damaged, it must be replaced by a
suitably qualified person in order to avoid a hazard.
Warning
Reversing the Oven Door
NOTE: This operation should only be carried out by a
suitably competent person.
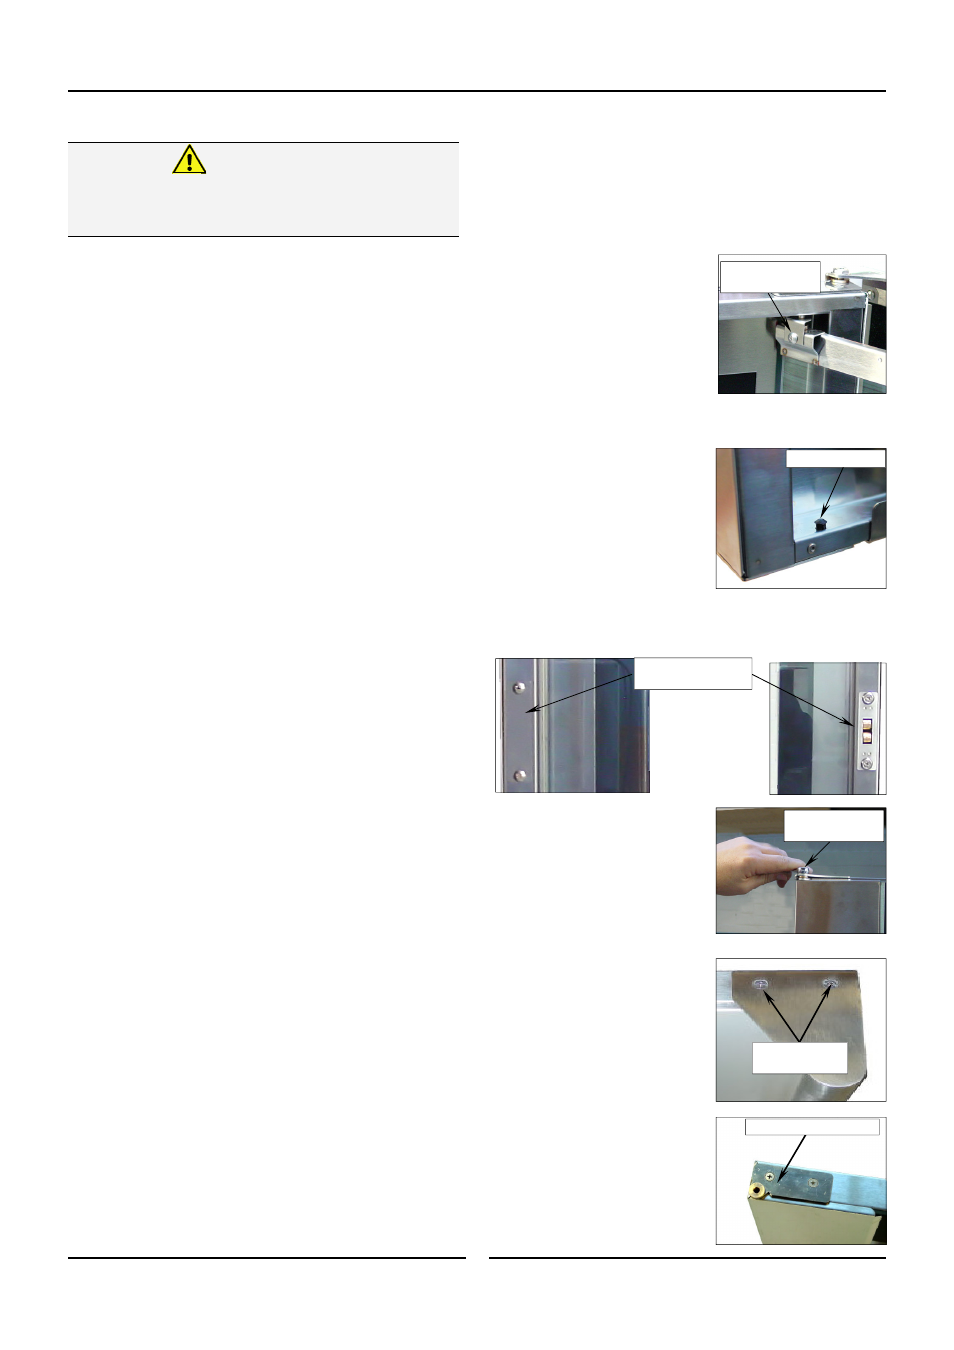
Remove the Oven Door Inner Glass.
1. Open the oven door and
open the door inner glass.
2. Remove the screw securing
the inner glass retaining clip
and remove the clip.
3. Lift up the inner glass and
remove, ensuring that the
pivot spacer is removed
from the lower inner glass
pivot and retained.
4. Remove the black plastic
plugs from the top and
bottom of the door and fit
to the holes where the
inner glass pivots were
removed from.
Remove the Oven Door.
5. Remove the door roller catch and blanking plate from
the inside of the door and swap these over.
6. Whilst supporting the door,
unscrew and remove the top
door pivot bolt from the top
door hinge assembly.
7. Remove the door and lay on
a flat surface or workbench.
8. Unscrew the screws securing
the door handle and remove
the door handle.
9. Remove the top door hinge
and fit to the bottom
opposite corner of the door.
10. Remove the bottom door
hinge and fit to the top
opposite corner of the door.
Fit Blanking Plugs.
Remove Top
Door Pivot Bolt.
Remove Top Door Hinge
Remove Handle
Securing Screws
Swap Roller Catch and
Blanking Plate over.
Remove Screw and
Retaining Clip.