Using the attachments, Using & cleaning the turbo nozzle, Using the stair and hair tool – Morphy Richards 73332 User Manual
Page 5: Emptying
55
Using the
attachments
Follow steps 1-4 but set the
carpet height adjustment knob
to the TOOLS setting.
5
Remove the hose connector Í
from the rear of the cleaner. Lift
the hose · from the top handle
hook. Insert the hose clip Ò
into the hose clip slot Ë.
•
Push the required attachment
firmly onto the end of the hose.
•
If additional length is required,
attach one or both extension
tubes Â.
6
Switch on „.
•
IMPORTANT: Always fix the
hose clip Ò to the main body
slot Ë when using the hose and
tools.
•
Never over extend the hose
such that the cleaner is pulled
over.
IMPORTANT: Turning the cleaner
sideways helps prevent the
cleaner being pulled along by
the stretch hose.
Using & cleaning the
turbo nozzle
(Certain models only)
Attach the turbo nozzle Ú to
the hose end connector Í.
Following use, your turbo nozzle
may become clogged. Turn over
the nozzle and pull away any
hairs or fibres. If they are tightly
wound around the brush,
carefully snip the fibres with
scissors, being careful not to
damage the brush bar, pull away
from the brush bar and dispose.
Using the Stair and
Hair tool
(Certain models only)
Attach the stair tool Û to the
hose connector Í for effective
stair cleaning.
Attach the hair tool Ù to the
stair tool for fantastic pet and
human hair pick-up D.
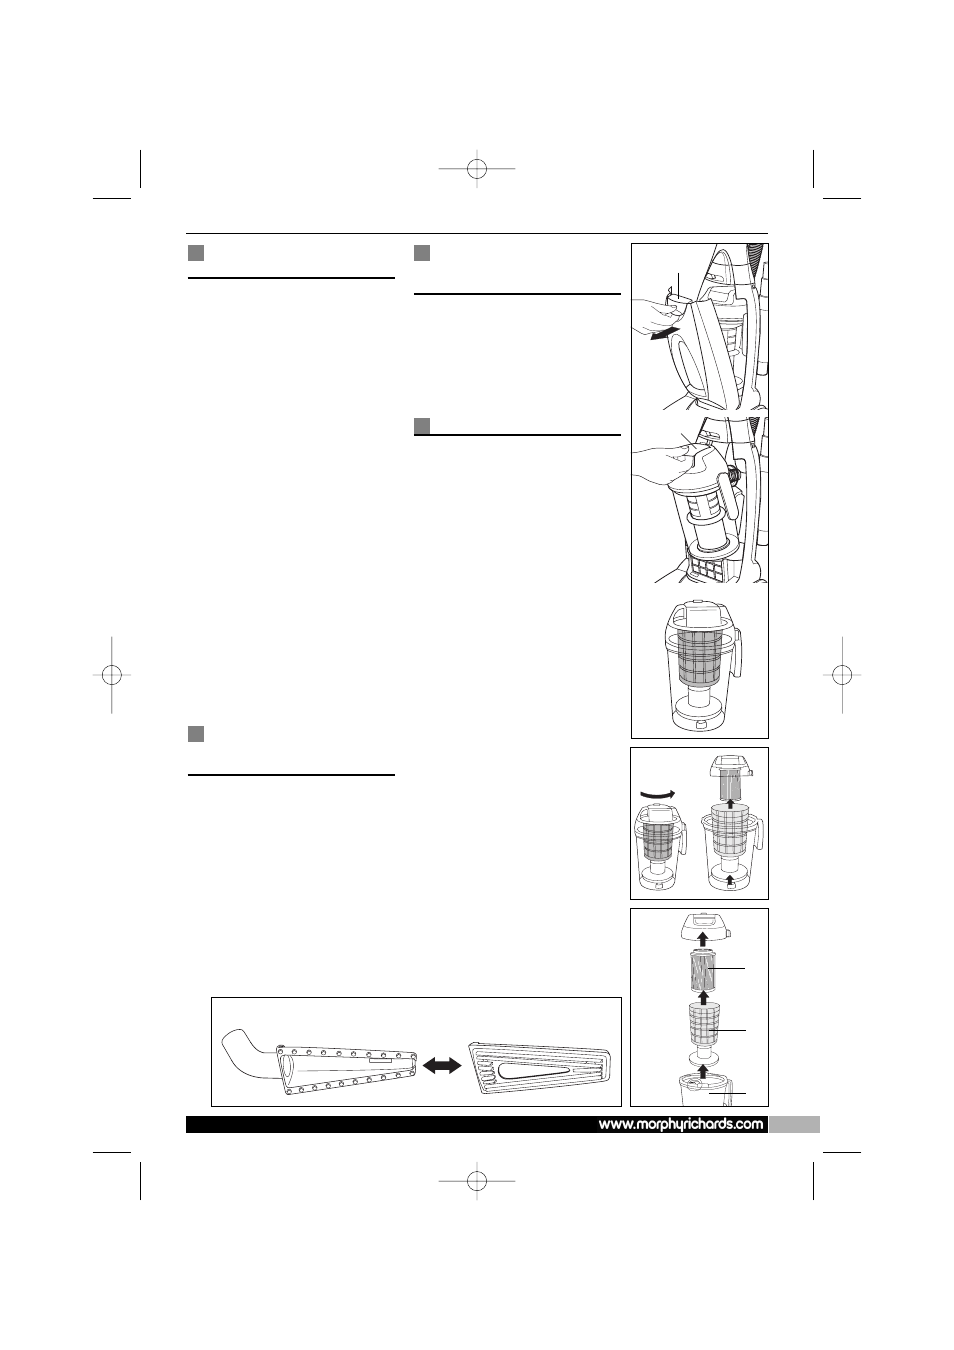
EMPTYING
Empty the dust canister
regularly even if it does not look
full, this will maintain the
performance.
1
Remove the front cover ‹ by
lifting the cover release lever ¤
E
.
2
Lift-up the dust canister release
Î
and pull the canister away
from the main body.
3
Take the canister to the dustbin.
4
Turn the lid quarter-of-a-turn
anti-clockwise to unlock, lift off
the lid with pleated filter Ì, put
to one side F.
5
Lift out the central mesh filter Ô
from the dust canister Ó G.
Brush clean if necessary.
6
Empty out the dust canister Ó.
7
Re-fit the central mesh filter.
8
Shake the pleated filter Ì to
remove all dust.
9
Re-fit pleated filter with lid into
the dust canister by lining up the
two arrows and turning the lid
quarter-of-a-turn clockwise to
lock.
10
Re-fit dust canister into cleaner
and push to lock into position.
11
Re-fit the front cover.
E
F
G
Ы Щ
D
FFoorr ddeettaaiillss ooff ootthheerr M
Moorrpphhyy RRiicchhaarrddss pprroodduuccttss,, pplleeaassee sseeee oouurr w
weebbssiittee::
¤
О
М
Ф
У
73332 rev3 10/9/08 09:56 Page 5