Appendix d: rotopod instructions, Rear mounting the pod section, Onyx 1640 – MACKIE 1640 User Manual
Page 32
32
ONYX 1640
ONYX 1640
Appendix D: Rotopod Instructions
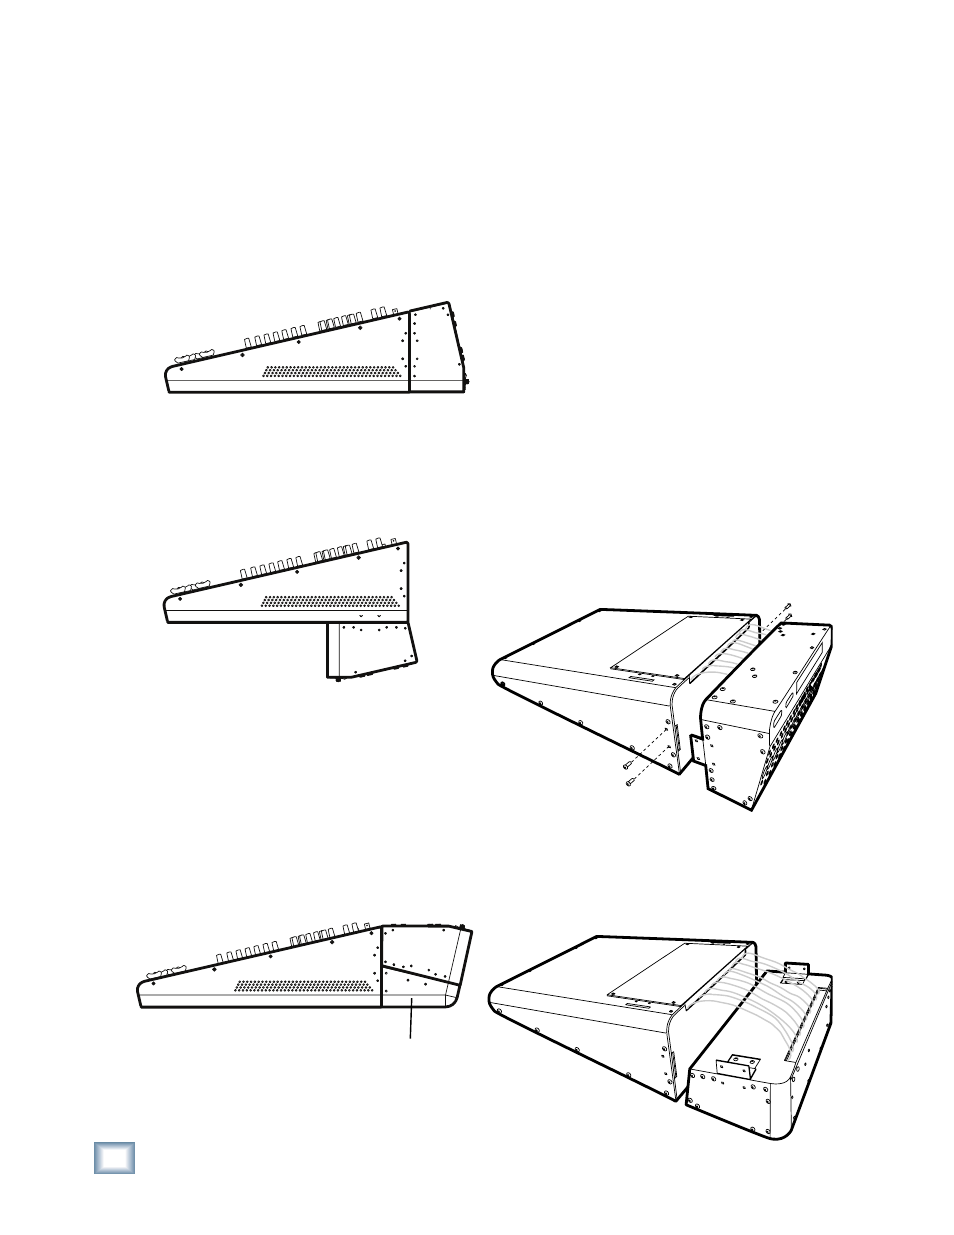
The Pod section of the Onyx 1640 mixer can be fi tted
in three different orientations to suit your preference:
1. From the factory, the Pod section has the input and
output connections at the rear of the mixer. If you
rack mount it, this will take up 14 rack spaces. (Al-
low one or two extra rack spaces for making your
connections.)
2. The Pod can be fi tted on the back of the mixer, with
the connections pointing out the back. This will
take up 12 rack spaces. The details below show how
to change to this confi guration. All you need is a
Phillips screwdriver.
3. Using an optional bracket, it can also be fi tted so
the connections face the same direction as the con-
sole side (the fun side) of the mixer. This will take
up 17 rack spaces.
If you would like to order the bracket, please con-
tact your Mackie dealer or Mackie technical sup-
port for details. The bracket comes with complete
installation instructions.
Rear Mounting the Pod Section
Tools and qualifi cations:
1. Phillips
screwdriver.
2. Pod Relocation Operator's General Journeyman's
Certifi cation License (PROGJCL grade III or
higher) from a Mackie-accredited Four-Year Pod
Relocation Technical Institute.
Procedure:
1. Turn off the mixer, and disconnect the power cord,
and all connecting cords. Put down that Ham
sandwich and stand away from the bag of Cheezey
What-nots.
2. Place the mixer face down on a soft and dry fl at
surface, previously prepared by removing all dust,
crumbs, small children, gnus, long-haired pets, and
wildebeests (okay, a wildebeest is a gnu).
3. Remove the four screws as shown below, and keep
them handy for step 8.
4. Gently pull the pod section away from the main
section, and rotate it so the connections are face
downwards. Do not strain the electrical wires join-
ing the two.
Optional Bracket