Aligning smartfinder, Aligning the viewfinder – Meade Instruments LX90-LNT User Manual
Page 15
15
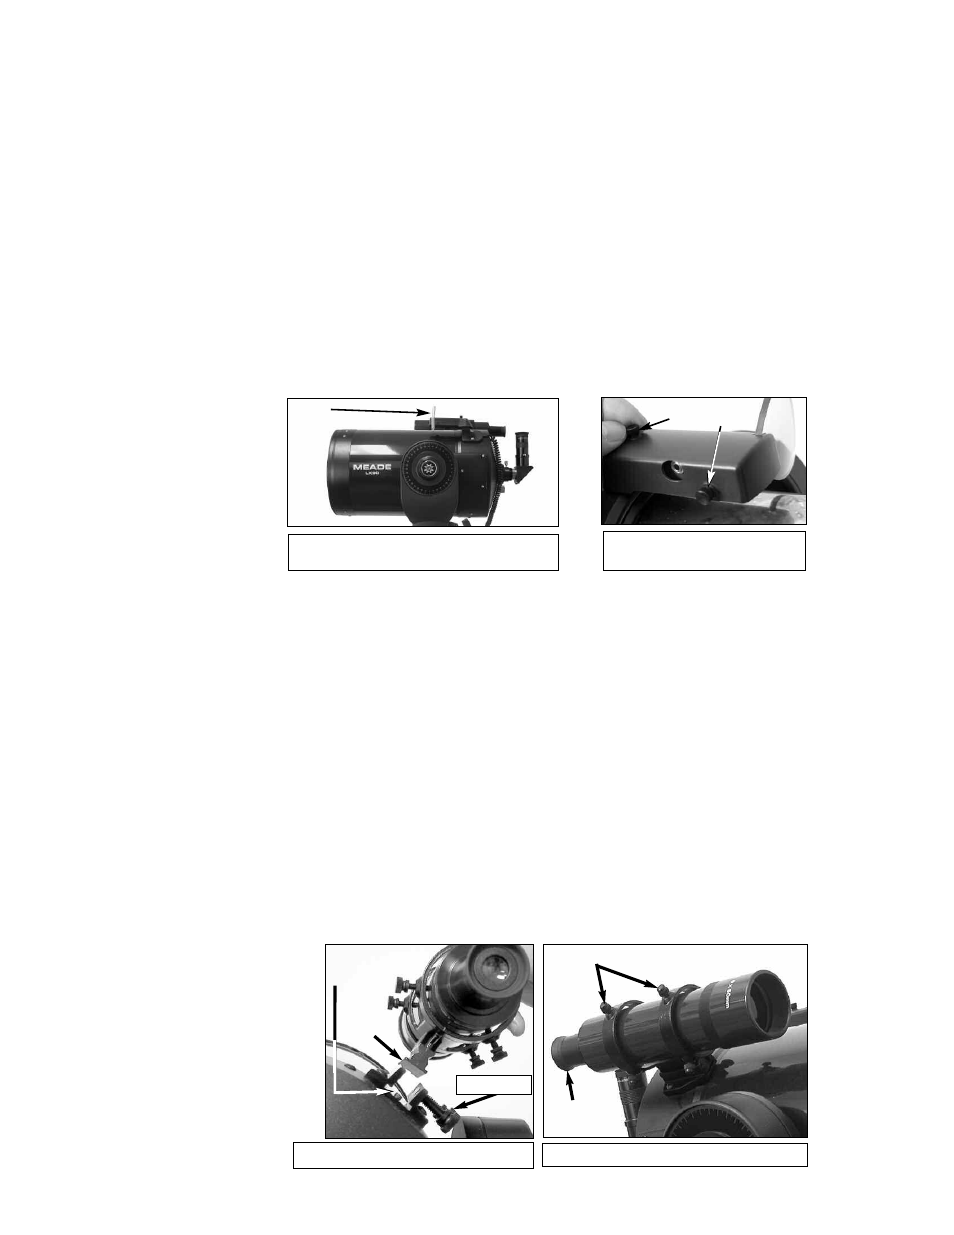
Aligning SmartFinder
In order for the SmartFinder to be useful, it must first be aligned with the main telescope, so
that both the SmartFinder and the main telescope are pointing at
precisely the same location. To align the SmartFinder:
1. Point the main telescope at some well-defined distant (perhaps a mile away) land object,
such as a telephone pole or sign.
Center the object, as precisely as
possible, in the SP 26mm eyepiece's field of view. Tighten the vertical and
horizontal locks (
6 and 9, Fig. 1) so that the tube cannot move and the object remains
centered.
2. While looking through the SmartFinder (
1, Fig. 6), turn the top or side alignment screws (2
and 3, Fig. 7), until the red dot of the SmartFinder points at precisely the same position as
the view through the eyepiece of the main telescope.
The SmartFinder is now aligned to the main telescope. Unless the alignment screws are
disturbed or the LNT Module is moved out of place, the SmartFinder should remain aligned
indefinitely.
Fig. 6b: Turn the top (2) or side
(3) SmartFinder.
Fig. 6: SmartFinder Location.
·
³
Aligning the Viewfinder
Like the SmartFinder, the viewfinder helps you locate objects and must also be aligned to the
main telescope. To align the viewfinder, perform steps 1 through 5 during the daytime; perform
step 6 at night.
1.
Slide the track on the bottom of the viewfinder into the slot in the viewfinder mounting
assembly. See
Fig. 7a. To secure the viewfinder to the mounting assembly, tighten the two
thumbscrews (
Fig. 7a) to a firm feel only.
2.
If you have not already done so, insert the Super Plössl 26mm eyepiece into the diagonal
prism.
3.
Unlock the R.A. (
9, Fig. 1) and Dec (7, Fig. 1) locks so that the telescope moves freely on
both axes.
4.
Point the telescope at some well-defined and stationary land object at least 200 yards dis-
tant, such as the top of a telephone pole or street sign. Center the object in the telescope
eyepiece. Re-tighten the R.A. and Dec locks.
5.
Look through the viewfinder eyepiece (
Fig. 7b) and loosen or tighten, as appropriate, one
or more of the viewfinder alignment screws (
Fig. 7b) until the viewfinder crosshairs are pre-
cisely centered on the object you previously centered in the telescope eyepiece.
6.
Check this alignment on a celestial object, such as the Moon or a bright star, and make any
necessary refinements, using the method outlined in steps 3 and 4.
»
Fig. 7a: Viewfinder Assembly.
Alignment
Screws
Mounting
Slot
Viewfinder
Eyepiece
Track
Fig. 7b: Viewfinder Assembly.
Thumbscrews