Locating the celestial pole, Autostar polar alignment, Easy polar alignment – Meade Instruments LX90-GPS User Manual
Page 51: One-star polar alignment, Two-star polar alignment, Setting circles
51
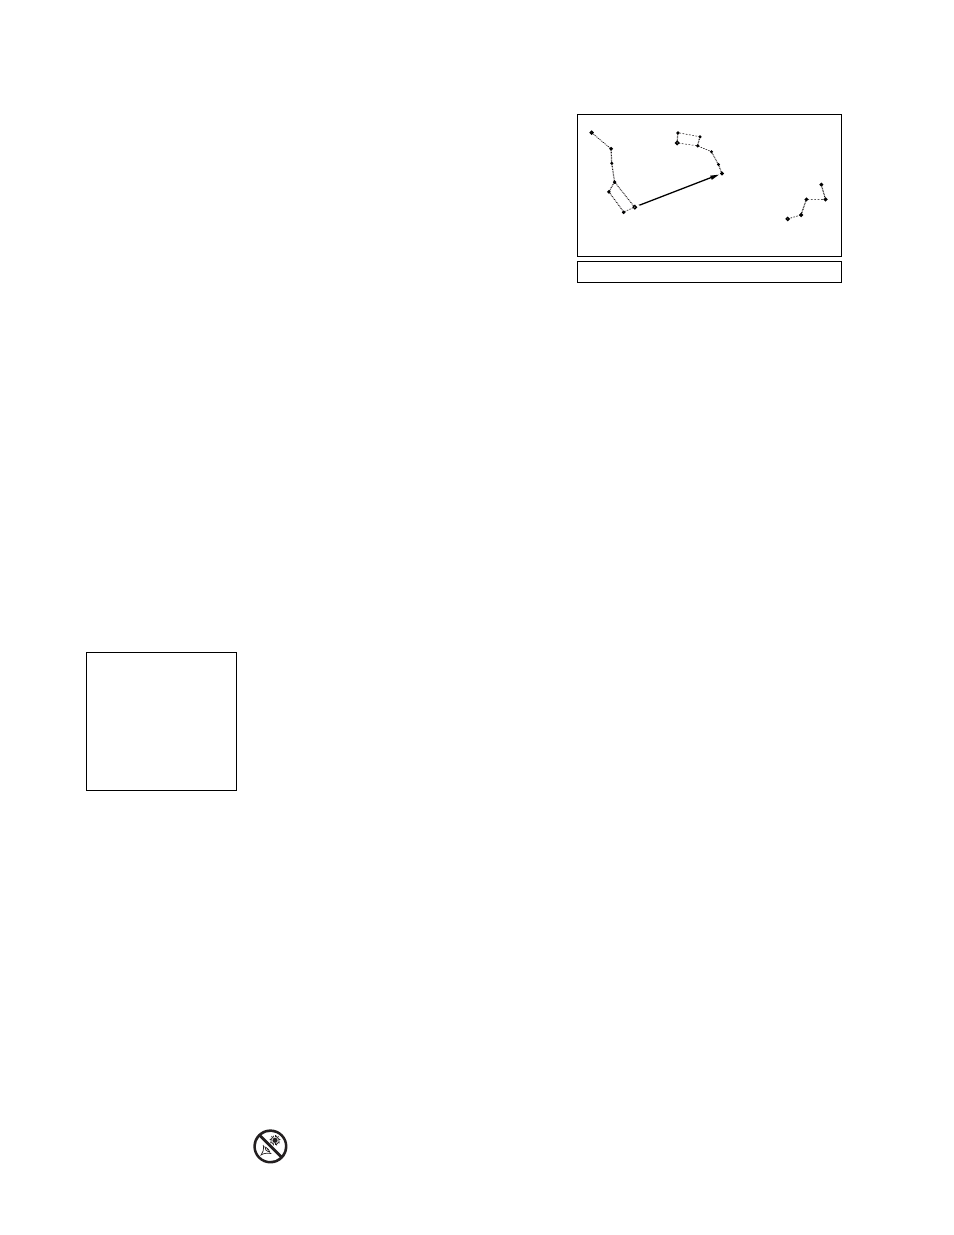
Locating the Celestial Pole
To get basic bearings at an observing location,
take note of where the Sun rises (East) and sets
(West) each day. After the site is dark, face North
by pointing your left shoulder toward where the
Sun sets. To precisely point at the pole, find the
North Star (Polaris) by using the Big Dipper as a
guide (
Fig. 29).
For precise tracking of astronomical objects, your
telescope should be Polar aligned.
IMPORTANT NOTE: For almost all astronomical observing requirements,
approximate settings of the telescope’s latitude and Polar axis are acceptable. Do
not allow undue attention to precise Polar Alignment of the telescope to interfere
with your basic enjoyment of the instrument.
AutoStar Polar Alignment
AutoStar provides three different methods for Polar Alignment: Easy, One-Star and Two-Star.
Easy Polar Alignment
Two alignment stars are chosen by AutoStar based on the date, time, and location entered.
First, choose "Polar" from the "Setup: Telescope: Mount" menu. The rest of the procedure is
identical to the (Alt/Az) "TWO-STAR," page 38, except that AutoStar prompts you to point the
telescope at Polaris and center it in the telescope eyepiece.
One-Star Polar Alignment
Polar One-Star Alignment requires some knowledge of the night sky. AutoStar provides a data-
base of bright stars and one star from this database is chosen by the observer for alignment.
Polaris is chosen by AutoStar. First, choose "Polar" from the "Setup: Telescope: Mount" menu.
The rest of the procedure is almost identical to the (Alt/Az)
ONE STAR ALT/AZ ALIGNMENT,
page
38, except that AutoStar prompts you to point the telescope at Polaris and center it in the tel-
escope eyepiece.
Two-Star Polar Alignment
Polar Two-Star Alignment requires some knowledge of the night sky. AutoStar provides a
database of bright stars and two stars from this database are chosen by the observer for align-
ment. First, choose "Polar" from the "Setup: Telescope: Mount" menu. The rest of the procedure
is almost identical to the
(Alt/Az) TWO STAR ALT/AZ ALIGNMENT
, page 38.
Setting Circles
Setting circles included with the LX90 permit the location of faint celestial objects not easily
found by direct visual observation. R.A. circle is located on the top surface of the telescope’s
drive base. The Declination circle (
11, Fig. 1) is located on the fork arm. With the telescope
pointed at the North Celestial Pole, the Dec circle should read 90° (understood to mean +90°).
Objects located below the 0-0 line of the Dec circle carry minus Declination coordinates. Each
division of the Dec circle represents a 1° increment. The R.A. circle runs from 0
hr
to (but not
including) 24
hr
, and reads in increments of 5
min
.
Using setting circles requires a developed technique. When using the circles for the first time,
try hopping from one bright star (the calibration star) to another bright star of known
coordinates. Practice moving the telescope from one easy-to-find object to another. In this way,
the precision required for accurate object location becomes evident.
NOTE: You may also enter an object's R.A. and Dec coordinates using the "User:
Objects" option of AutoStar's Object menu. AutoStar then automatically slews the
telescope to the entered coordinates.
Polaris
Little Dipper
Big Dipper
Cassiopeia
Fig. 29: Locating Polaris.
IMPORTANT NOTE: In
order to select any of
AutoStar's three Polar
Alignment options, you
must first select "Polar"
in the "Mount" option
of the "Setup:
Telescope" menu.
Looking at or near the Sun will cause irreversable damage to your eye. Do not point this telescope at or near the
Sun. Do not look through the telescope as it is moving.