Mounting an lx-4000 series in rack, Mounting the unit into a 19-inch or 23-inch rack, Cable connections – MRV Communications LX-4000 Series User Manual
Page 20
Installing the LX-4000 Series
20
MRV Communications, Inc.
www.mrv.com
451-0308
•
The unit may be front, rear, or center mounted.
• There is no mounting difference between the 19” and 23” rack mount ears.
Mounting the Unit into a 19-inch or 23-inch Rack
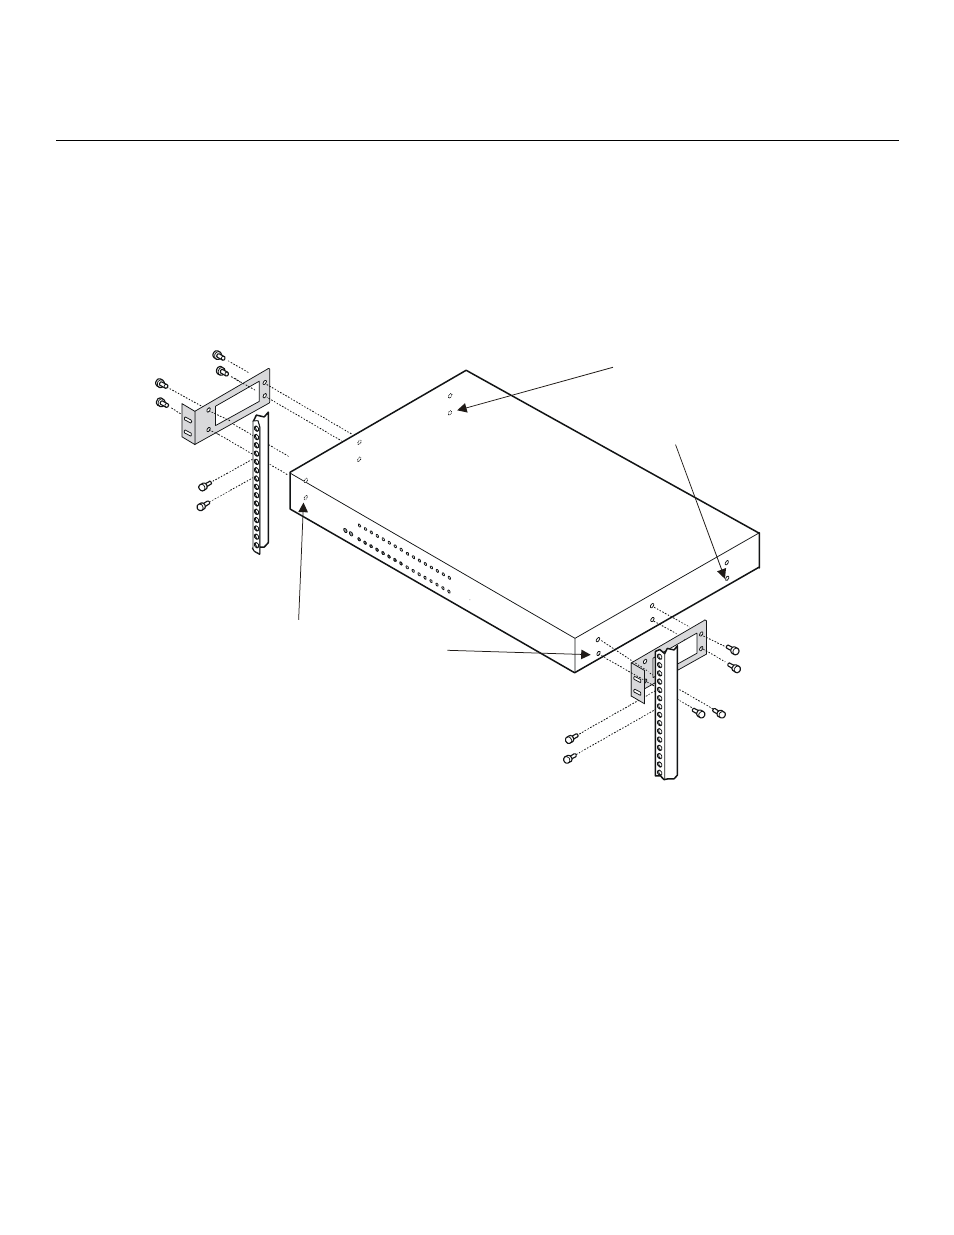
Attach the brackets to the unit, and then mount the unit in the rack. Refer to Figure 12 for further
information.
Figure 12 - Mounting an LX-4000 Series in Rack
Cable Connections
This section explains the cable connections for the LX-4000 unit.
Connect the Power Cable
Connect the supplied power cable to the rear of the LX-4000 unit and plug the other end into a 3-
prong wall outlet.
Connecting the Ethernet Interface
NOTE:
This port is set to auto negotiation by default. You can manually configure the port speed
and duplex if you want. Refer to the LX-Series Commands Reference Guide for further
details.
The three bottom side screws hold
the cover on the unit. To front-mount
the unit, you must
attaching the rack-mount brackets.
Then insert the supplied screws through
the brackets and into the same holes.
remove the front
and center top and bottom screws before
If you reverse-mount
the unit, remove the rear
and center top and bottom
screws, and insert the
supplied screws through
the rack-mount ears.