Recording, Playback – Olympus VN-750 User Manual
Page 5
5
EN
• The recorder beeps to alert you
of button operations or warn
you of errors.
[ON]: Enables the beep function.
[OFF]: Disables this function.
4 Press the
`OK button to complete
the setting.
"
• When you change the setting for
the time and date or beep sound,
remove the battery and then repeat
the above steps 1 through 4.
Recording
1 Press the MODE button to select
the desired recording mode.
[SP]: Standard recording.
[LP]: Long-term recording.
• To record a meeting or a lecture
clearly, select [SP].
2 Press the REC (
s) button to start
recording.
1
2
3
1 Recording mode
2 File number
3 Elapsed recording time
• The recording indicator light will
turn on.
• Turn the microphone in the
direction of the source to be
recorded.
3 Press the STOP (
4) button to stop
recording.
• Newly recorded audio will be
saved as the last file.
Pause:
If the recorder is in recording mode
and the REC (
s) button is pressed,
recording pauses. If the REC (
s)
button is pressed again, recording
resumes.
"
• To ensure recording from the
beginning, start recording after you
see the display and the recording
indicator light turning on.
• If the number of files inside the
recorder reached 200 or the
memory becomes full, you will
not be able to record any further,
and [FULL] will be displayed.
Delete any unnecessary file before
recording.
• When the remaining recording
time is less than 60 seconds, the
recording indicator light starts
fl ashing. When the recording time
is decreasing to 30 or 10 seconds,
the light fl ashes faster.
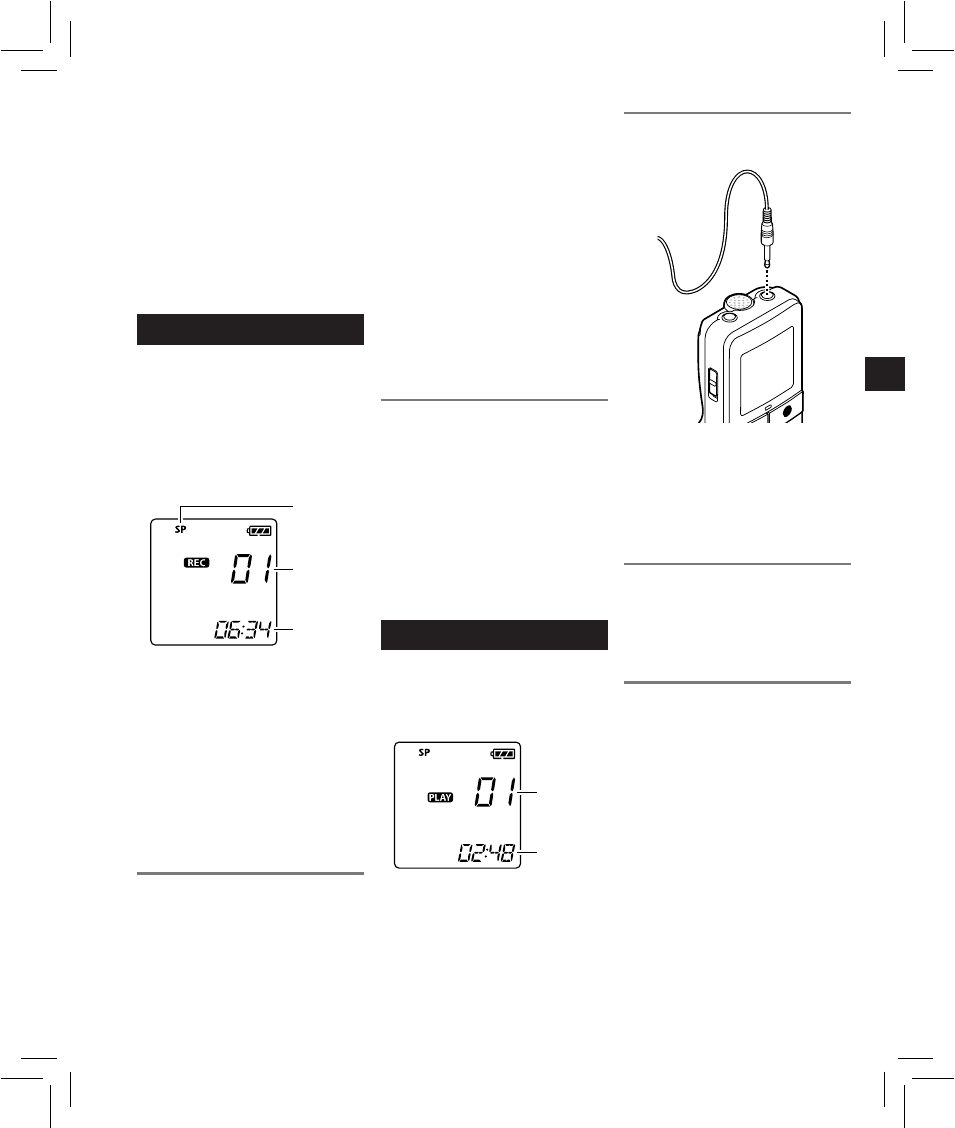
Recording from external microphones
or other devices:
External microphones and other
devices can be connected and the
sound can be recorded. Microphones
supported by plug-in power can also
be used.
"
• Do not plug and unplug devices
into the recorder’s jack while it is
recording.
• The built-in microphone will
become inoperable when an
external microphone is plugged
into the recorder’s MIC jack.
Playback
1 Press the
9 or 0 button to
select the file.
2 Press the
`OK button to start
playback.
1
2
1 File number
2 Elapsed playback time
3 Press the + or − button to adjust to
a comfortable listening volume.
• The volume can be adjusted
within a range from [00] to [30].
4 Press the STOP (
4) button at any
point to stop playback.
Playback through earphone:
An earphone can be connected
to the EAR jack of the recorder for
listening.
"
• To avoid ear irritation, insert the
earphone after turning down the
volume level. When you listen with
the earphone during playback, do
not raise the volume too much. It
may cause hearing impairment and
a decrease in hearing ability.
Forwarding and rewinding:
While the recorder is during playback
mode, press and hold the
9 or
0 button.
• When you release the button
the recorder will resume normal
playback.
Locating the beginning of a file:
While the recorder is during stop
mode or playback mode, press the
9 button.
• The recorder skips to the
beginning of the next fi le.
While the recorder is during playback
mode, press the
0 button.
• The recorder skips to the
beginning of the current fi le.
While the recorder is during stop
mode, press the
0 button.
• The recorder skips to the
beginning of the previous fi le. If
the recorder is in the middle of a
fi le, it will return to the beginning
of the fi le.
While the recorder is during playback
mode, press the
0 button twice.
• The recorder skips to the
beginning of the previous fi le.