Maintenance (engine) – Multiquip CENTRIFUGAL PUMP QP2H User Manual
Page 23
QP2H CENTRIFUGAL PUMP • OPERATION AND PARTS MANUAL — REV. #0 (08/04/08) — PAGE 23
MAINTENANCE (ENGINE)
MAINTENANCE
Perform the engine maintenance procedures as indicated below:
DAILY
■ Thoroughly remove dirt and oil from the engine and
control area. Clean or replace the air cleaner elements
as necessary. Check and retighten all fasteners as
necessary. Check the spring box and bellows for oil leaks.
Repair or replace as needed.
WEEKLY
■ Remove the fuel filter cap and clean the inside of the
fuel tank.
■ Remove or clean the filter at the bottom of the tank.
■ Remove and clean the spark plug (Figure 19), then adjust
the spark gap to 0.028 ~0.031 inch (0.6~0.7 mm). This unit
has electronic ignition, which requires no adjustments.
Figure 19. Spark Plug Gap
ENGINE OIL
1. Drain the engine oil when the oil is
warm as shown in
Figure 20.
2. Remove the oil drain bolt and sealing washer and allow
the oil to drain into a suitable container.
3. Replace engine oil with recommended type oil as listed in
Table 5. Engine oil capacity is 1.16 quarts (1.1 liters). DO
NOT overfill.
4. Install drain bolt with sealing washer and tighten securely.
Figure 20. Engine Oil (Draining)
DANGER — Cleaning Solvents
DO NOT use gasoline as a cleaning solvent because
that would create a risk of fire or explosion.
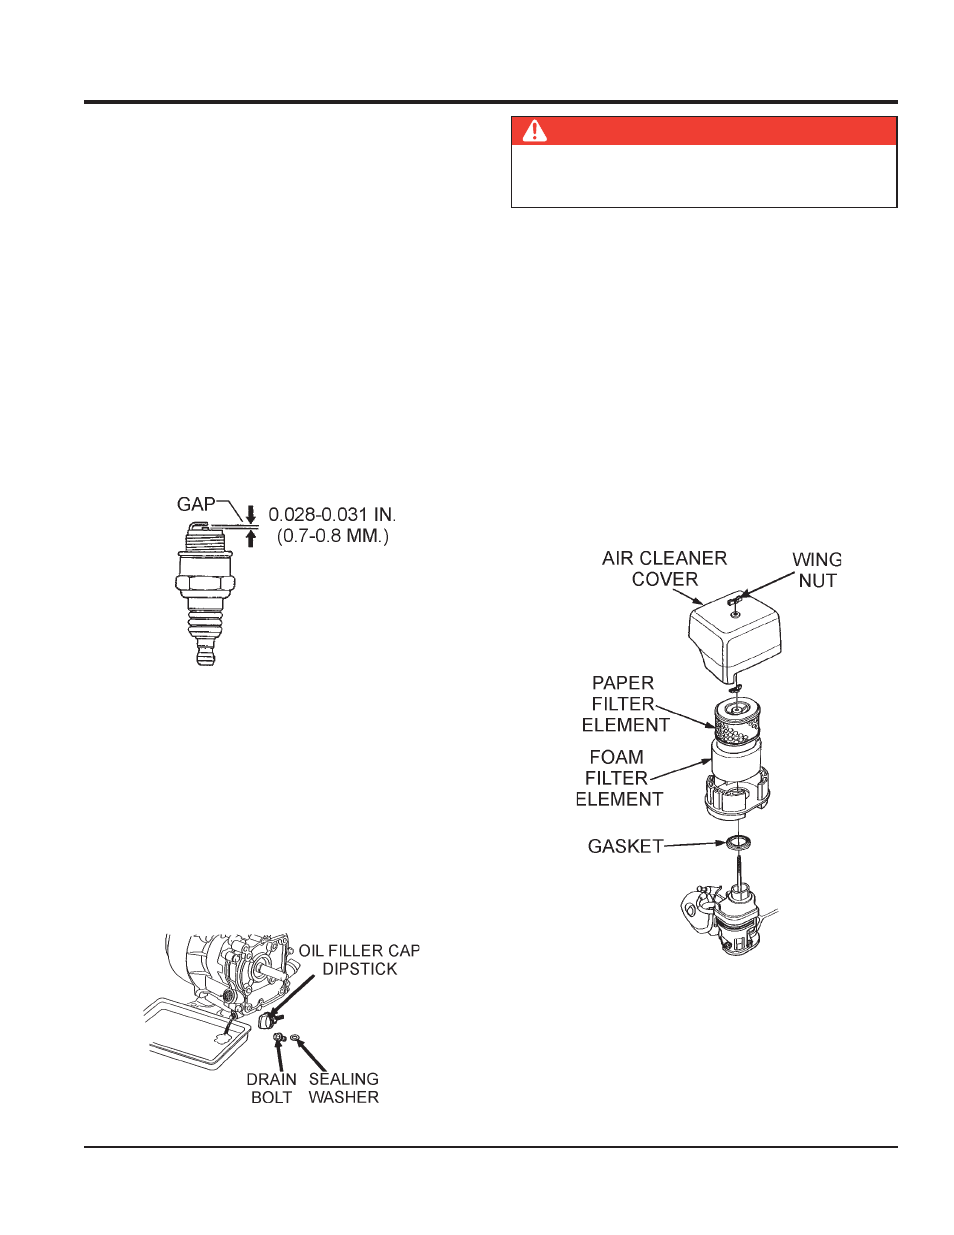
ENGINE AIR CLEANER
1. Remove the air cleaner cover and foam filter element
as shown in Figure 21.
2. Tap the paper filter element (Figure 21) several times
on a hard surface to remove dirt, or blow compressed
air [not exceeding 30 psi (207 kPa, 2.1 kgf/cm
2
)] through
the filter element from the air cleaner case side.
NEVER
brush off dirt. Brushing will force dirt into the fibers.
Replace the paper filter element if it is excessively
dirty.
3. Clean foam element in warm, soapy water or
nonflammable solvent. Rinse and dry thoroughly. Dip
the element in clean engine oil and completely squeeze
out the excess oil from the element before installing.
Figure 21. Engine Air Cleaner