Installing the power cable and fuse kit, Installing the microphone – Motorola Bluetooth Wireless Hands Free User Manual
Page 8
6
Insta
lling
th
e Han
d
s F
ree Kit
The location MUST NOT interfere with the vehicle’s air bag deployment.
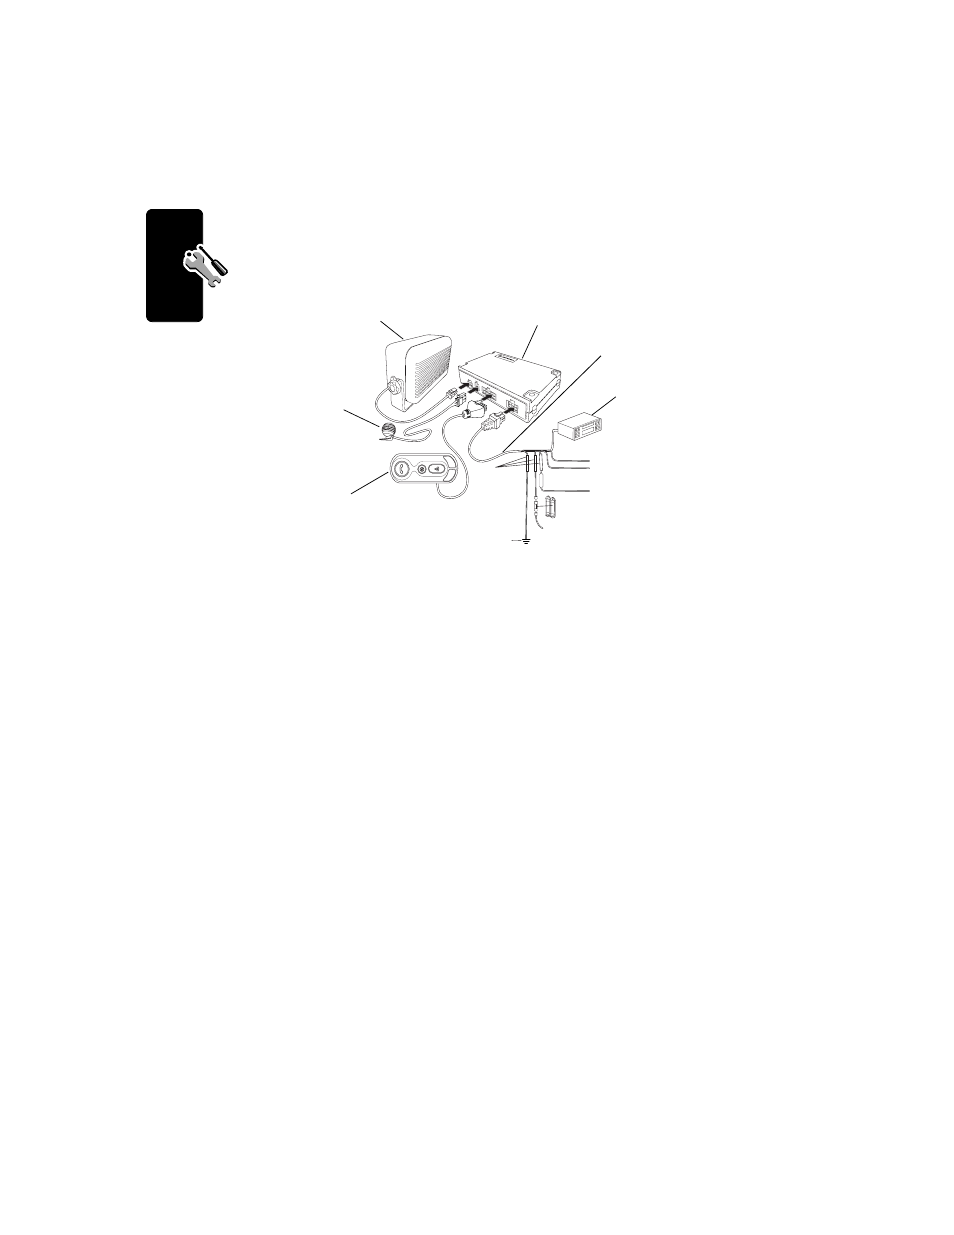
Installing the Power Cable and Fuse Kit
Caution: Failure to follow these steps may cause the accessory not to work properly and
may cause damage to the car kit.
1 Remove all fuses and tape them to their respective holders. DO NOT re-insert fuses until
you complete and inspect all connections.
2 Connect the fuse kit’s GREEN Ignition Sense wire (3 amp fuse) to an ignition-switched
location on the fuse block. When the ignition is off, the ignition sense line is low.
3 Connect the power cable’s ORANGE Entertainment Mute Wire to the vehicle’s
entertainment system.
Note: This feature is only operational if the car radio and/or phone support this capability.
Installation may require an optional relay (not included).
4 Connect the fuse kit’s RED positive primary lead (4 amp fuse) to a point in the vehicle’s
fuse box that is fused at 4 to 10 amp.
5 Connect the fuse kit’s BLACK ground wire to the vehicle chassis.
6 Inspect all connections.
Note: The Yellow and Blue wires are not used.
7 Re-insert all fuses. Do not replace any fuse with a higher amperage fuse.
Installing the Microphone
Note: Always use the supplied mounting hardware.
Orange
Blue
Yellow
Wire crimps:
green to green,
red to red,
black to black
Vehicle
Chassis
Green: to a point in
the fuse box
Red: to a point in fuse box
that is always active
4 - 10 AMP fuse
Black
C
B
Speaker
(SSN4020)
Junction Box
(SYN8883A, SYN0415A,
SYN0416A, SYN0417A
Microphone
(SMN4103)
Power Cable
(SKN4834A)
Vehicle
Radio
Control Module
(SYN9698A)
Fuse Kit
(SKN4937A)