For using the remote control, Name and function remote controller – Marantz SC-7S1 User Manual
Page 17
14
■
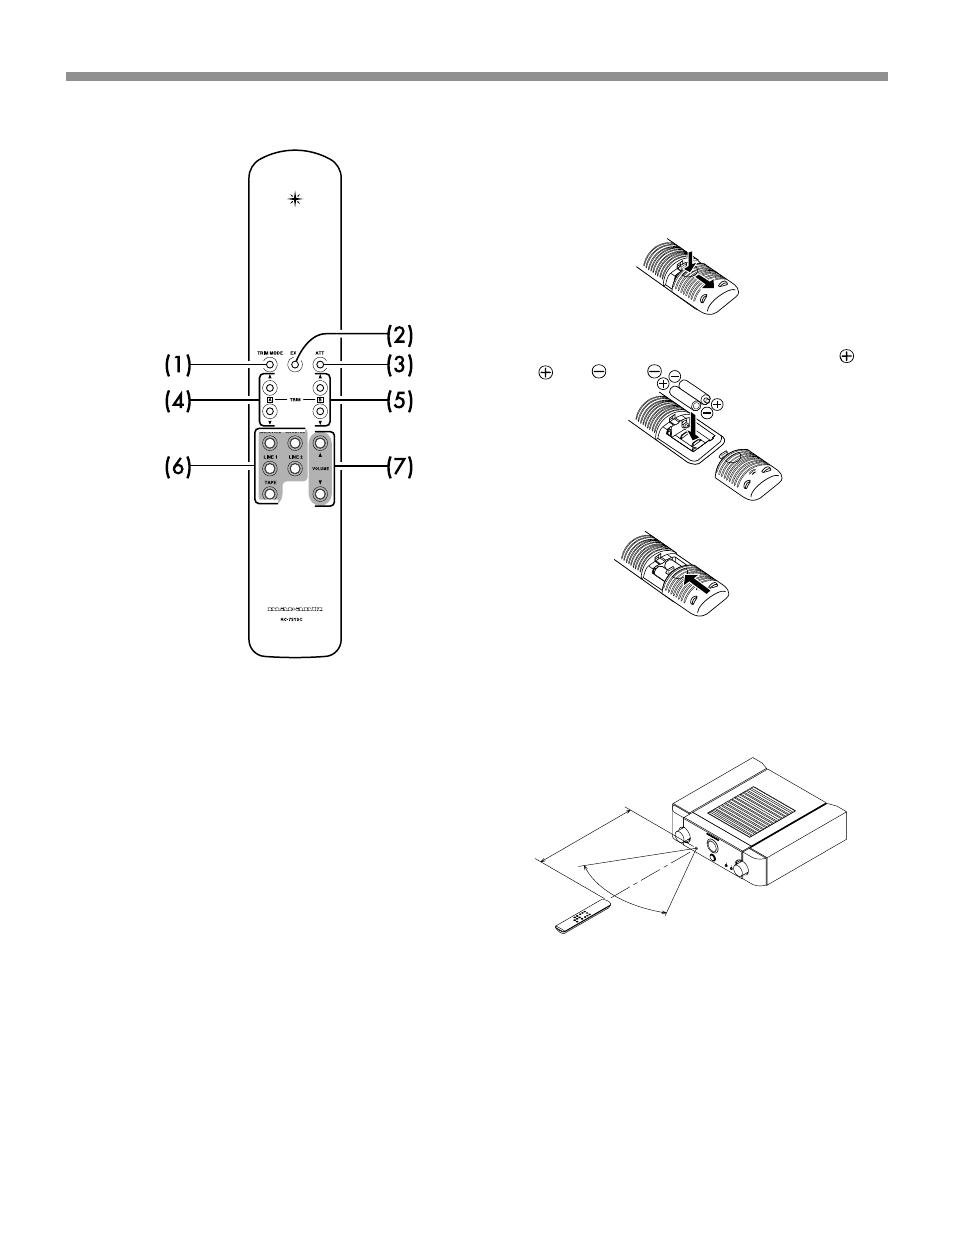
For using the Remote Control
●
Loading batteries
Before using the supplied remote control for the first time,
load the batteries in the remote control. The batteries pro-
vided are used only to verify the operations of the remote
control.
1
Remove the battery cover which is found on the back side
of the remote control.
2
Load the two new size “AAA” batteries inside the
battery compartment while taking care to align their
polarities correctly with the polarity markings (
with
and
with
).
3
Push the cover on the back side in the direction of
the arrow to close.
●
Operatable range of the Remote control
Operate the remote control unit (RC-7S1SC) within a dis-
tance of approx. 5 m from the infrared signal reception win-
dow (remote sensor) on the front of the SC-7S1.
Remote control operation may not be possible if the remote
control unit’s transmitter is not pointing in the direction of
the remote sensor or if there is an obstruction between the
transmitter and the remote sensor.
●
Caution
Do not allow direct sunlight, an inverter fluorescent light or
other strong source of light to shine onto the player’s infrared
signal reception window (remote sensor). Otherwise, the
operation of the remote control unit may be disabled.
Bear in mind that operating the remote control unit may cause
other devices operated by infrared rays to be operated by
mistake.
The remote control unit cannot be operated if the space be-
tween the controller and the player’s remote sensor is ob-
structed.
Do not place any objects on top of the remote control unit.
Doing so may cause one or more buttons to be held down
which will cause the batteries to run down.
5. Name and function
Remote controller
(1)
Trim Mode
Button to switch to Trim mode for trim adjustment.
(2)
Exit button
Button to finish Trim mode after Trim adjustment.
(3)
ATT (Attenuation) button
Button to attenuate at one touch.
(4)
Trim-A
▲
/
▼
(Trim A Channel up/down) button
Button to fine-tune the output level of the A ch by Trim adjust-
ment.
(5)
Trim-B
▲
/
▼
(Trim B Channel up/down) button
Button to fine-tune the output level of the B ch by Trim adjust-
ment.
(6)
Input selector button
Button to select input source.
(7)
Volume
▲
/
▼
(Volume up/down button)
Button to adjust volume.
Approx. 5m
60°