Troubleshooting, Tips, Before you call for service – GE 49-85179 User Manual
Page 45
45
Before you call for service…
GEAppliances.com
O
pe
ra
tin
g
In
str
uc
tio
ns
Ca
re
a
nd
C
lea
nin
g
In
sta
lla
tio
n
In
str
uc
tio
ns
Tro
ub
les
ho
ot
in
g
Tip
s
Sa
fe
ty
In
str
uc
tio
ns
Co
ns
um
er
S
up
po
rt
Troubleshooting Tips
Save time and money! Review the charts on the following
pages first and you may not need to call for service.
Problem
Possible Causes
What To Do
Top burners do not light
Plug on range is not completely
•
Make sure electrical plug is plugged into a live, properly
or do not burn evenly
inserted in the electrical outlet.
grounded outlet.
(The front right burner
Burner hole or slits on the side
•
Remove the burners (on models with standard twin
is designed to have
of the burner may be clogged.
burners) or burner heads and caps (on models with
slightly smaller flames
sealed burners) and clean them with a sewing needle
between the 6 and 9
or twist-tie. Make sure you do not enlarge the holes.
On sealed burner models, check and clean the electrode
area for burned-on food or grease.
Improper burner assembly.
•
Make sure the burner parts are installed correctly.
See the Care and cleaning of the range section.
Burner flames very
Improper air to gas ratio.
•
If range is connected to LP gas, contact the person
large or yellow
who installed your range or made the conversion.
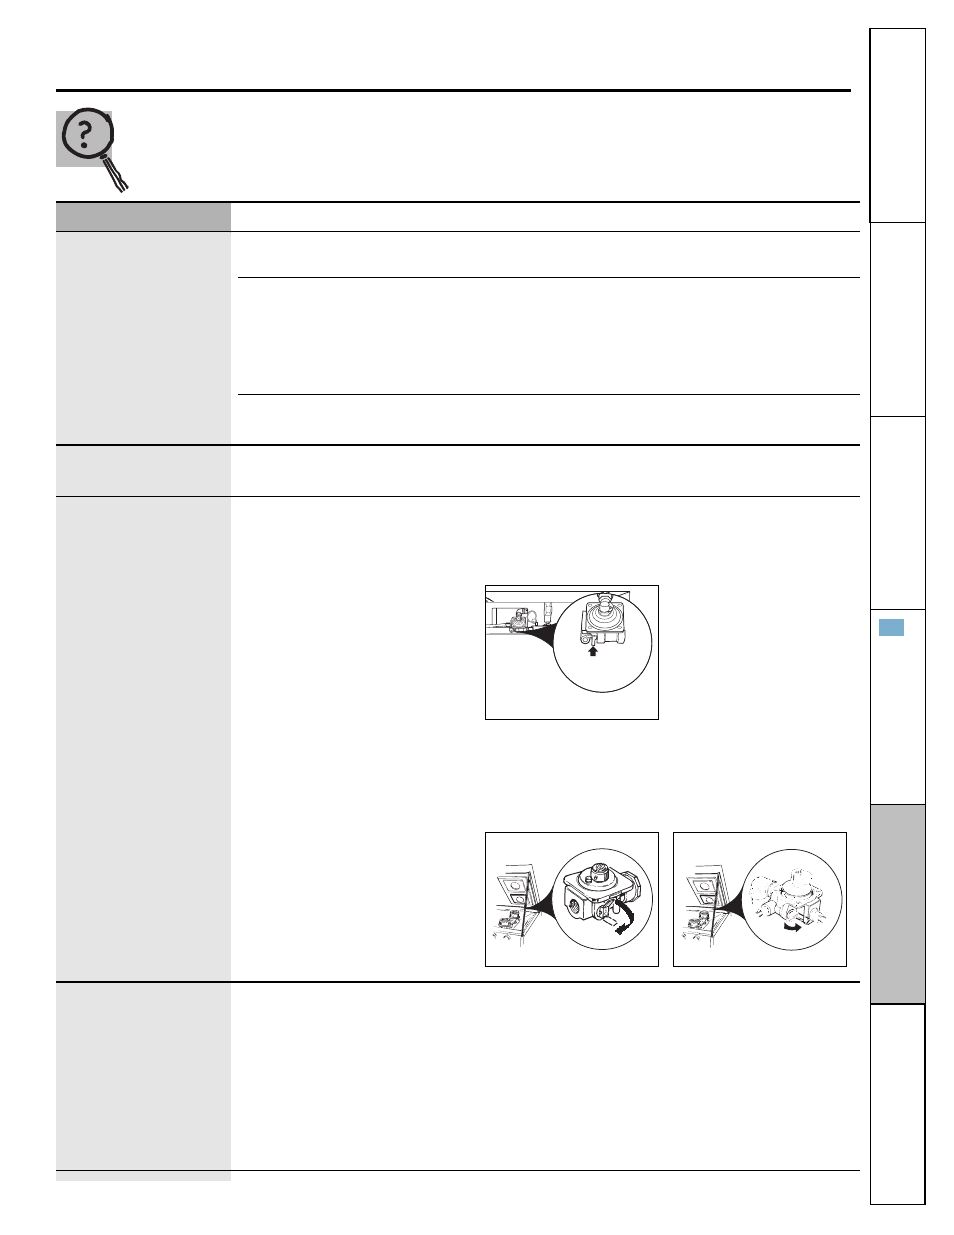
Surface burners light
The oven gas shut-off valve
•
To check the oven gas shut-off valve on sealed burner
but oven does not
may have accidentally been
models, remove the warming drawer, storage drawer or
moved during cleaning or
kick panel (see the Care and cleaning of the range section)
moving.
and look for the gas shut-off lever at the back of the range.
•
To check the oven gas shut-off valve on standard twin
burner models, raise the cooktop and look for the gas
shut-off lever at the extreme right rear corner. Follow
the directions in box A or B that match your regulator
type.
Scratches (may appear
Incorrect cleaning
• Scratches are not removable. Tiny scratches will become
as cracks) on cooktop
methods being used.
less visible in time as a result of cleaning.
glass surface
Cookware with rough bottoms
• To avoid scratches, use the recommended cleaning
being used or coarse particles
procedures. Make sure bottoms of cookware are clean
(salt or sand) were between
before use, and use cookware with smooth bottoms.
the cookware and the surface
of the cooktop.
Cookware has been slid
across the cooktop surface.
Lever is
shown closed.
PULL TO OPEN.
Sealed burner models
Lever is shown closed.
PULL TO OPEN.
Standard twin burner models
Lever is shown closed.
PULL TO OPEN.
Standard twin burner models
A
B
Top burners do not light
or do not burn evenly.
(The front right burner
is designed to have
slightly smaller flames
between the 6 and 9
o’clock positions. This
is normal.)