English, 5 installation of expansion cards – GIGABYTE GA-8I915MD-GV User Manual
Page 18
GA-8I915MD-G/GA-8I915MD-GV Motherboard
- 18 -
English
1-5
Installation of Expansion Cards
You can install your expansion card by following the steps outlined below:
1. Read the related expansion card's instruction document before install the expansion card into the
computer.
2. Remove your computer's chassis cover, screws and slot bracket from the computer.
3. Press the expansion card firmly into expansion slot in motherboard.
4. Be sure the metal contacts on the card are indeed seated in the slot.
5. Replace the screw to secure the slot bracket of the expansion card.
6. Replace your computer's chassis cover.
7. Power on the computer, if necessary, setup BIOS utility of expansion card from BIOS.
8. Install related driver from the operating system.
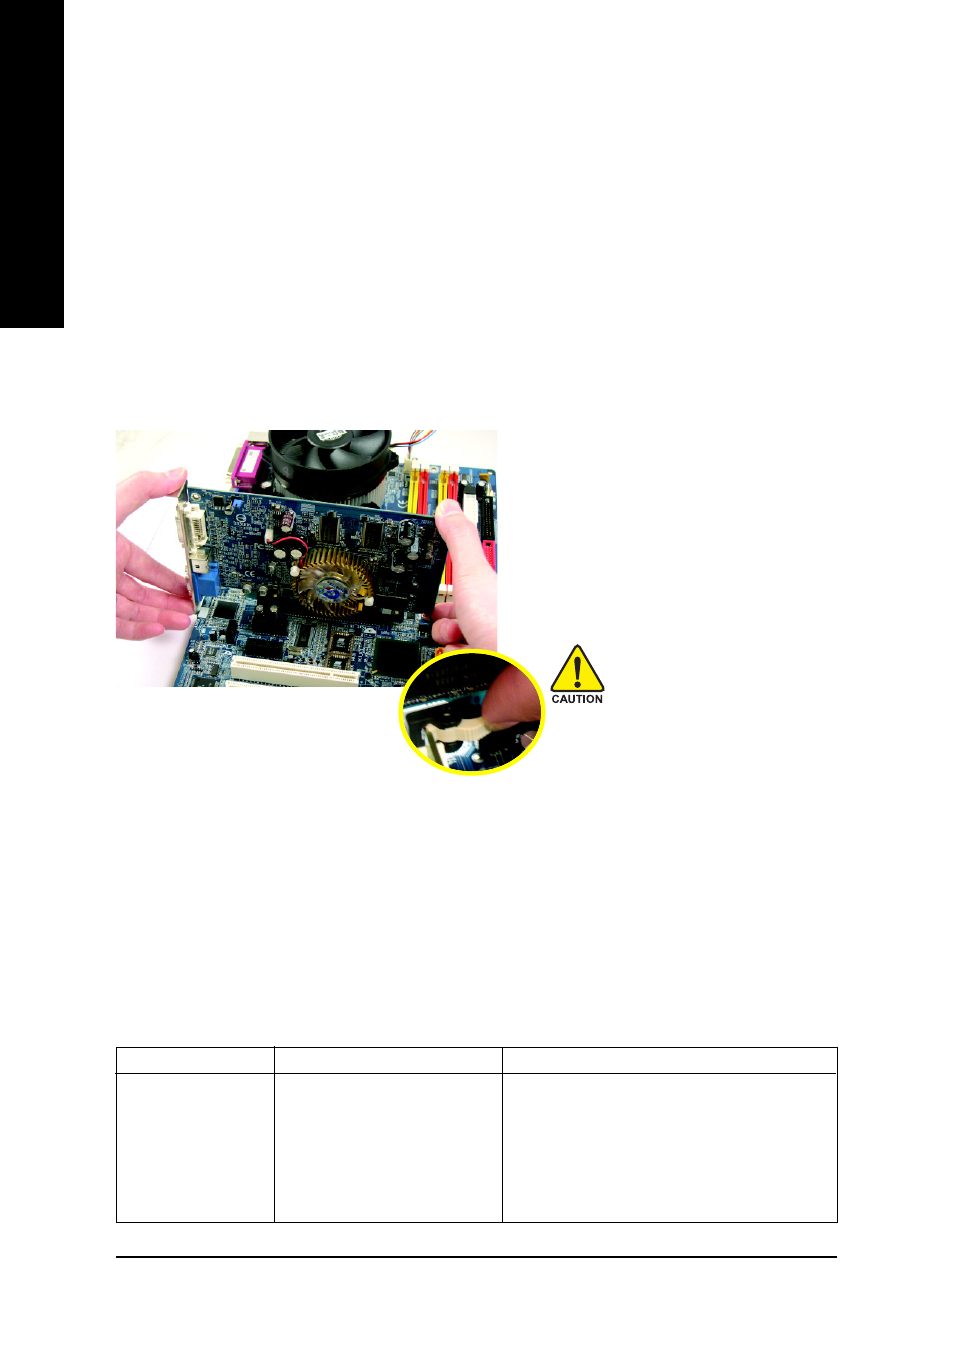
Installing a PCI Express x 16 expansion card:
Please align the VGA card to the onboard
PCI Express x 16 slot and press firmly down
on the slot. Make sure your VGA card is
locked by the latch at the end of the PCI
Express x 16 slot. When you try uninstall
the VGA card, please press the latch as the
picture to the left shows to release the card.
(The items below are all supported under the Windows XP operating system. When using an
add-on graphics card, please first delete the onboard graphics driver before installing the driver
for the add-on graphics card.)
1-5-1 Graphics Card Support List *
Graphics Chip
Maker
Model Name
Nvidia
Gigabyte
GV-NX53128D
Gigabyte
GV-NX57128D
Gigabyte
GV-NX59128D
Gigabyte
GV-NX62128D
Gigabyte
GV-NX66256D
Gigabyte
GV-NX66T128VP
To be continued...
Figure 1-1. PCI Express x16 Cards
"*" Only for GA-8I915MD-GV.