Turning on and off, Turning the laser on and off, Turning the led lights on and off – Global Machinery Company BS230L User Manual
Page 13: Removing and installing band saw blades
13
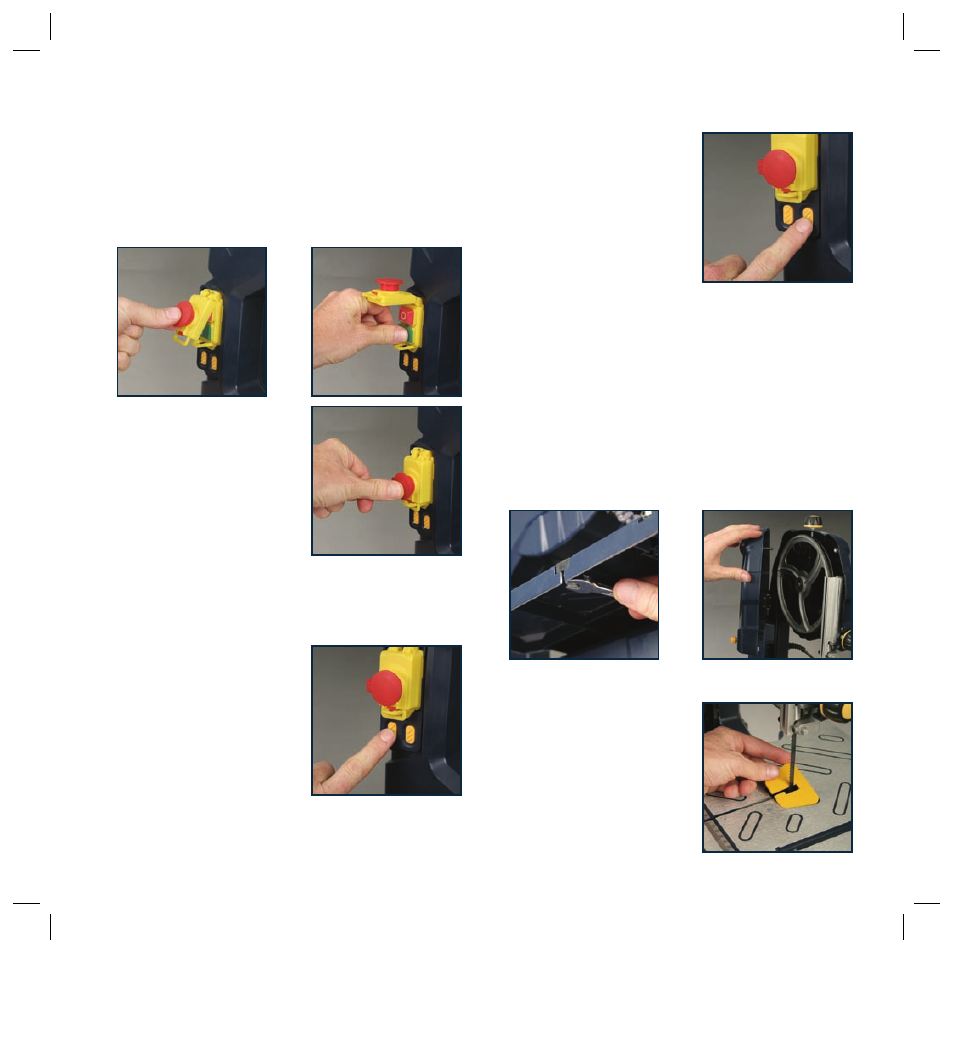
Turning on and off
The safety switch employs a red hinged cover that clips
over the ON/OFF switches.
1. To switch on, unclip the cover fastener, raise and hold
the cover (1) then press the ON switch (2). Now let the
cover fall so that it rests against the switches. Do not
close the cover.
2. To switch off, simply push on
the red cover (1) to snap it
shut. This pushes the OFF
button underneath the cover
and cuts off the power. To
switch on again it is necessary
to unclip the cover and raise it.
Note.
The saw is automatically
turned off in the event of a power
failure. You will need to press the ON button again to restart
the saw.
Turning the laser on and off
1. To turn the laser on press the
laser light on/off switch (3).
2. To turn the laser off press the
laser light on/off switch one
more time.
3. To adjust the laser line turn
the laser adjustment knob in
an anti-clockwise direction to
loosen it and then move it to the left or right until the laser
line is in line with the blade. Turn the laser adjustment
knob in a clockwise direction to tighten it.
Turning the LED lights on and off
The LED light will illuminate the
work area for greater visibility of
the cutting line.
1. To turn the worklight on press
the light on/off switch (4).
2. To turn the worklight off press
the light on/off switch one
more time.
Removing and installing band saw blades
WARNING.
Always ensure that the saw is switched off
and unplugged from the power supply before making any
adjustments.
This bandsaw is supplied with a general purpose
woodcutting blade.
1. Remove the rip fence from the table.
2. Remove the hex screw, washer and bracket from the
front of the work table by loosening the hex screw using
the 10mm wrench.
3. Open the blade housing doors.
4. Remove the table insert (15)
so you can get better access
to the blade guard. Loosen
and remove the hex screw
that secures the blade guard
in position using the 3mm hex
key supplied. The blade guard
can now be pushed to the side
of the blade.