Installation – GE Monogram MONOGRAM ZCG3100 User Manual
Page 14
14
Procedure D
3/4" thick wood panel with custom handle
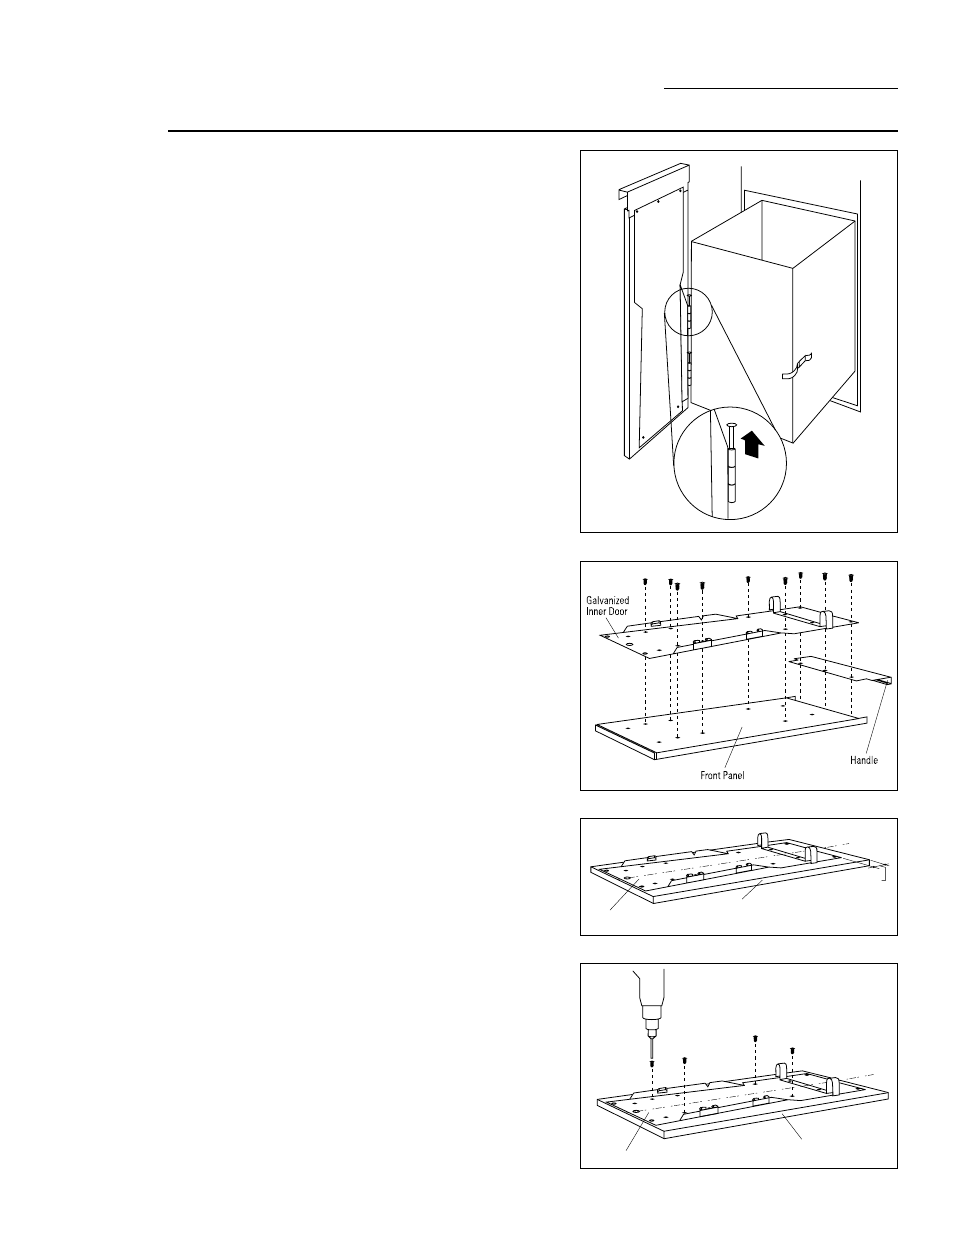
• Pull the drawer out to stop position.
• Unlatch the drawer front by opening the clasp on
the right side.
• While supporting the weight of the drawer front,
remove the hinge pins on the left side.
• Lay drawer front face down on a flat surface.
• Remove 9 screws which retain the front panel and
handle.
– Save galvanized inner door.
– Discard front panel with side trim and handle.
• Place galvanized inner door onto the back side of
the finished panel.
• Position the inner door 1-5/16" below the top of the
finished panel and center, left to right.
• Use the inner door as a template. Drill 2 pilot holes
near the top and 2 at the bottom, sized to match
screws being used. (Screws are not provided)
• Drive 2 screws loosely into the bottom and 2 screw
into the top. Check to be sure the inner door is
centered left to right over the finished panel.
Tighten screws.
Caution:
Select screw length carefully to avoid penetration of the
finished side.
Galvanized Inner Door
Back Side Finished Panel
CL
1-5/16"
Galvanized Inner Door
Back Side Finished Panel
CL
Installation
Built-In Compactors