Grizzly Oak Workbench T10157 User Manual
Page 3
t10157 oak Workbench
-3-
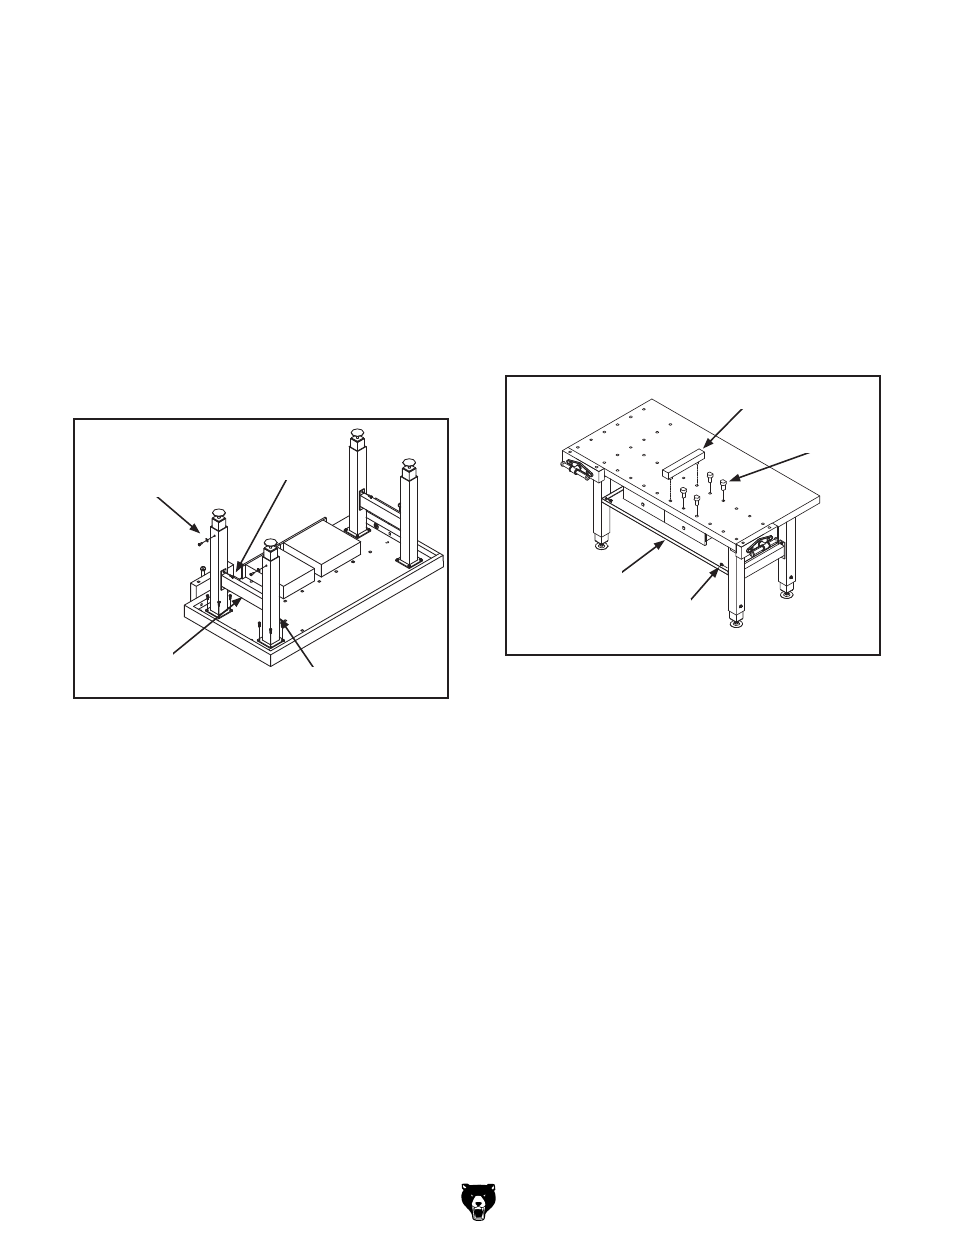
figure 7. installing the legs.
5
⁄
16
" 18 x 1" Flange Bolts
11. attach the leg supports to the leg assemblies
with the
5
⁄
16
"-18 x 1" flange bolts, as shown in
figure 7, then secure the leg assemblies to
the workbench top with the
5
⁄
16
"-18 x 1" flange
bolts.
12. With assistance, flip the workbench right side
up, then adjust the foot pads to make the top
surface level.
13. attach the bottom shelf to the legs with
the
5
⁄
16
"-18 x
1
⁄
2
" flange bolts, as shown in
figure 8.
14. insert the bench stop bars and the bench
dogs into the workbench top to finish the
assembly.
8. insert the vise assemblies through the holes
in the table edge and thread the leadscrew
into the leadscrew plate.
9. With assistance, turn the workbench top
upside down on a flat, protected surface.
10. slide the lower legs into the upper legs,
then secure them together with the
5
⁄
16
"-18 x
3
⁄
4
" hex bolts and flat washers, as shown in
figure 7.
Note: Make sure that the completed leg
assemblies are all the same length, which will
dictate the height of the finished workbench
(from 32"–39").
5
⁄
16
"-18 x
3
⁄
4
"
hex Bolts & Flat
Washers
leg
support
5
⁄
16
"-18 x 1"
Flange Bolts
figure 8. Bottom shelf installed.
Bottom shelf
Bench dog
5
⁄
16
" x
1
⁄
2
"
Flange Bolt
Bench stop Bar