Notice – Grizzly Oak Workbench T10157 User Manual
Page 2
-2-
t10157 oak Workbench
2. align the drawer side panels with the drawer
sub-assembly, as shown in
figure 2, then
secure them with the M4 x 30 wood screws.
3. attach the ball bearing drawer slides to
tops of the drawer side panels, as shown in
figure 3, with the M4 x 13 wood screws.
Note: Make sure the drawer slides properly
fit with the pre-installed slides underneath the
workbench top, as shown in
Figure 4.
figure 4. aligning the drawer slides with the pre-
installed slides.
align these slides
NOTICE
When gluing parts together, wipe off the
excess and allow the glue to completely
dry before proceeding to avoid inadver-
tently gluing the wrong parts in subsequent
steps.
figure 3. attaching drawer slides to the drawers.
drawer
slides
M4 x 13
Wood
screws
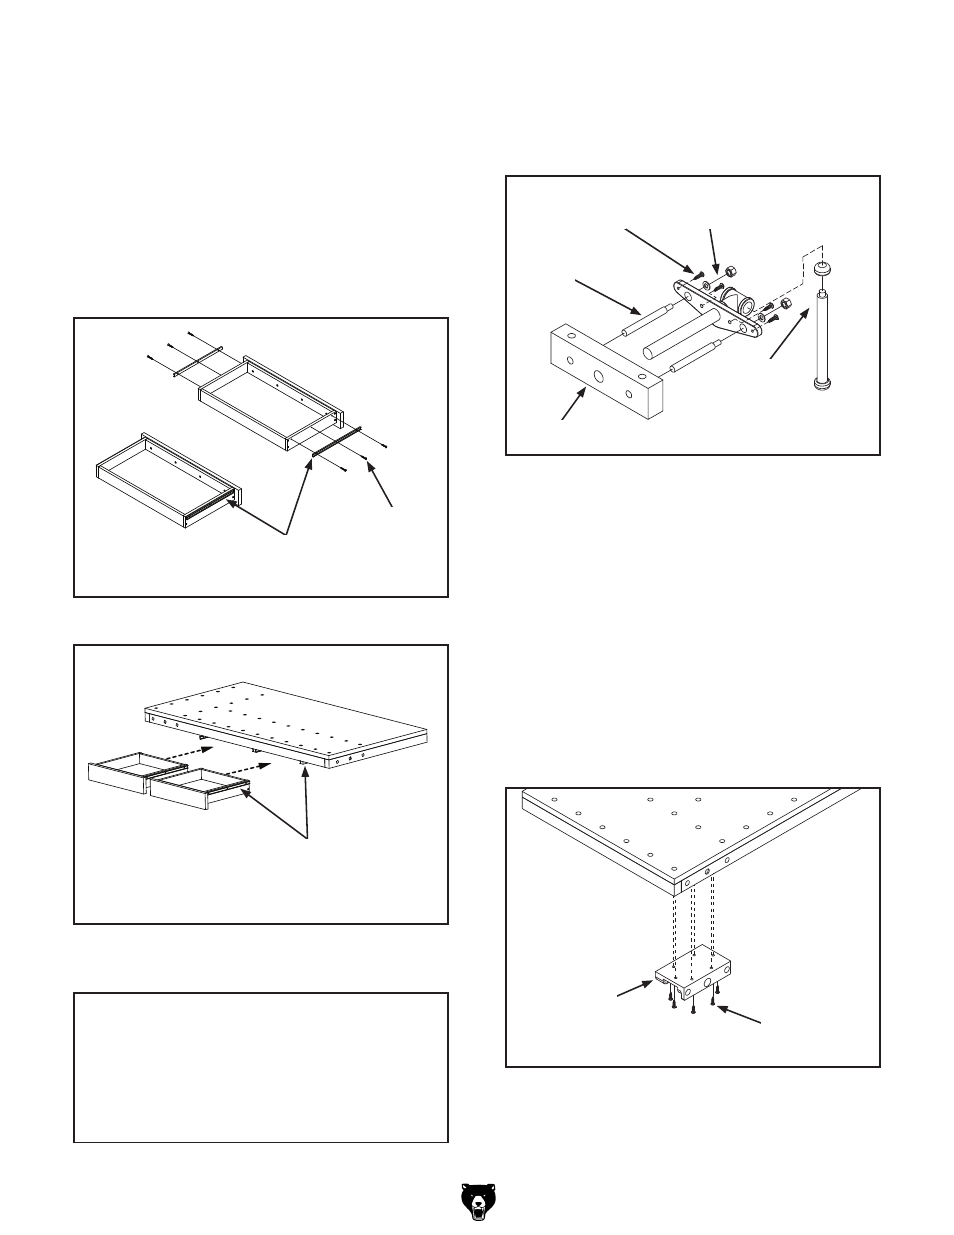
4. insert the tubes through the rear of the vise
leadscrew assemblies and secure them with
the
5
⁄
16
"-18 hex nuts and
5
⁄
16
" flat washers, as
shown in
figure 5.
5. insert the handles through the ends of the
vise leadscrew assemblies (see
figure 5)
and glue on the knobs to hold them in place.
6. slide the vise leadscrew assemblies into the
vise faces and secure them with the
1
⁄
4
" x 1
1
⁄
2
"
wood screws.
7. position the vise leadscrew plates under-
neath the table and align their holes with
those in the table edges, then secure them
in place with the
1
⁄
4
" x 1
1
⁄
2
" wood screws, as
shown in
figure 6.
figure 5. Vise assembly.
5
⁄
16
" hex nut
& Flat Washer
1
⁄
4
" x 1
1
⁄
2
"
Wood screw
tube
handle
& Knob
Vise Face
figure 6. Vise leadscrew plate aligned with the
underside of table and holes in the table edge.
Vise
leadscrew
plate
1
⁄
4
" x 1
1
⁄
2
"
Wood screw