Table assembly, Vise installation – Grizzly Super Heavy-Duty Workbench H8361 User Manual
Page 2
-2-
H8361/H8362 (Mfg. 05/09+)
Table Assembly
1. Place eight
5
⁄
16
"-18 dowel nuts in the holes on
the cross braces, as shown in
Figure 3.
Vise Installation
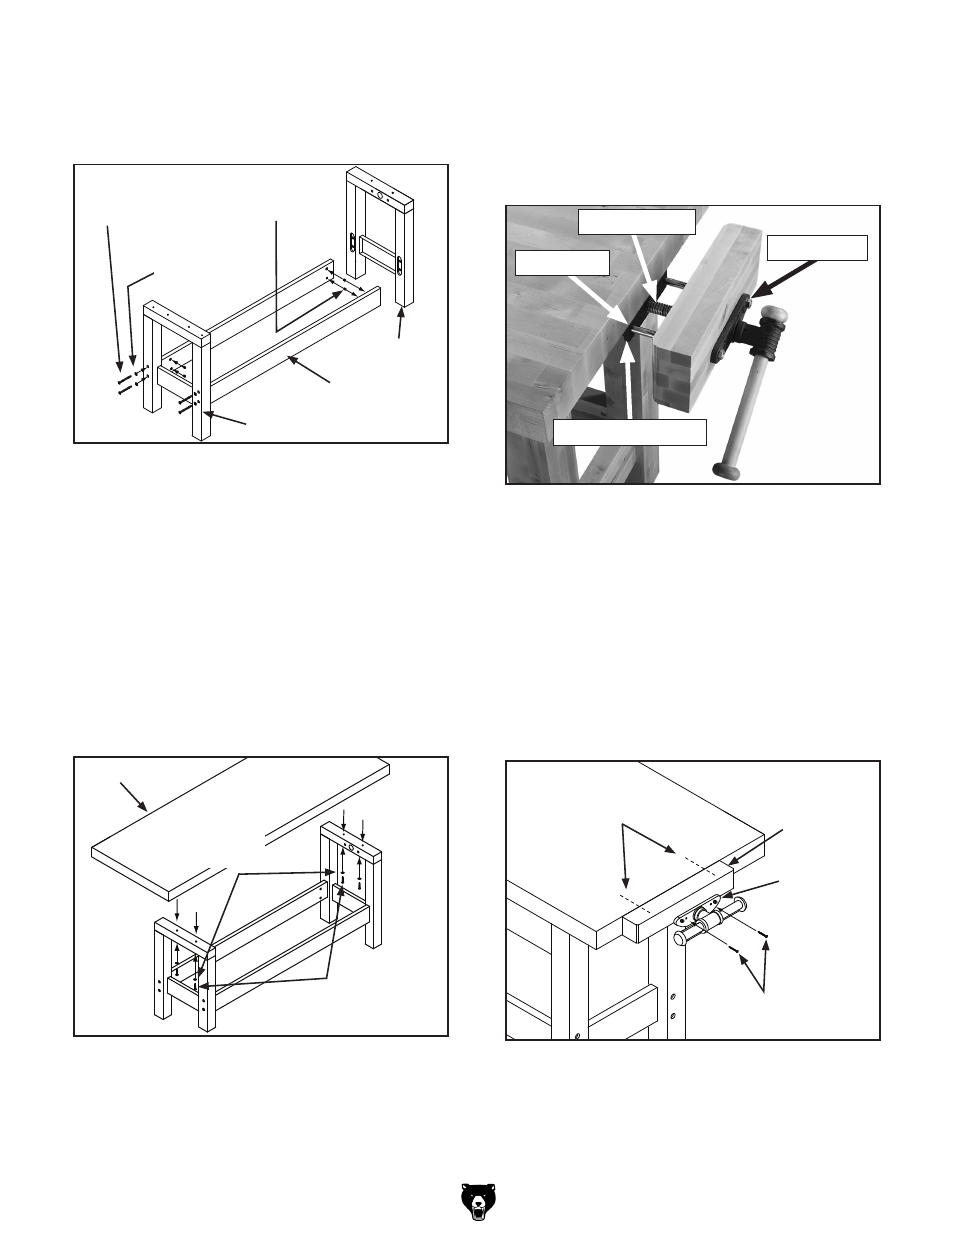
1. insert the metal shafts and threaded rod of
the vise through the holes in the vise wood
block and into the vise support block under
the bench top (see
Figure 5).
Figure 3. Attaching cross braces and legs.
2. insert the cross braces into the right and
left legs, and secure with eight
5
⁄
16
"-18 x 4"
machine screws and flat washers.
Note: Do not fully tighten the fasteners until
instructed.
3. Place the bench top over the legs, align the
mounting holes, and secure with four
5
⁄
16
" x
2
1
/
2
" wood screws and
5
⁄
16
" flat washers, as
shown in
Figure 4. Secure all the machine
screws now.
5
⁄
16
"-18
Dowel Nut
5
⁄
16
"-18 x 4"
Machine Screw
Right Leg
Cross Brace
Left Leg
Figure 6. installing vise.
Table Top &
Wood Block Flush
#5 x 1
7
⁄
16
"
Wood Screws
Vise Plate
Wood Block
Figure 5. Vise threaded into vise support block.
3. Adjust the top of the wood block flush with the
surface of the table using a straightedge, as
shown in
Figure 6.
2. Turn the vise handle clockwise until the wood
block (
Figure 5) just touches the table.
Note: Do not fully tighten the vise handle;
leave it loose enough so the wood block can
be adjusted in the next step.
Wood Block
Threaded Rod
Metal Shaft
Vise Support Block
5
⁄
16
" Flat
Washer
Figure 4. installing table top.
5
⁄
16
" x 2
1
⁄
2
"
Wood Screws
Bench Top
5
⁄
16
" Flat
Washers