Installing memory – Gateway E-9520T User Manual
Page 39
www.gateway.com
33
7
Secure the diskette drive into the carrier with the two screws (6) included in the optional
diskette drive installation kit.
8
Push the diskette drive assembly into the drive tray until it snaps into place.
9
Connect the data and power cables to the back of the diskette drive.
10
Reinstall the bezel, if required, by snapping it into place on the front of the chassis.
11
“Closing the server case” on page 26
12
Reconnect all power cords and peripheral device cables, then turn on the server.
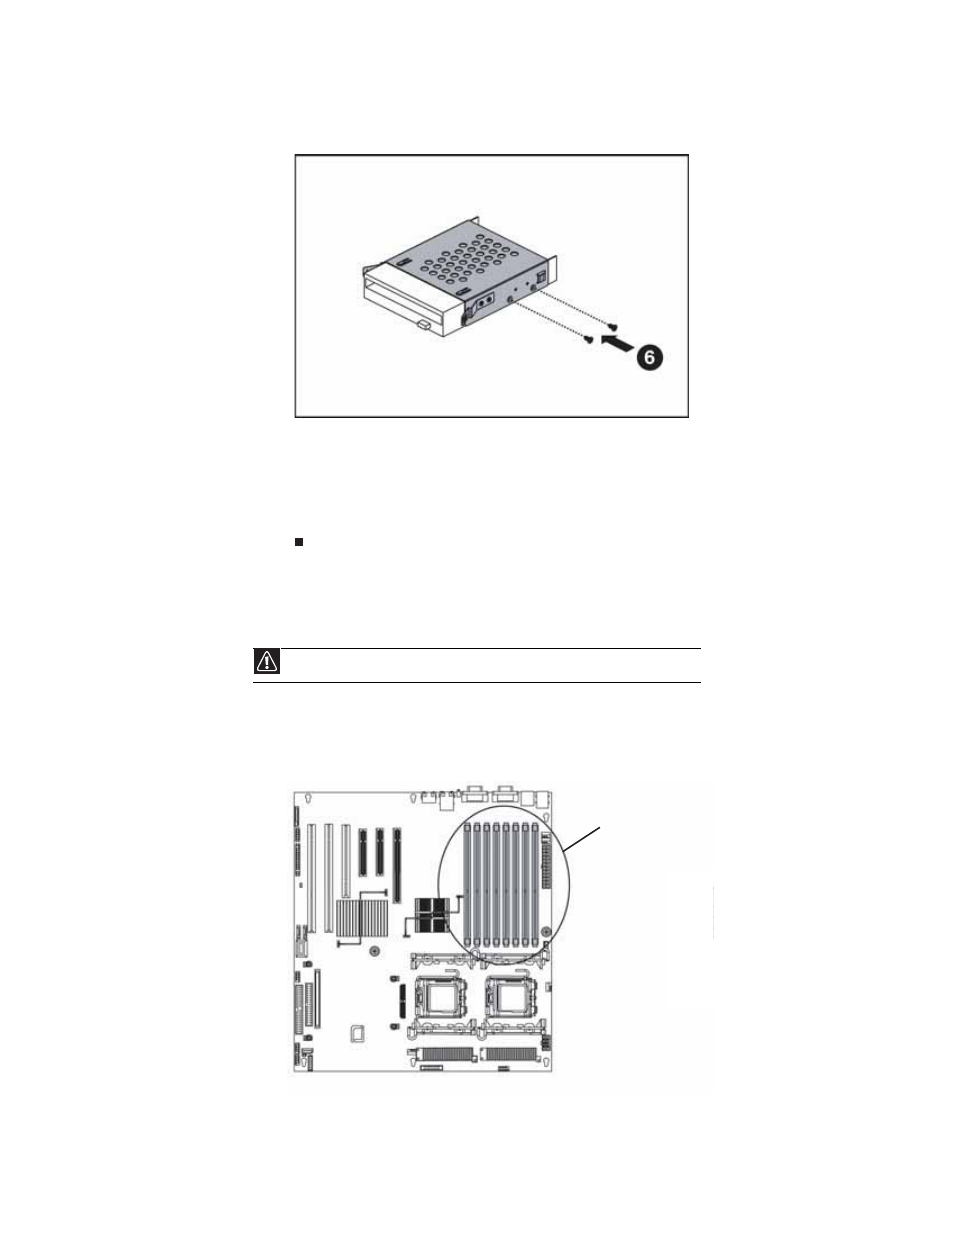
Installing memory
Your server supports from 512 MB to 32 GB of total memory with fully-buffered (FB-DIMM)
support. Supported DIMM sizes include 512 MB, 1 GB, 2 GB, and 4 GB.
The BIOS configures the memory controller to run in single-channel, dual-channel, or four-channel
mode. Memory mirroring and memory sparing can be enabled in the BIOS setup menu (see
the BIOS Setup Utility” on page 51
).
Caution
Use only 667 Mhz compliant, 240-pin, SDRAM registered ECC, DIMM memory modules.
Memory slots