Blade change – Grizzly G1010 User Manual
Page 33
G1010 4" x 6" Metal-Cutting Bandsaw
-31-
Blade Change
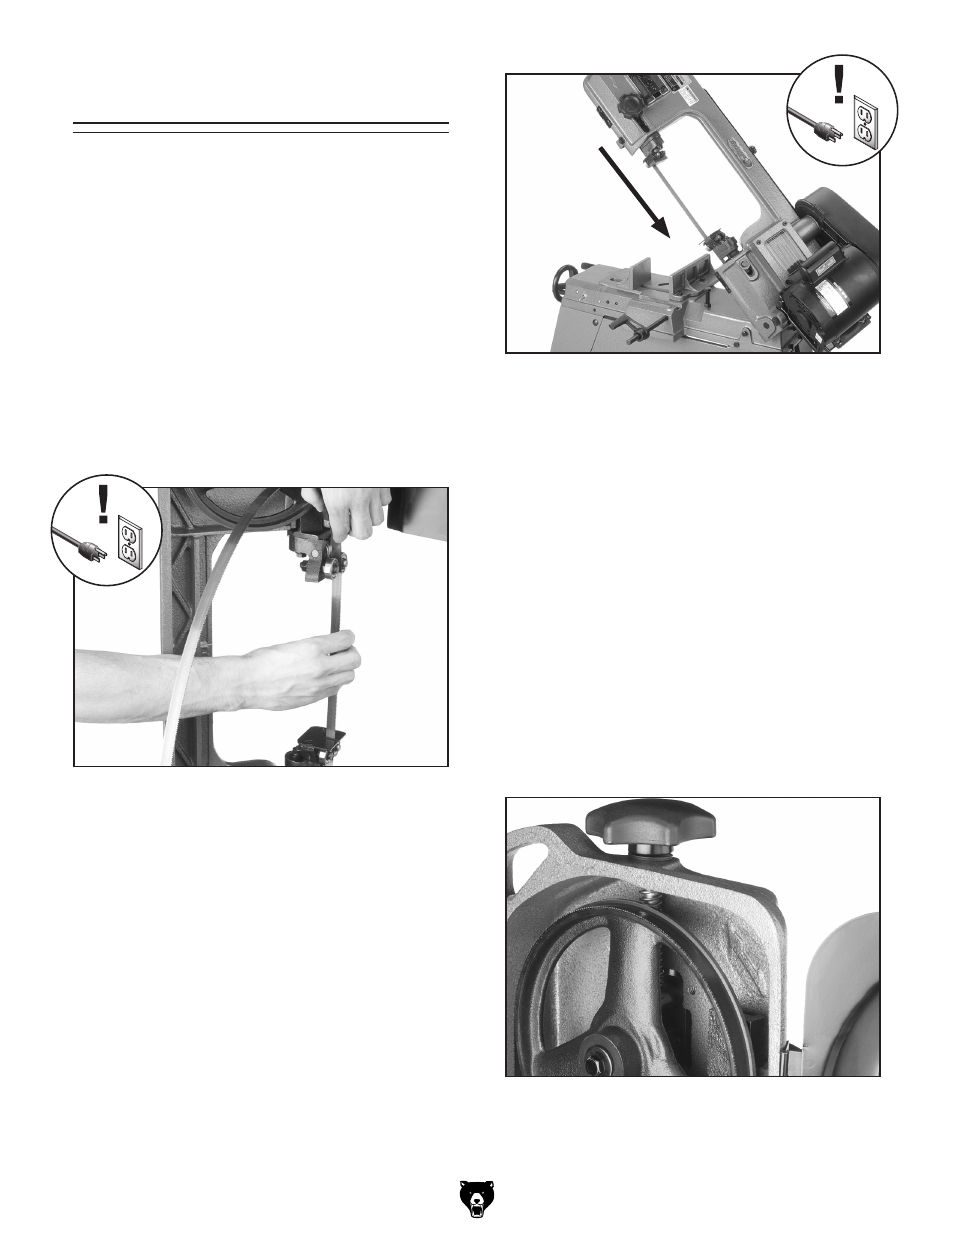
Figure 46. Installing blade.
Figure 47. Blade cutting direction.
Figure 48. Tension knob and blade.
Blades should be changed when they become
dull, damaged, or when you are using materials
that require a blade with a certain type or tooth
count.
To change the blade on the bandsaw:
1. UNPLUG THE BANDSAW!
2. Raise the head of the bandsaw to the vertical
position and remove the wheel access
cover.
3. Loosen the tension knob and slip the blade
off of the wheels.
4. Install the new blade through both blade
guide bearings as shown in
Figure 46 and
around the bottom wheel.
5. Hold the blade around the bottom wheel with
one hand and slip it around the top wheel with
the other hand, keeping the blade between
the blade guide bearings.
Note: It is sometimes possible to flip the
blade inside out, in which case the blade will
be installed in the wrong direction. Check to
make sure the blade teeth are facing toward
the workpiece, as shown in
Figure 47, after
mounting to the bandsaw. Some blades will
have a directional arrow as a guide.
6. When the blade is around both wheels,
adjust the position so the back of the blade is
against the shoulder of the wheels.
7. Tighten the tension knob in Figure 48 so the
blade will not slip on the wheels on start up.
8. Connect the bandsaw to the power source.
9. Briefly turn the bandsaw ON then OFF to
position the blade and resume the previous
tracking.
—If the tracking needs to be adjusted, see
Tracking in the next section.
—If the tracking is fine, proceed to
Blade
Tension on Page 33.