Etting, Ersonal, Ransmitter – GTO SL-1000 User Manual
Page 25
22
2. S
ET
THE
TRANSMITTER
DIP S
WITCHES
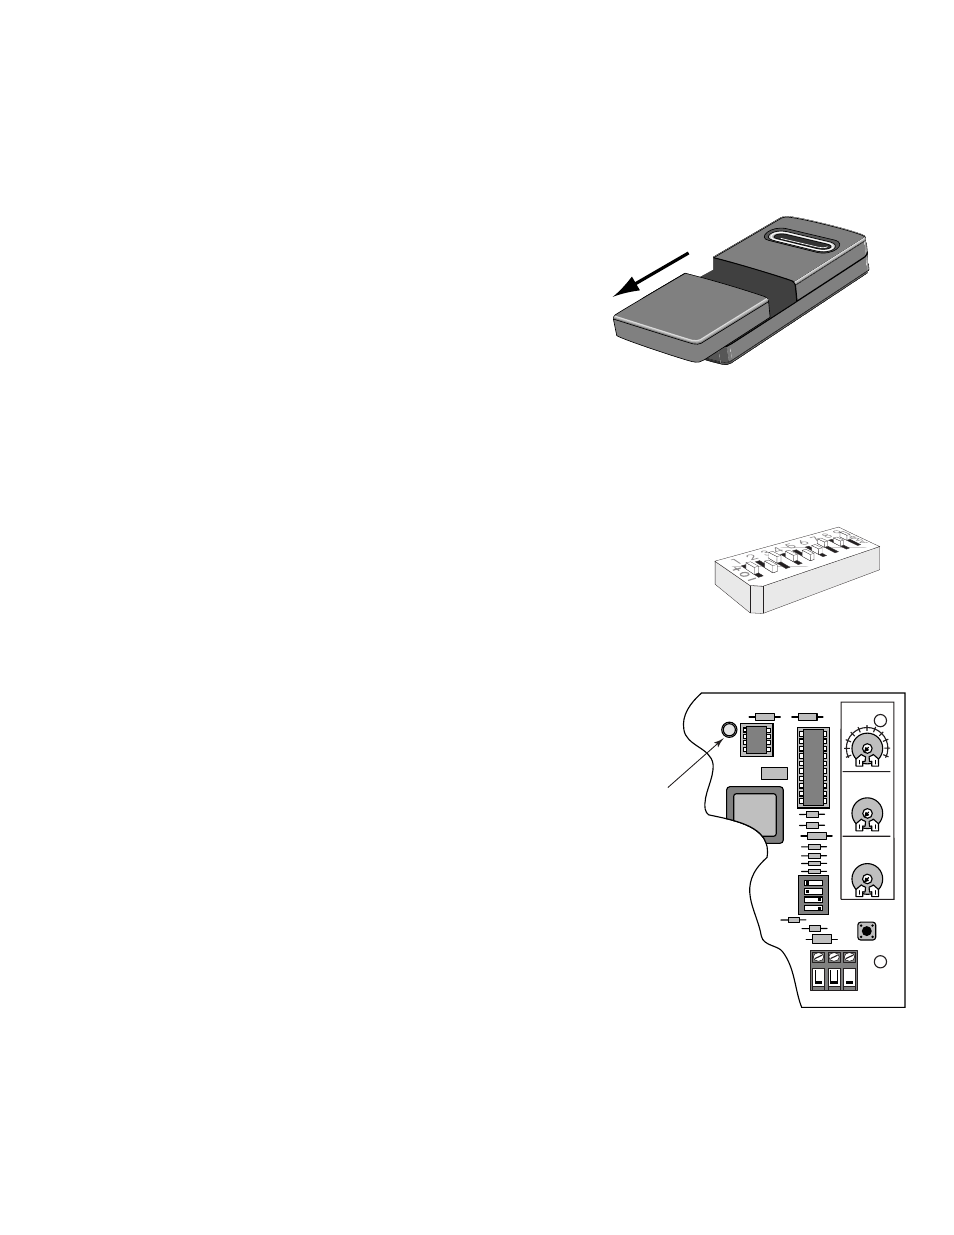
There are nine (9) transmitter DIP switches; each of which can be placed in three
different positions (+, 0, –). DO NOT set all the switches in the same position, such
as all +, all 0, or all –. Once the DIP switches have been set to a personal code, replace
and close the access cover.
WARNING: No other adjustments should be made inside the transmitter.
3. “T
EACH
”
THE
N
EW
C
ODE
TO
C
ONTROL
B
OARD
M
EMORY
A.
Turn control box power switch OFF.
B.
Unscrew and remove the control box cover.
C.
Press and hold the LEARN button on the control board, and
turn the power switch ON. Release LEARN button. Wait 15
seconds for the receiver to charge.
D.
Press and hold transmitter button until the red STATUS LED
comes ON.
E.
Release transmitter button. The new code is stored in the
control board memory.
1234
ON
RCVR
SEQ1
SEQ2
LEARN
STATUS
R B G
AUTOCLOSE
INERTIA
OBSTRUCT
SENS.
PULL/PUSH
SNGL/DUAL
MIN
MAX
MIN
OFF
120
60
MAX
STATUS LED
S
ETTING
THE
P
ERSONAL
T
RANSMITTER
C
ODE
1. R
EMOVE
THE
T
RANSMITTER
C
OVER
Grasp the sides of the access cover and slide it away from the
transmitter button (see illustration). When the access cover is
removed, the battery and the DIP switches will be exposed. To set
a new code, use a small screwdriver to move the switches.
, Inc.
, Inc.
, Inc.
All GTO transmitters are set to a standard code at the factory and are ready to activate the automatic gate operator.
For safety and security, however, we strongly recommend that the factory setting be replaced with a personal code.
Follow the directions below:
Replace the control box cover and turn the power switch to the ON position.