Installation instructions, Fastening the installation brackets (figs. 3-4), Fastening the cooktop to the counter (figs. 5-6) – Fisher & Paykel CG122 User Manual
Page 16
14
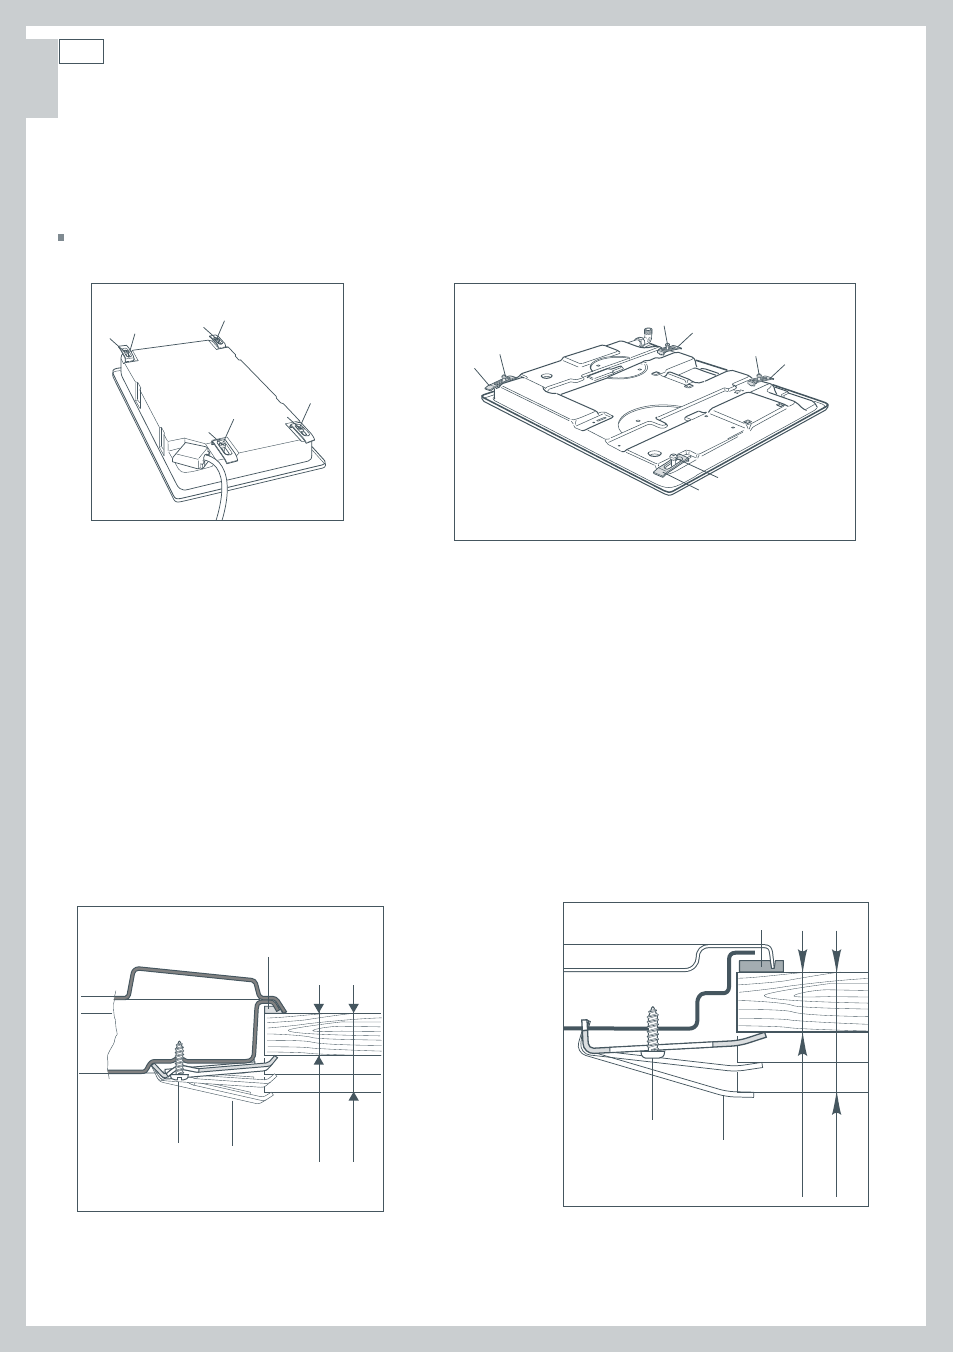
Fastening the installation brackets (Figs. 3-4)
Each cooktop is provided with an installation kit including brackets (“A”) and screws (“B”) for
fastening the cooktop to countertops from 51⁄64” (20 mm) to 1 37⁄64” (40 mm) thick.
Turn the cooktop upside down, place it on a soft surface and fasten the brackets “A” to the
appropriate holes, without tightening the screws “B” for the moment (see Fig. 3 or 4).
Fastening the cooktop to the counter (Figs. 5-6)
1
Spread the sealing material “C” out along the edge of the cutout, making sure that the junctions
overlap at the corners.
2
Insert the cooktop into the cutout and position it correctly.
3
Adjust the position of the brackets “A” and tighten screws “B” to secure the cooktop
firmly in position. See Fig. 5 or 6.
4
Using a sharp cutter or trimmer knife, trim the excess sealing material around the edge of the
cooktop. Take care not to damage the countertop.
Installation instructions
Fig. 3 Location of installation brackets-CG122 models
Fig. 5 Fastening the cooktop to the counter-CG122 models
Fig. 6 Fastening the cooktop to the counter-CG244 models
Fig. 4 Location of installation brackets-CG244 models
A
B
B
B
B
A
A
A
(20
mm) min.
(40
mm) max.
B
C
A
51⁄64
”
137⁄64
”
B
C
A
(20
mm) min.
(40
mm) max.
51⁄64
”
137⁄64
”
B
B
B
B
A
A
A
A
US CA