FUJITSU ScanSnap S1300 User Manual
Page 6
6
3.
Connect cables to the ScanSnap.
z
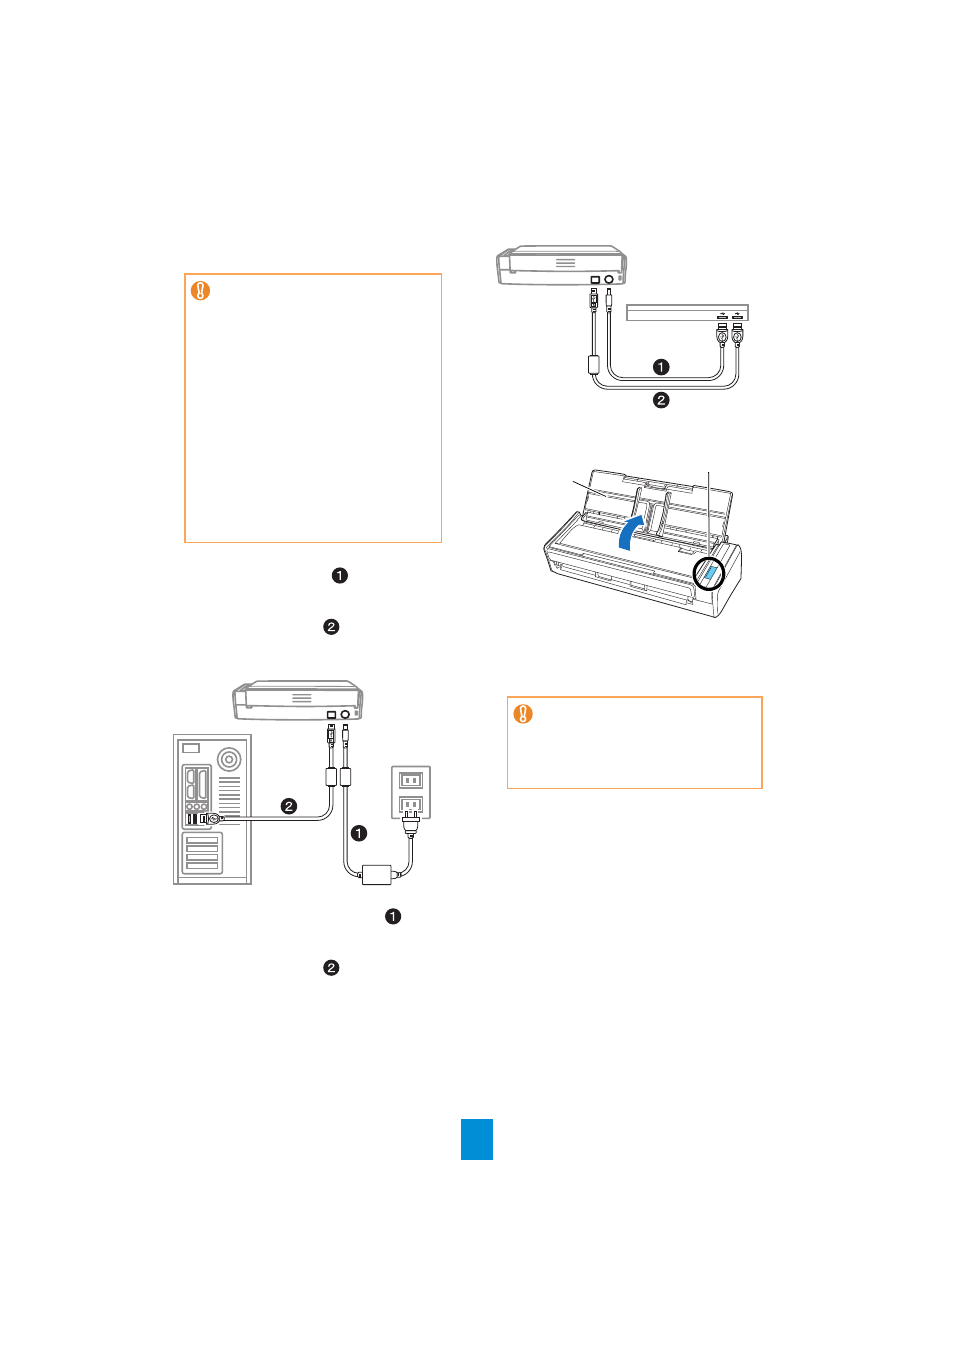
Using the Power Cable
1. Connect the power cable
to the power
connector of the ScanSnap and plug in the
AC outlet.
2. Connect the USB cable
to the USB con-
nector on the ScanSnap and the USB port on
your computer.
z
Using the USB Bus Power Cable
1. Connect the USB bus power cable
to the
power connector on the ScanSnap and the
USB port on your computer.
2. Connect the USB cable
to the USB con-
nector on the ScanSnap and the USB port on
your computer.
4.
Open the ADF paper chute (cover) of the
ScanSnap.
D The [Scan] button lights in blue, indicating
that the ScanSnap is turned on.
D The ScanSnap should be automatically
detected by your computer.
z
Use only the cables supplied with the
ScanSnap.
z
To power on the ScanSnap, the USB
cable and either of the power cables
(power cable or USB bus power cable)
are need to be connected.
z
When connecting to a USB hub, be sure
to connect the ScanSnap to the hub
nearest to your computer (first stage). If
the ScanSnap is connected to a USB hub
from the second stage onwards, it may
not operate correctly.
z
If connecting the ScanSnap with USB 2.0,
make sure that the USB port and the USB
hub are compliant with USB 2.0. The
scanning speed slows down if the
ScanSnap is connected with USB 1.1. If
your computer has the USB 2.0
compatible port, use it.
The bottom part of the ScanSnap may
become hot when the ScanSnap is used
but this does not affect ScanSnap
operation or cause any physical harm.
Be careful not to drop the ScanSnap
when carrying it.
[Scan] Button
ADF Paper Chute
(Cover)