14 control panel brilliance, 15 measuring the range, Measuring range by the range rings – Furuno MODEL 1622 User Manual
Page 15: Measuring range by vrm
7
Table 1-1 Menu description
Menu Item
Description
1
ECHO STRETCH
Stretches echoes in the range direction.
2
INT. REJECT
Suppresses radar interference.
3
NAV DATA
Turns navigation data on/off.
4
VIDEO
Displays echoes in black or white.
5
WATCHMAN
Selects transmitting interval.
6
DIMMER
Adjusts control panel brilliance.
7
DSPL ON STBY
Turns navigation data display in standby on/off.
8
TRAIL TIME
Select trail time (target echo plotting interval).
9
TRAIL BRILL
Selects echo trail brilliance.
10
RANGE
Selects range to use.
1.14 Control Panel Brilliance
1. Press the [MENU] key.
2. Select
DIMMER.
3. Select level desired; 3 is the highest level of
illumination.
4. Press the [MENU] key.
1.15 Measuring the Range
The bearing to a target can be measured by the
range rings, by the cursor and by the VRM
(Variable Range Marker).
Measuring range by the range rings
Count the number of rings between the center
of the display and the target. Check the range
ring interval and judge the distance of the echo
from the inner edge of the nearest ring.
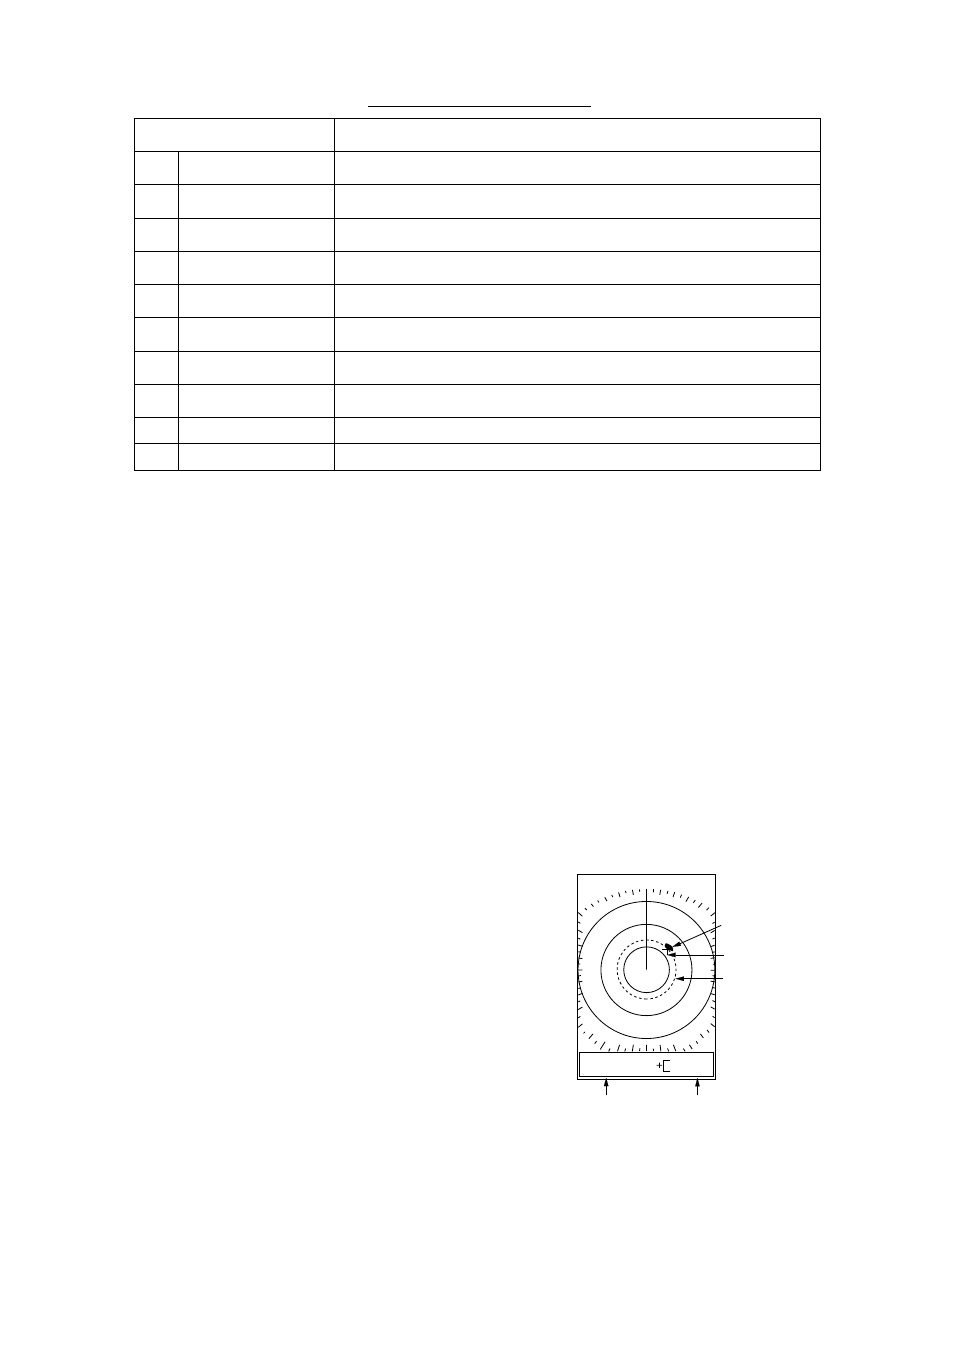
Measuring range by VRM
1. Press the [VRM] key to turn on the VRM.
2. Within 10 seconds after turning on the VRM;
that is, while "VRM" is highlighted, press
▲
or
▼
to place the VRM on the inside edge
of the target.
3. Check the VRM readout at the bottom left
corner on the screen.
To erase the VRM, press and hold down the
[VRM] key until the VRM disappears.
Note: The VRM is "frozen" on the display when
the [VRM] key is pressed a second time, or 10
seconds elapses without pressing
▲
or
▼.
When the VRM is fixed on the screen "VRM" is
not highlighted.
6.0
NM
2.0
VRM
2.42
NM
045.0
°
2.42
NM
Target
VRM
VRM
range
Cursor
Cursor
range
Figure 1-13 How to measure range by
the cursor and VRM