Ride-on rocker, Label application, Assembly – Fisher-Price 73528 User Manual
Page 9
9
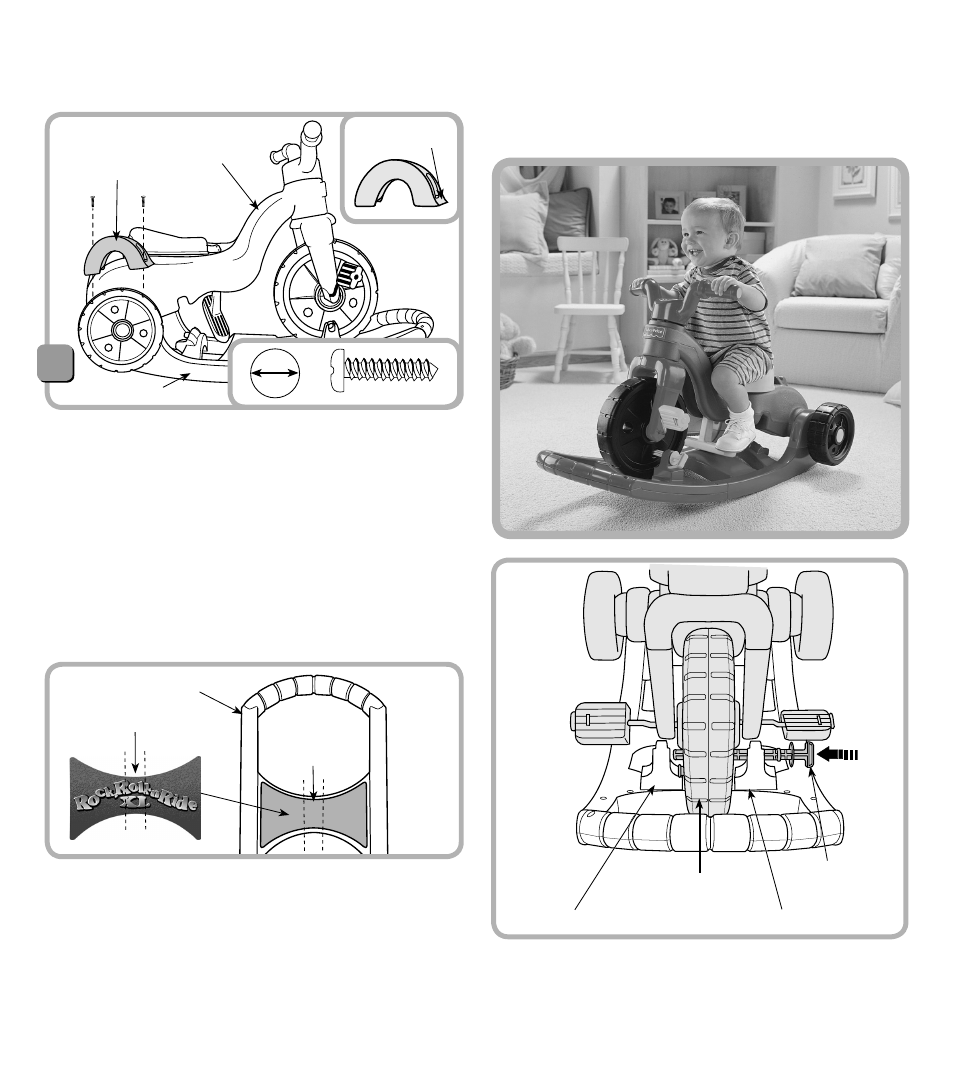
Ride-on Rocker
• Insert the base/handle pin through one wheel retainer,
a hole in the front wheel and into the other wheel retainer.
• Push the handle pin to “snap” it into place. Pull on the
handle pin to be sure it is secure.
Wheel Retainer
Front Wheel
Wheel Retainer
Base/Handle Pin
IMPORTANT! Be sure to adjust the seat in the most
forward position for Ride-on Rocker mode.
Label Application
Handle
Place Center
of Label Here
Center of Label
Assembly
15
Base/Handle
Flared End
Handle
Cover
Trike
• Position the base/handle covers so that the flared end
faces the front of the trike.
• Fit the base/handle covers onto the trike rear frame near
the rear wheels.
• Insert two #10 x
¾"
screws into each base/handle cover
and tighten.
Assembly is now complete.
• Before applying the label, wipe the surface of the
handle with a clean, dry cloth to remove any dust or oils.
• Remove the backing from the label.
• First, position the center of the label on the handle,
as shown. Then, smooth each end of the label outward
to attach it to the handle.
• For best results, avoid repositioning a label once it has
been applied to the handle.