Fender PDP-S50 User Manual
Page 10
✧
f
f e
e n
n d
d e
e r
r .
. c
c o
o m
m
✧
P
P
P
P
D
D
D
D
P
P
P
P
S
S
S
S
p
p
p
p
e
e
e
e
a
a
a
a
k
k
k
k
e
e
e
e
rr
rr
S
S
S
S
y
y
y
y
s
s
s
s
tt
tt
e
e
e
e
m
m
m
m
s
s
s
s
Thank you for purchasing your PDP Speaker System from
Fender
®
Audio. We are sure you will find it both a unique
and effective sound reinforcement product, providing
years of trouble-free service. PDP–125 / PDP–1 speakers
are sheilded to prevent them from interfering with your
plasma display or other nearby electronics.
PDP-1 Passive Presentation Loudspeakers
•Perfect for use in all audio general applications where a
passive loudspeaker is needed.
•Complete with wall mount kit.
•Attractive silver or black anodized aluminum enclosure.
•Frequency Response - 150-20KHz (±3dB).
•Power Handling - 40 Watts each (RS426B).
•Impedance - 8
Ω
.
•weight
8.7 lbs each (4kg).
•Dimensions (HxWxD) - 24" (610mm) x 5" (127mm) x
4.13" (105mm ).
PDP-125 Powered Presentation Loudspeakers
•Perfect for use in all audio general applications where a
powered speaker is needed.
•Complete with wall mount kit.
•Attractive silver or black anodized aluminum enclosure.
•Frequency Response - 150-20KHz (±3dB).
•Power - 20 Watts RMS each channel.
•weight
9.25 lbs each (4.5kg).
•Dimensions (HxWxD) - 24" (610mm) x 5" (127mm) x
4.13" (105mm).
PDP-S50
•Perfect for use in all audio general applications where a
small powered subwoofer is needed.
•Attractive silver or black enclosure.
•Frequency Response - 45-150Hz (±3dB).
•Power - 50Watts RMS.
•weight 30lbs.
•Dimensions (HxWxD) - 15.6" (397mm) x 12.5" (318mm) x
10" (254mm).
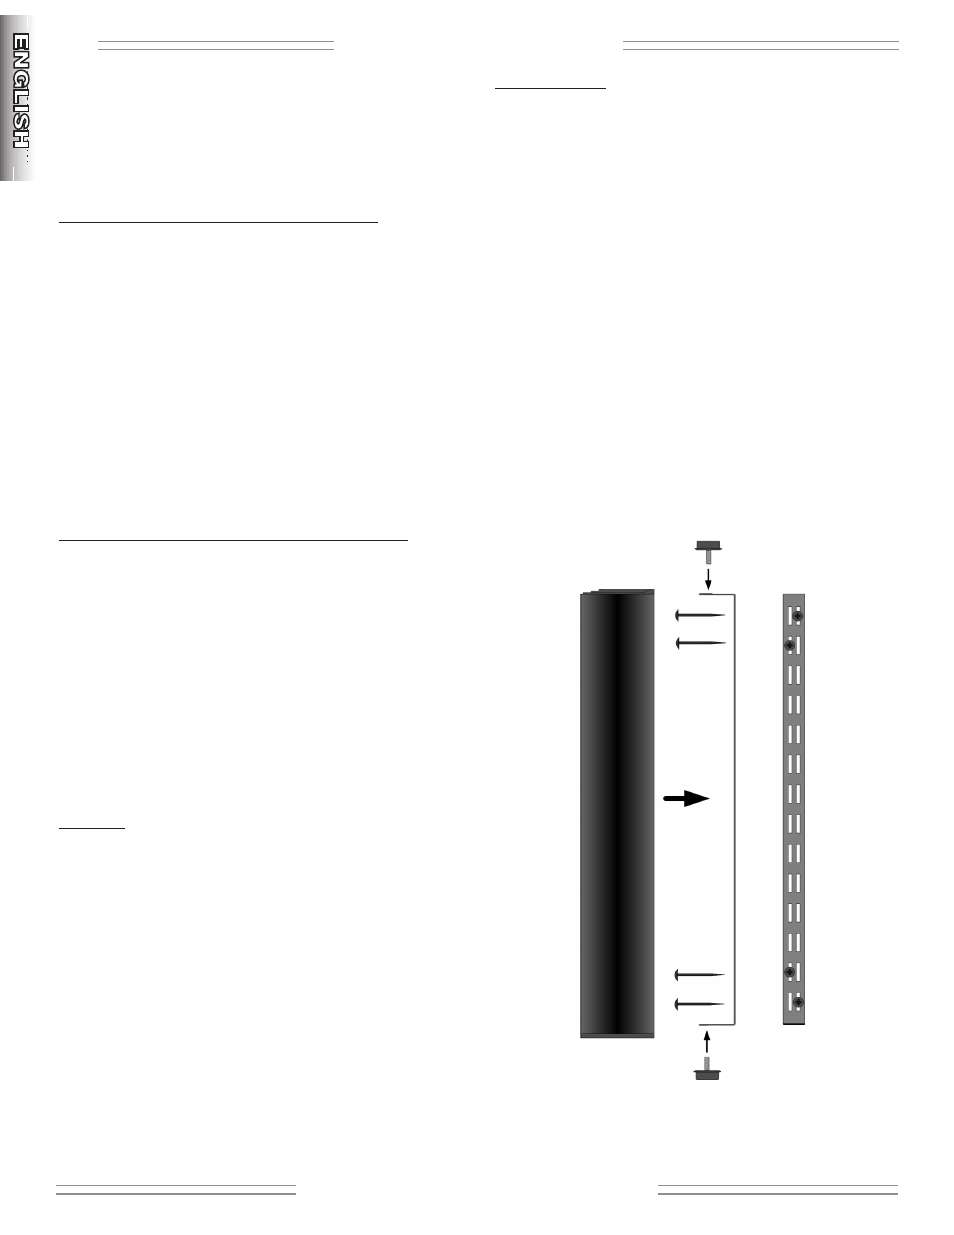
INSTALLATION:
To mount your PDP speaker system properly, you will
need the following tools and hardware available at your
local hardware store:
- Electric drill.
- Philips screwdriver.
- 8, #8, 2 1/2 inch, round, washer-head screw.
- stud-finder.
Use the stud finder to find a metal or wooden stud in the
wall. Fasten each bracket to the wall using the screw
configuration shown in the picture (right). It may be easier
to drill a small 1/8” pilot hole for each screw before
fastening the screws. When the brackets are secured to
the wall, attach the speakers with the supplied knobs as
depicted in the picture.
WARNING: Failure to follow these directions may mean
that your speaker system is not securely attached to the
wall and could create a falling hazard. If you have any
apprehension or confusion about the directions in this
section, contact a professional installer.
P
P
P
P
D
D
D
D
P
P
P
P
S
S
S
S
p
p
p
p
e
e
e
e
a
a
a
a
k
k
k
k
e
e
e
e
rr
rr
S
S
S
S
y
y
y
y
s
s
s
s
tt
tt
e
e
e
e
m
m
m
m
s
s
s
s
✧
f
f e
e n
n d
d e
e r
r .
. c
c o
o m
m
✧
10