Controls and features, Front side / top surface / right side – Meridian Audio FDP-DILA2 User Manual
Page 6
6
Controls and Features
Front Side / Top Surface / Right Side
1
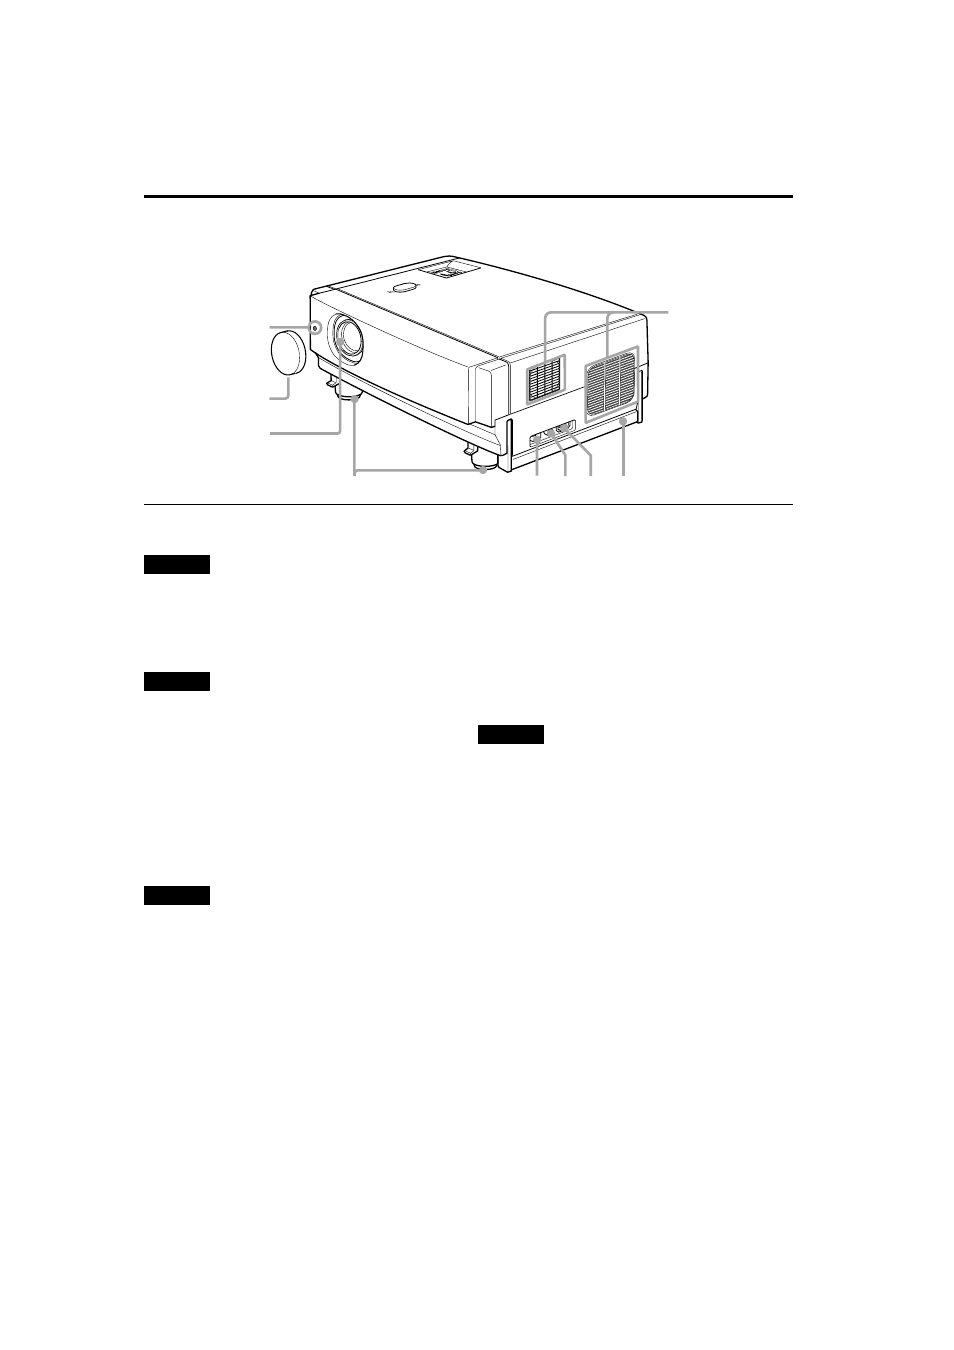
Exhaust vents
Vents for cooling fans through which warm air comes out.
CAUTION
• Do not block the exhaust vents, or heat will build up inside,
possibly causing a fire. Also, do not touch the vents, or this
could give you a low-temperature burn.
2
Carrying handle
Raise this handle when carrying the projector.
CAUTIONS
• When carrying the projector, do not transmit shocks to it.
Also be careful to keep it balanced.
• Do not carry it while the light-source lamp is on or the
cooling fan is operating. This could cause personal injury.
3
AC IN (power input) terminal
This is the power input terminal where the supplied
power cord is connected. For details, refer to page 30.
4
Fuse holder
A fuse rated 12A/250V is installed. (Power source
protection)
To replace the fuse, refer to page 57.
CAUTION
• When replacing the fuse, use the same rating and type.
Otherwise, a fire may occur and/or the projector may be
damaged.
5
MAIN POWER switch
This is the main power switch. When it is turned on, the
projector goes into stand-by state, and the STAND BY
indicator on the control panel comes on. (Refer to
page 32.)
ON [ | ]: The main power turns on.
OFF [
‡
‡
‡
‡]: The main power turns off.
6
Adjustable feet (for adjusting the height and
angle)
By extending the feet, the projector angle can be
adjusted up to +7°.
For details, refer to “Adjusting the Inclination of the
Projector” on page 16.
7
Lens
One of the optional lens units should be installed before
using the projector.
A lens-hole blind cover (black one) is installed when the
projector is shipped from the factory.
For details on the types of optional lenses available, refer
to page 18.
CAUTION
• Please consult your authorized dealer or service center for
information about attaching an optional lens.
8
Lens cap
This is the lens cap provided for the optional lens.
When you are not using the projector, attach the lens cap
to protect the lens from dirt or being damaged. (Refer to
page 30.)
9
Remote sensor
When operating with the remote control, aim it toward
this sensor. (Refer to page 20.)
LA
MP
TE
MP
HID
E
PC
VID
EO
ME
NU
KE
YS
TO
NE
PR
ES
ET
EX
IT
EN
TE
R
OP
ER
A T
E
DO
WN
UP
9
7
5 4 3 2
8
6
1
Cabinet Design
Subject to Change without notice.