Battery removal & disposal, Removal of battery pack – Fantom Vacuum FM1705K User Manual
Page 8
Battery Removal & Disposal
Avant de commencer:
Votre balayeuse à main sans cordon exige très peu d’assemblage. Retirez-la de la
boîte et familiarisez-vous avez toutes ses pièces indiquées dans l’illustration des
pièces (pg. 18) Ceci vous aidera à assembler et à utiliser la balayeuse à main sans
cordon.
COMMENT UTILISER LA BALAYEUSE À MAIN SANS CORDON
1. Avant l’usage initial, chargez la balayeuse pendant 24 heures. La balayeuse
fonctionnera convenablement lorsque ses piles seront entièrement chargées.
Lorsque pleinement chargée, la balayeuse fonctionnera pendant environ 20 à 25
minutes, selon le type d’usage (exemple – comptoirs/tables ou meubles).
2. Appuyez sur le commutateur pour mettre la balayeuse en marche. Pour l’éteindre,
appuyez encore une fois sur le commutateur(Fig. 1).
REMARQUE: n’utilisez pas la balayeuse dans que son plateau à poussière
soit en place.
Fig. 1
NOTE:
If uncertain as to how to remove your battery pack, we suggest
you take your sweeper to a reputable small appliance service
technician to have this service performed.
Follow these steps when battery removal is required.
This hand sweeper is equipped with Ni-Cd batteries and you need to dispose of them
properly. When the batteries are no longer good for use, they must be removed from
the sweeper for disposal. Do not remove the batteries for any reason other than
disposal of them. The batteries must be recycled or disposed of in accordance
with local regulations. Please consult your Yellow Pages or local recycling
center for more information.
WARNING:
You must never use ordinary batteries for replacement as
these may leak and cause damage. Use only battery pack XSB705 supplied
for replacement by FANTOM.
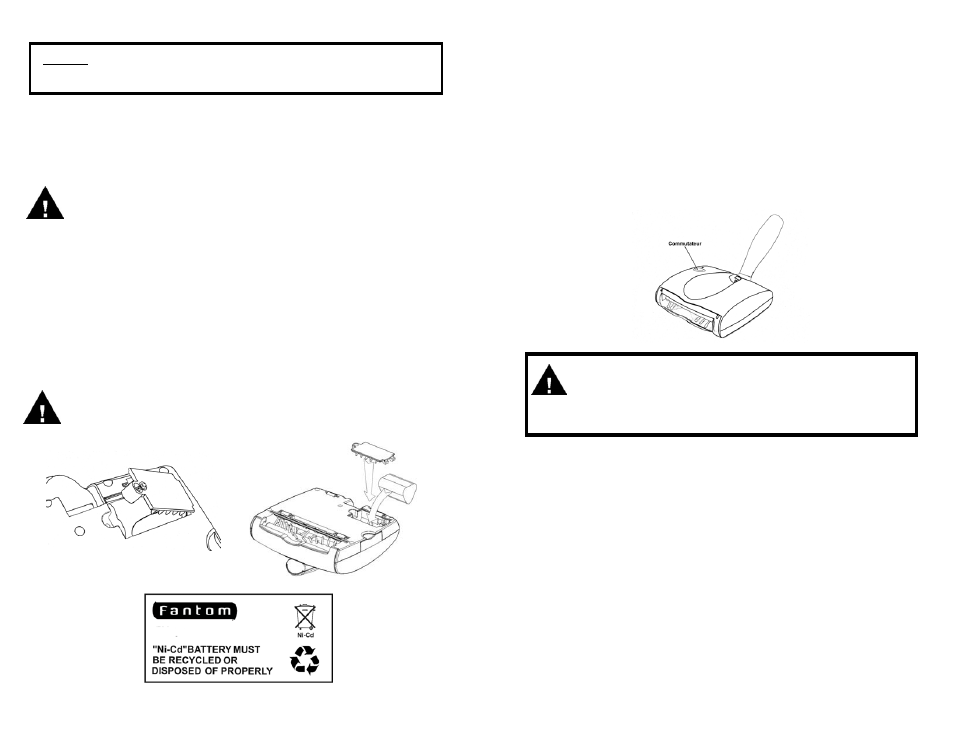
Removal of Battery Pack
1.
Turn unit over so that the base is facing upwards.
2.
With a #1 Phillips screw diver, remove the screw securing the battery pack
compartment cover to the unit and place aside. (Fig. 8)
3.
Remove the old battery pack from the unit and detach the connector jack from
the unit. (Fig. 9)
4.
Attach the connector jack from the new battery pack to the female connector jack
in the battery compartment.
5.
Insert the new battery pack into the battery compartment making sure that all the
wiring carefully tucked inside under the battery pack.
6.
Replace screw to secure the battery compartment cover to the unit. Do not
over tighten.
CAUTION:
This appliance contains Ni-Cd batteries. The batteries
must be recycled or disposed of in accordance with local regulations.
Please consult your Yellow Pages or local recycling center for more
information.
Fig. 8
Fig. 9
ATTENTION:
Les appareils électriques ou électroniques ne
doivent pas être rangés dans des endroits très chauds et
humides et ne doivent pas y être exposés. Ne rangez pas la
balayeuse près des cuisinières, radiateurs, fournaises ou dans
la salle de bain.
Fig. 18
3.6 V dc 900 mA
6
19