Timer operation (weekly timer), En-7, Press the set button – FUJITSU AOU36RC User Manual
Page 8
En-7
PM
PM TIMER
NEXT DAY
DAY
WEEKLY
ON
OFF
2
TIMER
MODE
SET TIME
TEMP./DAY
FAN
CONTROL
AM
CLOCK
TIMER
MODE
SET
ZONE
START/STOP
CLOCK ADJUST
SET TIME
TEMP./DAY
FAN
CONTROL
MASTER
CONTROL
DAY OFF
ENERGY SAVE
AM
PM
TIMER
DAY
WEEKLY
ON
OFF
1
6
7
NOTES:
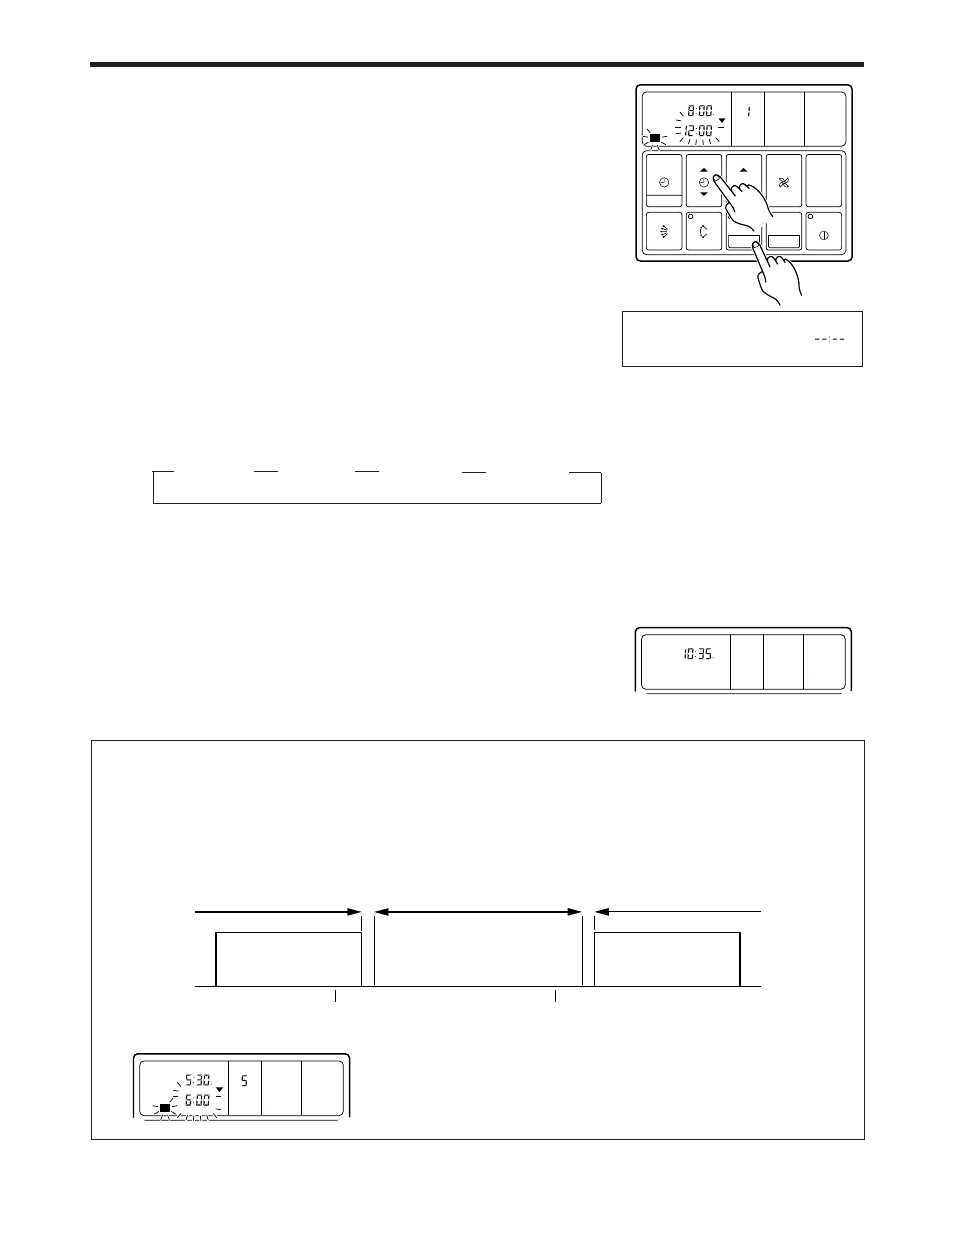
(1) If no time values are flashing, the clock display will automatically reappear after 15 seconds if no buttons are pressed.
(2) A flashing time value indicates that the system is in time-setting mode. To return to the clock display you must hold
down the SET button for 3 seconds.
(3) You do not need to set values for both WEEKLY 1 and WEEKLY 2. If you wish, you can set values only for WEEKLY 1
or only for WEEKLY 2.
(4) The allowable range for the day’s time settings is shown below.
(5) If you set the OFF time to occur on the day following the ON time, the NEXT DAY caption appears on the display.
6
Press the SET TIME button to set the day’s first OFF
time.
The earliest OFF time you can set is 5 minutes after the ON time. The
latest OFF time is 11:55 p.m. on the subsequent day.
7
Press the SET button.
This registers the first OFF time for the day, completing the “WEEKLY 1”
settings for that day.
The display switches to “WEEKLY 2”, and the day’s second ON time be-
gins flashing.
8
Repeat the operations described in Steps 4 to 7 to set
the second ON and OFF times for the day (the “WEEKLY
2” times).
When you press the SET button after setting the “WEEKLY 2” OFF time,
the system registers the “WEEKLY 2” settings for the day and returns you
to the “WEEKLY 1” ON time setup process. (The first ON setting reap-
pears and begins flashing.)
You can review your settings by pressing the SET button. Each press
moves you to the next setting, as follows.
WEEKLY 1
WEEKLY 1
WEEKLY 2
WEEKLY 2
ON
OFF
ON
OFF
9
Press the TEMP./DAY button to select another day for
setup. The repeat steps 4 to 8 above to set the ON and
OFF times for that day.
10
When you have finished setting all of the times, hold
down the SET button for 3 seconds.
The WEEKLY display flashes for 3 seconds while the new WEEKLY TIMER
settings are registered, and then the clock display reappears.
TIMER OPERATION (WEEKLY TIMER)
Next day’s WEEKLY
settings
Cannot set
5 min.
Available range
Cannot set
5 min.
ON
OFF
ON
OFF
Previous day’s WEEKLY
settings
12:00 a.m.
12:00 a.m.
If the timer is not set, press the SET but-
ton with the time display blank “
”,
and perform next operation.
s
s
s
s