4 installation and connection – Akg HM 1000 Ceiling Hanging Module for CK Series Microphone Capsules User Manual
Page 27
27
DISCREET ACOUSTICS modular
4.1 Capsule
Modules
Important:
4.2 GN 15/30/50 ESP
Installation Modules
4.2.1 ON/OFF Key,
LED Ring, Bass
Cut
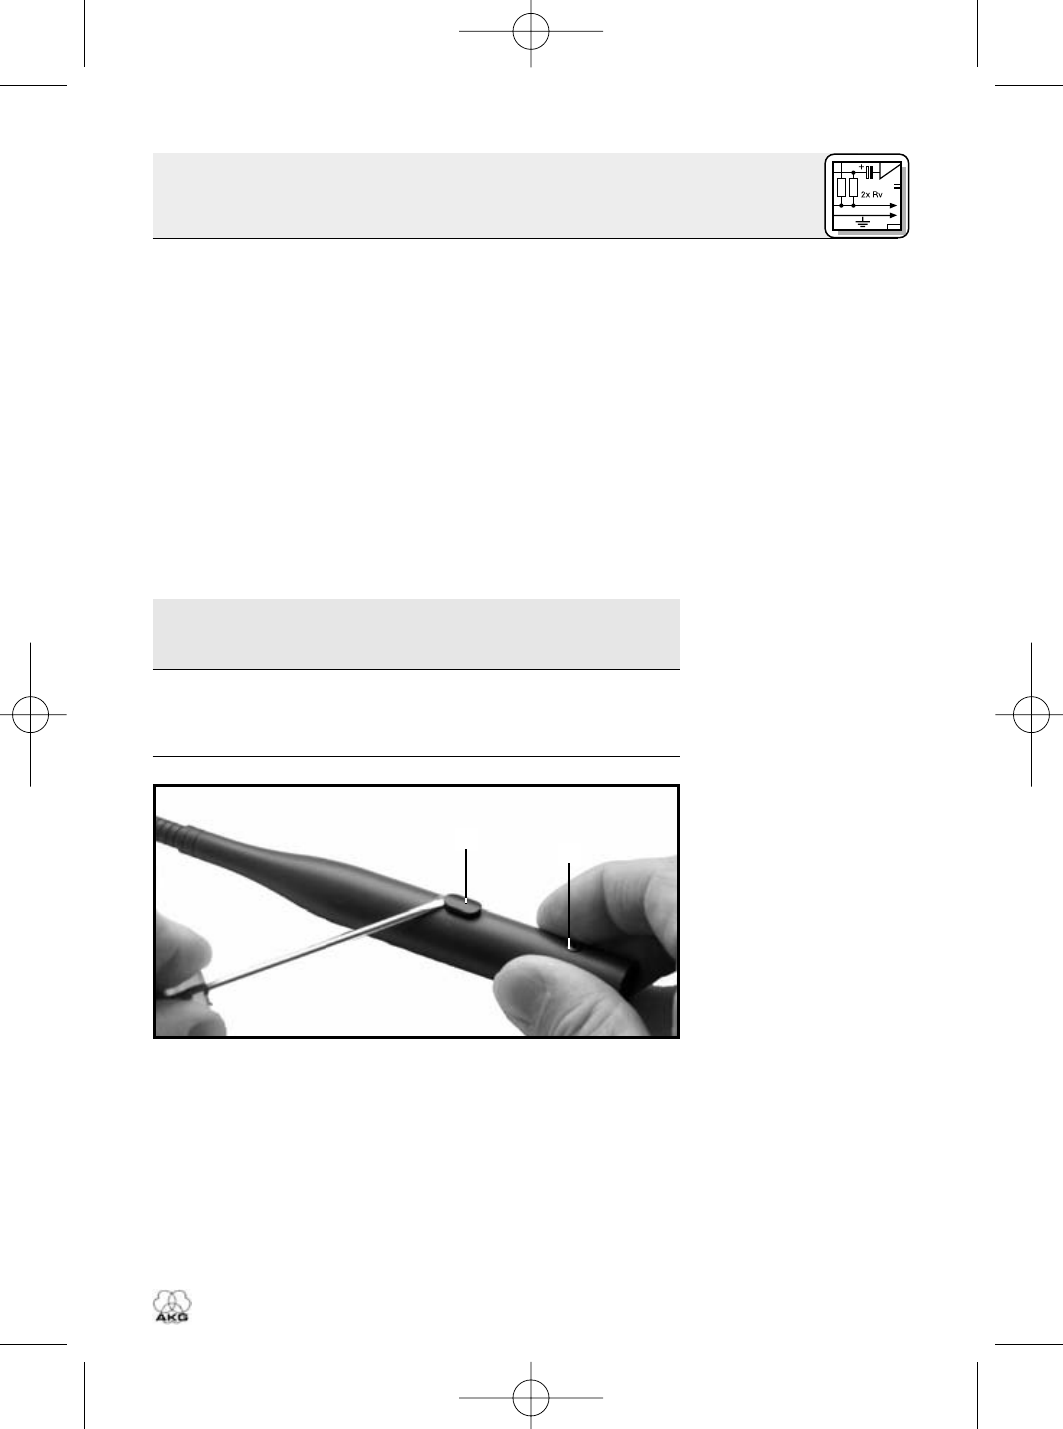
Fig. 1: Opening the
DPA-P.
Refer to fig. 1.
All Discreet Acoustics Modular Capsule Modules are con-
denser microphones and therefore require a power sup-
ply (phantom power). The Installation Modules have been
designed for connection to microphone inputs with 9 to
52 V phantom power.
1. Screw the Capsule Module onto the Installation Mod-
ule.
The screw thread is relatively fine and therefore very
smooth-running. Make sure not to tilt the capsule
when placing it on the Installation Module thread be-
cause this would damage the thread.
2. To lock the capsule, use commercial minimum-tack
screw locking adhesive that allows you to unscrew
the capsule later if need be.
•
Before replacing a Capsule Module, be sure to
switch your sound system OFF in order to prevent
unwanted noise.
Prior to using the GN 15/30/50 ESP, you may choose to
program the functions of the ON/OFF key, LED ring, and
bass cut filter as detailed in Tables 2/2a on pages 28/29.
1. Use a screwdriver to lever the ON/OFF button (1) out
of the shell.
2. Unscrew the fixing screw (2) CCW.
3. Touch a bare, grounded metal part to discharge any
static charge that may have built up on your body.
(Electrostatic charges may damage electronic cir-
cuits.)
4. Pull the circuit board out of the shell WITH EXTRA
CARE.
4 Installation and Connection
2
2
1
4513_09_BDA_DAM_Hex0909_ps.qxd 11.09.2009 10:45 Uhr Seite 27