页 11, C.fn: setting custom functions, Creating a catchlight – Godox VING V860IIN TTL Li-Ion Flash Kit for Cameras User Manual
Page 12
C.Fn: Setting Custom Functions
The following table lists the available and unavailable custom
functions of this flash.
m/ft
APO
AF
Sv APOT
BEEP
LIGHT
LCD
m
ft
ON
OFF
ON
OFF
60min
30min
ON
OFF
12sec
OFF
ON
0~9
Distance indicator
Auto power off
AF-assist beam
Slave auto power
off timer
Beeper
Backlighting time
LCD contrast ratio
- 47 -
- 48 -
C
.
Fn
Custom
Functions
Custom
Function
Signs
Function
Setting
No
.
Settings &
Description
m
feet
ON
OFF
ON
OFF
60min
30min
ON
OFF
Off in 12 sec.
Always off
Always lighting
10 levels
Low Battery Warning
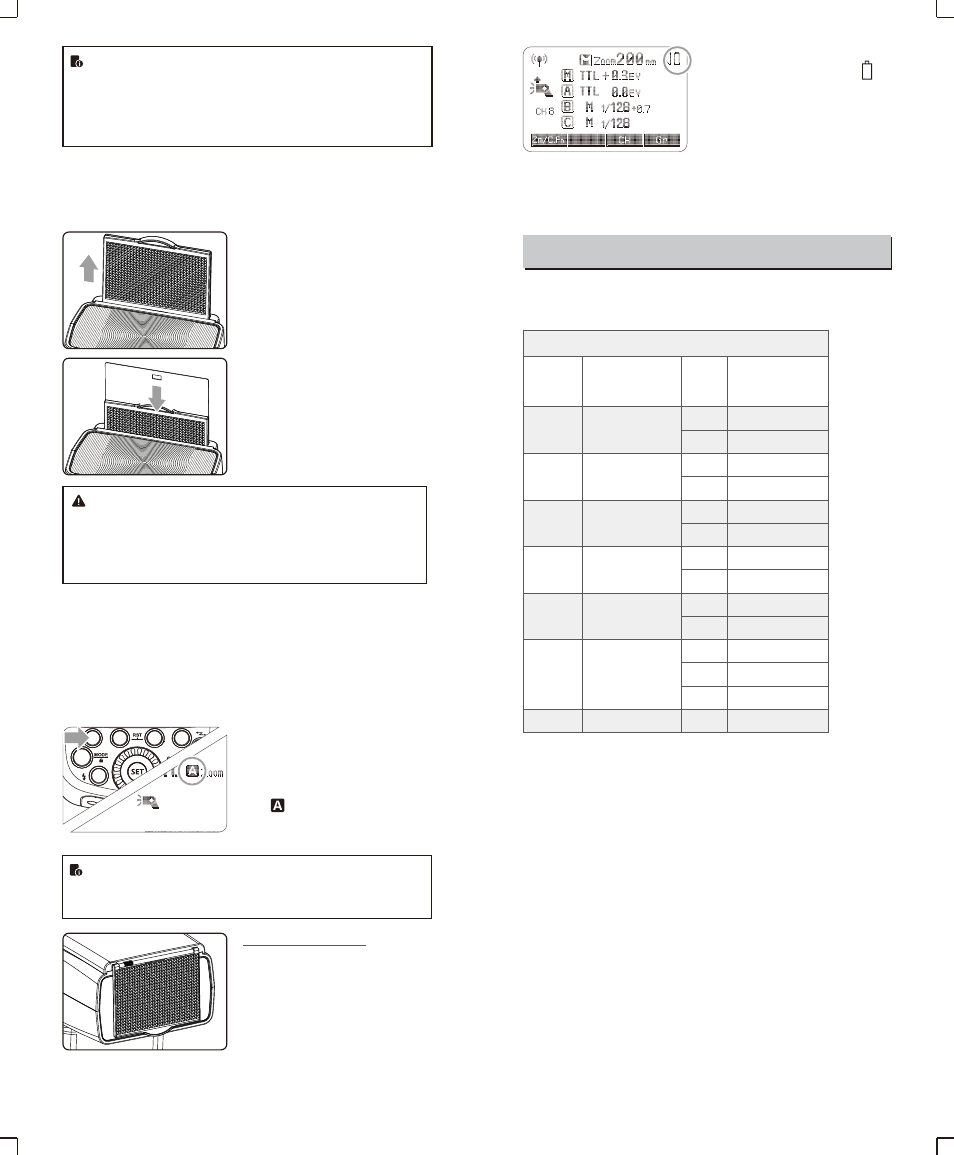
If the battery power is low, <
>
will appear and blink on the LCD
panel. Please replace the battery
immediately.
1
.
Press
<
Zm
/
C
.
Fn
>
Backlight
/
Custom
Setting Button
for
2
seconds
or
longer
until
C
.
Fn
menu
is
displayed
.
The
“
Ver
x
.
x”
in
the
top
-
right
corner
refers
to
the
software
version
.
2
.
Select
the
Custom
Function
No
.
●
Turn the Select Dial to choose the Custom Functions.
3
.
Change
the
Setting
.
●
Press
<
SET
>
button
and
the
Setting
No
.
blinks
.
●
Turn
the
Select
Dial
to
set
the
desired
number
.
Pressing
<
SET
>
4. In the C.Fn states, long press the “Clear” button for 2 seconds
until “OK” is displayed on the panel, which means the values in
C.Fn can be reset.
●
If the wall or ceiling is too far away, the bounced flash might
be too weak and result in underexposure.
●
The wall or ceiling should be a plain, white color for high
reflectance. If the bounce surface is not white, a color cast
may appear in the picture.
Creating a Catchlight
With the catchlight panel, you can create a catchlight in the subject’s
eyes to add life to the facial expression.
Point the flash head upward
1
by 90°.
Pull out the wide panel. The
2
catchlight panel will come out
at the same time.
Push the wide panel back in.
3
●
Push in only the wide panel.
●
Follow the same procedures
as for bounce flash.
●
Point the flash head straight ahead and then upward by
90°. The catchlight will not appear if you swing the flash
head left or right.
●
For best catchlight effect, stay 1.5m/4.9ft away from the
subject.
ZOOM: Setting the Flash Coverage and Using
the Wide Panel
The flash coverage can be set automatically or manually. It can be
set to match the lens focal length from 20 mm to 200mm. Also, with
the built-in wide panel, the flash coverage can be expanded for
14mm wide-angle lenses.
In Manual Zoom mode, press the
●
Turn the Select Dial to change
the flash coverage.
●
If <
> is displayed, the flash
coverage will be set
automatically.
If you set the flash coverage manually, make sure it covers
the lens focal length so that the picture will not have a dark
periphery.
Using the Wide Panel
Pull out the wide panel and place it
over the flash head as shown. The
flash coverage will then be extended
to 14 mm.
●
The catchlight panel will come out
at the same time. Push the
catchlight panel back in.
●
The <
ZOOM/C.FN
> button will not
work.