Installation, Standard installation – Pelco WMVE-SR Wall Mount User Manual
Page 4
4
C2253M (1/11)
Installation
STANDARD INSTALLATION
1. Using the wall mount as a template, mark the fastener positions on the mounting surface.
2. Prepare the mounting surface.
3. Route the system power and video wiring through the wall mount.
4. Use a minimum of two 1/4-inch fasteners of appropriate type (not supplied) to secure the wall
mount to the mounting surface.
NOTE:
(Outdoor installations only)
Seal the fastener holes with an appropriate sealant (not supplied)
to prevent water damage. Be sure to apply the sealant between the mount and the mounting surface.
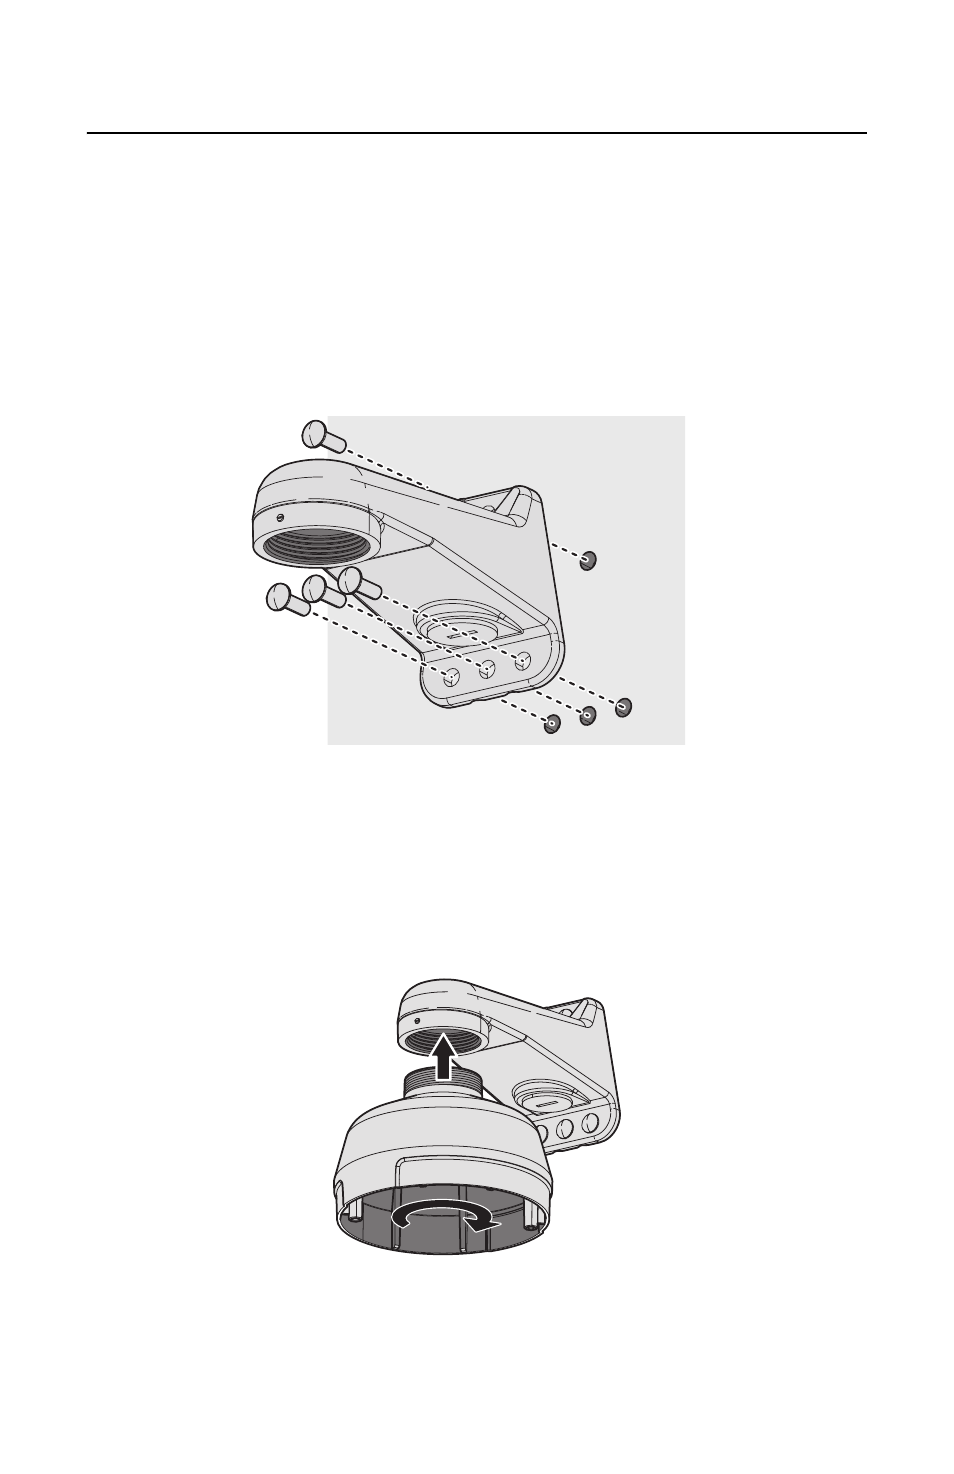
Figure 1.
Installing the Wall Mount
5. Attach the pendant mount adapter (not supplied) to the wall mount:
a.
Route the wiring through the pendant mount adapter.
b.
Apply anti-seize lubricant (supplied) to the threads of the pendant mount adapter.
c.
Screw the pendant mount adapter onto the mount arm.
d.
Use a 5/64-inch hex Allen wrench (not supplied) to tighten the setscrew located on the front
of the wall mount.
Figure 2.
Installing the Pendant Mount Adapter
6. To complete the installation, refer to the manual supplied with the pendant mount adapter.