MODE
MENU
GR/CH
10
%
MENU
MODE
MENU
GR/CH
10
%
MODE
MENU
GR/CH
10
%
MODE
MENU
GR/CH
10
%
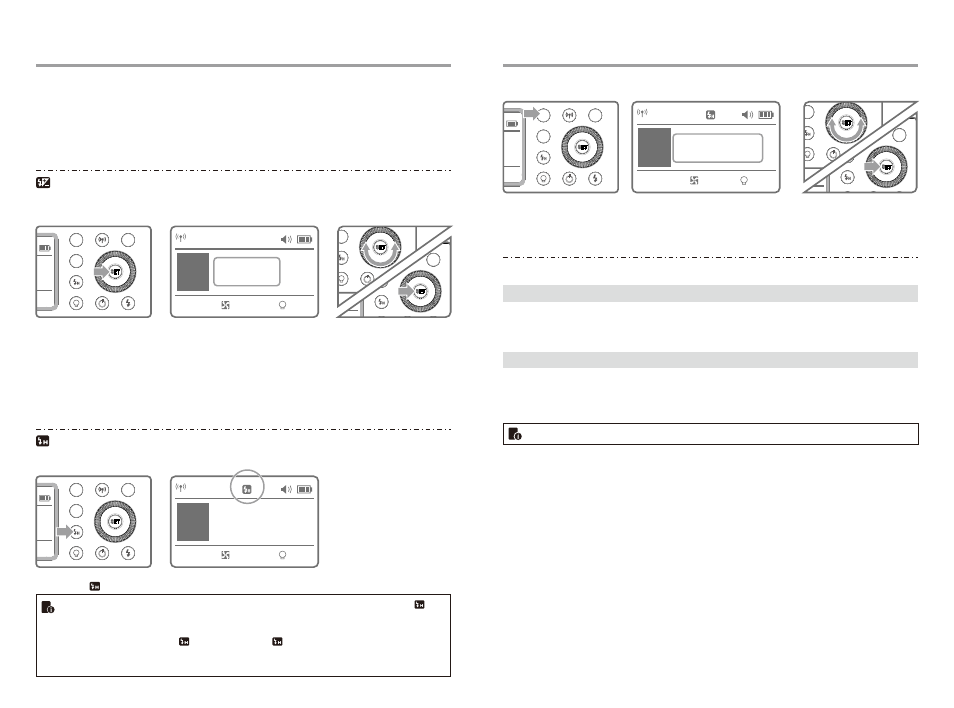
Flash Mode
— M: Manual Flash
The flash output is adjustable from 1/1 full power to 1/256th power in 0.1 stop increments. To obtain a correct flash
exposure, use a hand-held flash meter to determine the required flash output.
Press <
MODE
> button so
1
that <
M
> is displayed.
Turn the Select Dial to choose a
2
desired flash output amount.
Press <
SET
> button again
3
to confirm the setting.
Press < MENU > button to enter C.Fn-SLAVE to choose S2 function, so that this flash can also function as an
optical S2 secondary flash with optical sensor in M manual flash mode. This is useful when cameras have pre-flash
function. With this function, the flash will ignore a single “preflash” from the main flash and will only fire in response
to the second, actual flash from the main unit.
Optical S1 Secondary Unit Setting
In M manual flash mode, press