Name of parts – Godox AD400Pro Witstro All-in-One Outdoor Flash User Manual
Page 5
- 29 -
- 30 -
Name of Parts
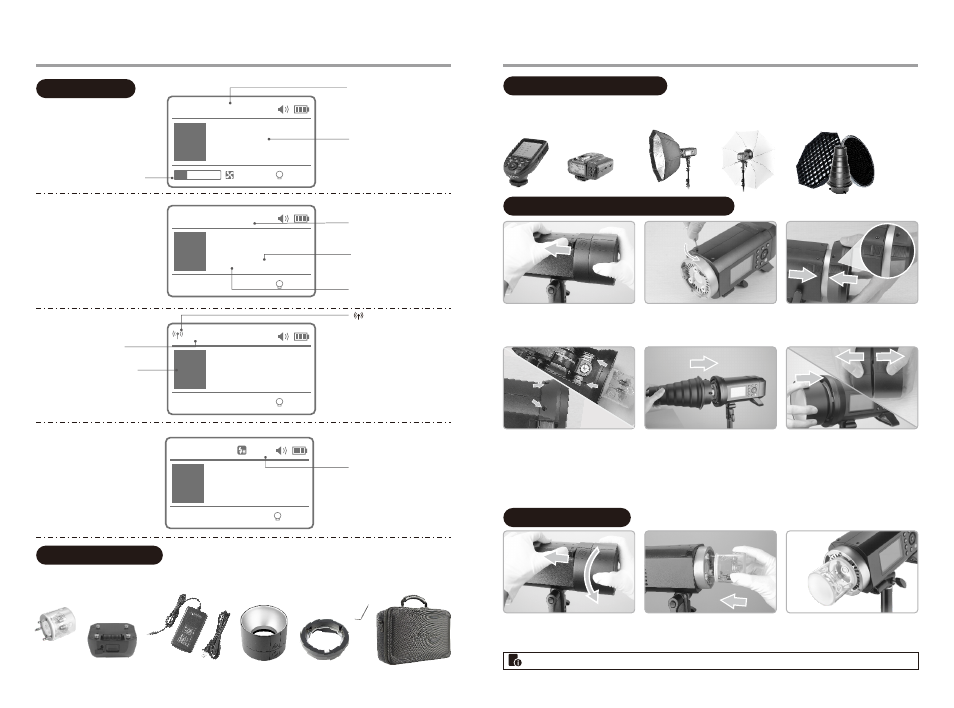
Name of Parts
(2) M Manual Flash
(3) Multi Flash
LCD Panel:
(4)
Radio Transmission Shooting
The product can be used in combination with the following accessories sold separately, so as to achieve best
photography effects: Xpro & X1 Wireless Flash Trigger, Softbox, Beauty Dish, Fold up Umbrella, Snoots,
Light Stand, etc.
Separately Sold Accessories
Replacing Adapter Rings and Accessories
1.
Remove the reflector or other
accessories from the flash head.
2.
Loosen the two Mount Fixing Screws.
Attaching Flash Tube
1
.
Remove the reflector or other
accessories from the flash head.
2
.
Match the flash tube in the Tube
Socket. Push the flash tube in until it
is securely seated into the socket.
1. Flash tube 2. Lithium battery pack 3.Battery charger 4. Power cord 5. Standard Reflector
6.Bowens-mount adapter ring 7.Wrench 8. Portable Bag 9. Instruction manual
Included Accessories
CH
1
Multi
A
OFF
1/
256
5 - 5
Hz
M
A
1/
256
S2
OFF
Multi
A
OFF
1/
256
5 - 5
Hz
t.1
1/10100
M
A
10
%
1/
256
S1
/
S2
M:
Manual
flash
Manual flash output
Flash duration
Multi
:Stroboscopic flash
Number
of flashes
Flash
frequency
:
Radio transmission
wireless shooting
Firing group
Channel
(4)
Optical transmission wireless shooting
●
Note: To avoid damage, please detach the flash tube during the transportation.
3.
Match the Accessory Locking Ring of
Bowens-mount or other mount
adapter ring to the Accessory Locking
Ring of the flash and push it in.
5.
Install the Bowens-mount
accessories or other corresponding
accessories.
6.
If needed to use new Godox-mount
accessories after installing the adapter ring
of other brand, please split the reflector
and insert it into the new Godox mount to
install the required accessories(How to
detach the standard reflector: hold the two
ends and detach it.). Or install the new
Godox-mount softbox directly (except for
Profoto-mount adapter ring).
1
2
3
4
5
5
6
7
8
4.
Tighten the two screws and use
another two screws provided to fix.