Chapter 3 hot keys, led and osd instructions – GeChic 1102I 11.6" 16:9 Portable Touchscreen LCD Monitor User Manual
Page 15
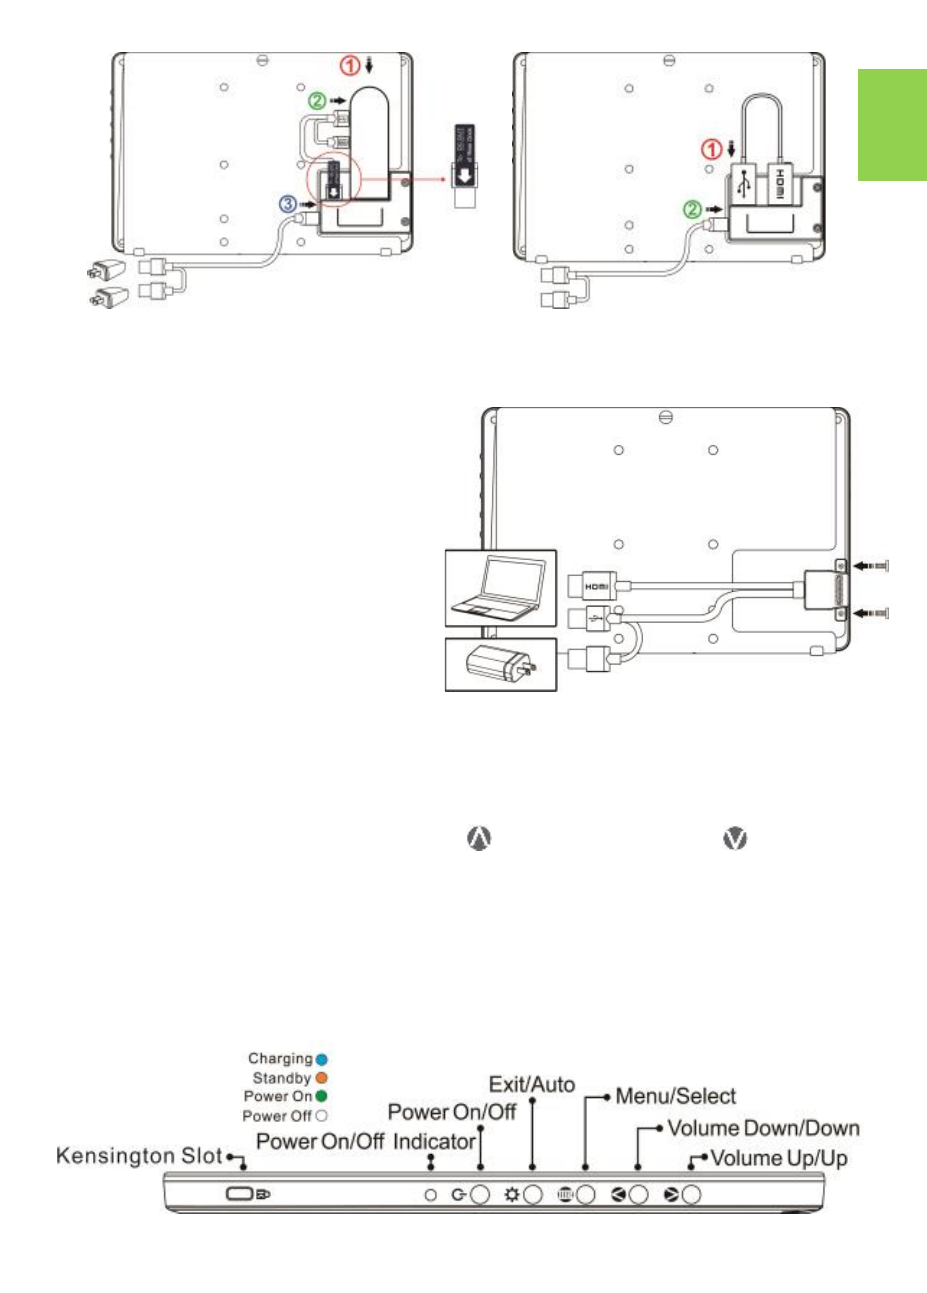
Fig.: Install Compute Stick
Fig.: Install Wireless Adapter
Section 9 Install On
-
Lap Proprietary HDMI
-
A & USB
-
A to Dock Port
Cable
As the fig., remove the rubber bung
at the rear of the monitor firstly.
Insert "On
-
Lap Proprietary HDMI
-
A
& USB
-
A to Dock Port Cable" to the
rear port of 1102, and then screw it
up. Plug in USB
-
A connector to
computer's USB port; HDMI
-
A con-
nector to computer's HDMI port.
Please press the menu button of
the monitor to enter OSD menu
and choose "HDMI 2" as "Input
Source."
Fig.: Install On
-
Lap Proprietary HDMI
-
A & USB
-
A to Dock Port Cable
Chapter 3 Hot Keys, LED and OSD Instructions
Section 1 Hot Keys & LED Indications
Notice: If need to adjust
“
Increase/up
”
or
“
Decrease/down
”
continuously , press the button and don't release. Do not press two
buttons at the same time, or it may cause no response or fault response.
LED Light Description
:
LED Light: It shows
green
light when turning on On
-
Lap Monitor and shows
orange
light when stand by. There is no light when the monitor is off. When
charging to 1102H's battery, it shows
blue light
.
9