Rj-45 crossover insert ports 1-8, Ethernet hub/switch, Data network – Quintum Technologies Tenor DX Quick Start User Manual
Page 4
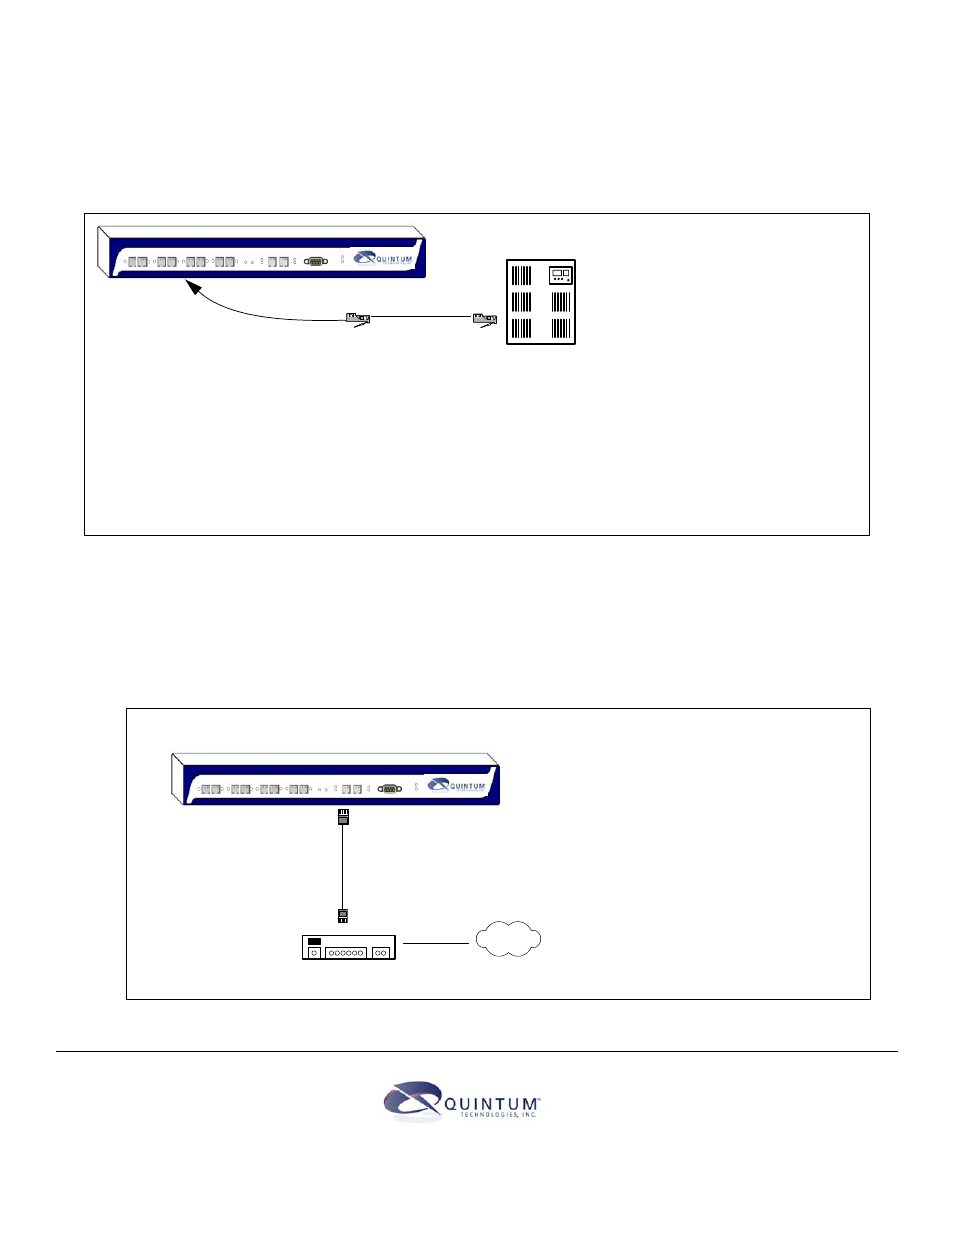
Connect to Line Interface (PBX)
Since there are many different PBX devices and connection methods, your individual PBX will determine the connection
method you use to connect to the unit. For example, your PBX may be connected using a patch panel, punch down block, wire
wrapped blocks, etc. If you are not sure about installation procedurs, contact the network administrator or review the documen-
tation you received with the PBX.
Figure 5: Connect to Line Interface (PBX)
1
2
3
4
5
6
7
8
R
E
S
E
T
D
I
A
G
CONSOLE
POWER
ALERT
LAN 1 LAN 2
Line/Act
100
Line/Act
100
PBX
RJ-45 Crossover
Insert ports 1-8
1. Plug one end of the crossover RJ-45 cable into one of
the eight network ports on the front of the unit. (This
cable from Quintum is the red RJ-45 crossover cable.)
2. Connect the other end of the crossover RJ-45 cable into
the appropriate port on the PBX.
Connect to Ethernet Hub/Switch (LAN)
You can use these instructions for general connection purposes only. The Ethernet hub/switch manufacturer’s docu-
mentation should provide specific instructions for connection to another device, such as the Tenor DX. Only LAN 1 is
available for use; LAN 2 is reserved for future use.
Figure 6:
1
2
3
4
5
6
7
8
R
E
S
E
T
D
I
A
G
CONSOLE
POWER
ALERT
LAN 1 LAN 2
Line/Act
100
Line/Act
100
Data
Network
Ethernet Hub/Switch
1. Plug one end of the grey or white RJ-45
ethernet cable into LAN 1 in the port
labeled LAN 1.
2. Plug the other end of the cable into one of
the Ethernet hub/switch ports.
RJ-45
Connect to Ethernet Hub/Switch
71 James Way
Eatontown, New Jersey 07724
1.732.460.9000
1.732.544.9119 (fax)
Technical Support:
Toll Free (U.S. Only): 1.877.435.7553
Internationally: 1.732.460.9399
Email:[email protected]