Installation and connection – AXING SKM 1-03 User Manual
Page 6
Operation Instructions SKM 1-03/-04/-05/-06 and 2-03/-04
Chapterl 2: Installation and connection
6
© AXING AG | Switzerland | Reserving change in design and type - We cannot be held liable for printing errors
2014-09-17
2
Installation and connection
The modulator modules can be mounted either to SKS 4-0x or SKS 8-00 system or stand-alone
2.1
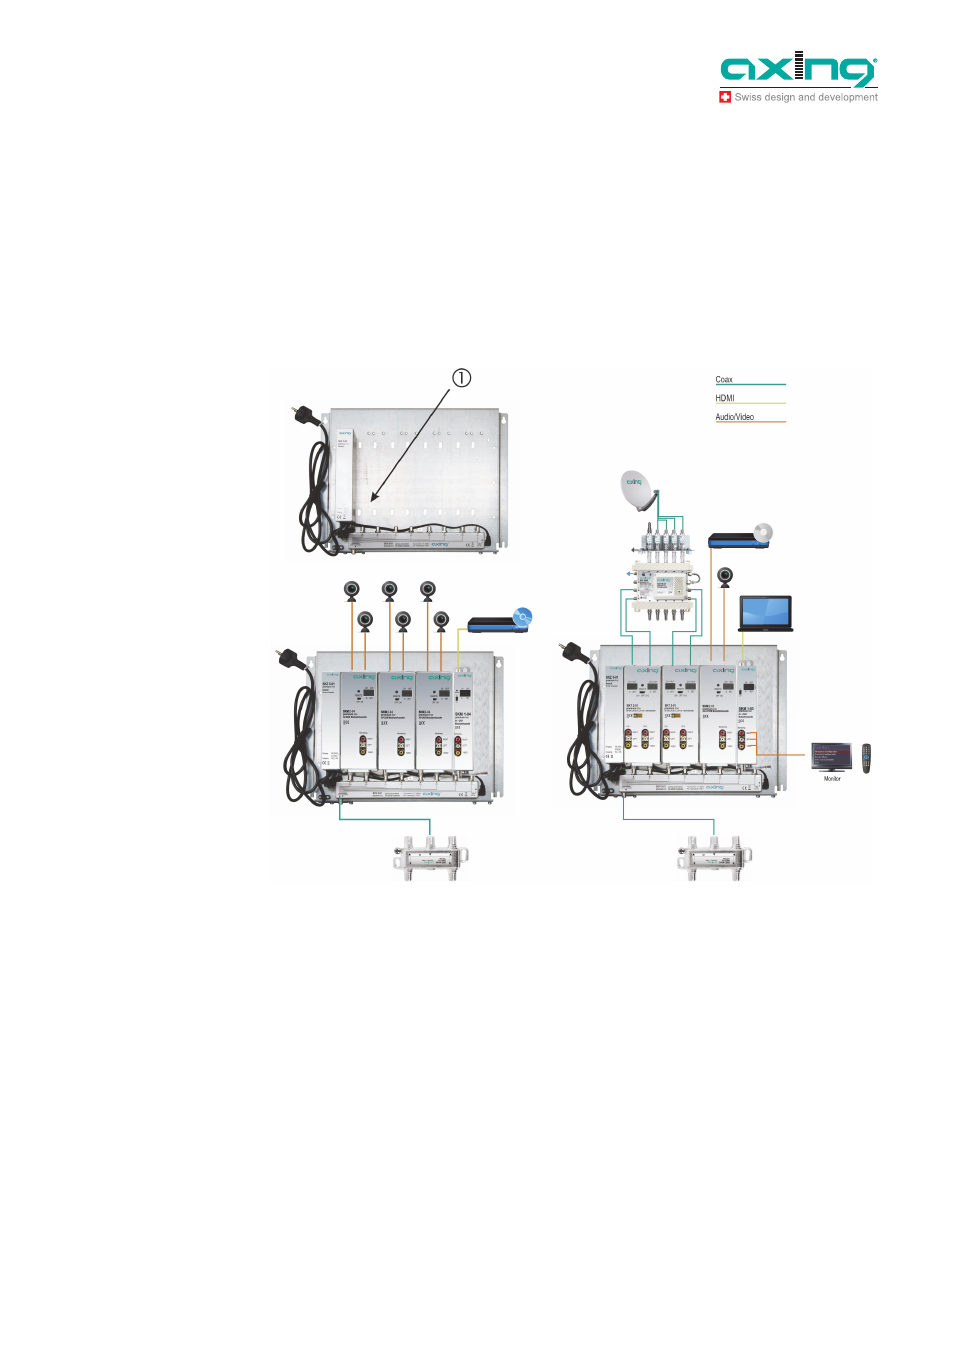
Installation and connection in a headend base unit
If you want to operate the SKM 1-01 on a headends basic unit SKS x-xx, plug the module into the output
combiner (1) and fasten it by screws. Each free slot may be used.
The power supply unit SKZ 5-01 or SKZ 6-00 supplies the module via the active output combiner. Signals
from AUDIO/VIDEO source are fed to Audio/Video inputs of the modules (see Fig. 2).
For detailed information on the headend base unit, refer to the corresponding operating instructions.
Before inserting or changing a module, pull the mains plug of the headends basic unit from the socket!
Ground the base plate in order to avoid dangerous overvoltages according to EN 50083-1, EN 60728-
11:2010 (attention: risk of fire/death).
It is not possible to insert two single modules side by side in the basic unit.
The SKM 1-07 cannot be used in combination with a headend base unit.
Fig. 3: Installation and connection
in a headend base unit
Notes