Customizing receiver, Viewing photos on your receiver, External hard drive – Dish Network Solo ViP 411 User Manual
Page 85
Customizing Receiver
75
Using Multimedia
Viewing Photos on Your Receiver
1
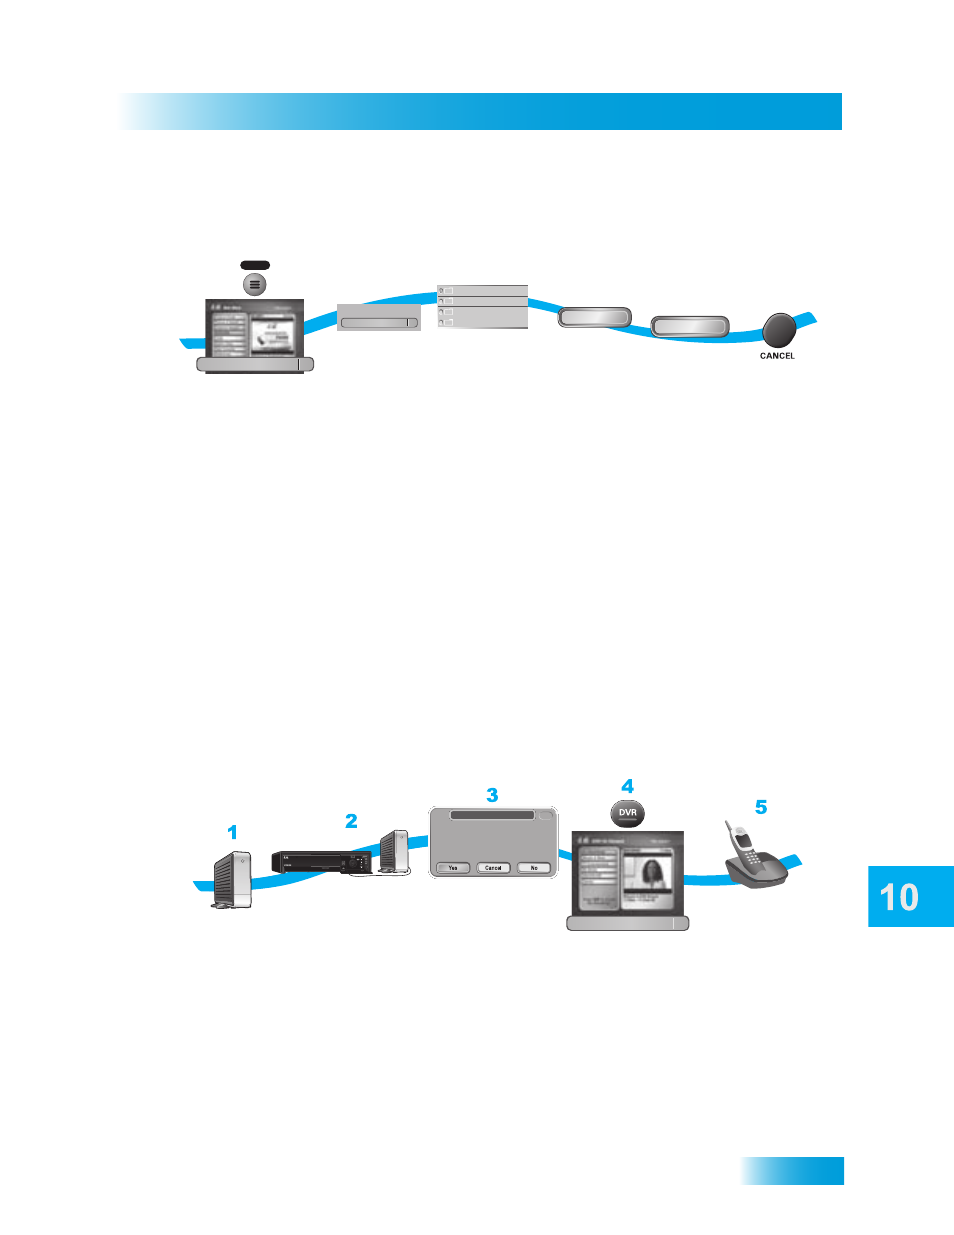
Press MENU and select Multimedia.
2
Select My Photos under My DISH Receiver.
3
Select the photo folder you want to view.
4
Select Slideshow.
5
Set up your options if desired, and/or select Play.
6
Press CANCEL to exit the slideshow.
External Hard Drive
You can expand the storage capacity of your DVR receiver by connecting a compatible
USB 2.0 hard disk drive. Transfer programs from the receiver to your external drive for
storage, and play back programs directly from the external hard drive.
Choosing a compatible external hard drive:
•
The hard drive must have a USB 2.0 connection.
•
The capacity of the hard drive should be between 40GB and 750GB.
•
Using a hard drive with an external power supply is recommended. External hard
drives powered by the USB cable may not function properly with your receiver.
•
Do-it-yourself kits and expandable racks may not be compatible.
1
2
3
4
5
6
Press MENU and
select Multimedia
Select
My Photos under
My DISH
Receiver
Select the
photo folder
you want to
view
Slideshow
Play
MENU
Select
Slideshow
Select Play
(or set up your
options then
select Play)
Press the
CANCEL button
to exit out of the
slideshow
My Photos
1
My DISH Receiver
August 31 2005 10:03am
September 3 2005 9:03am
December 2 2005 10:03am
January 8 2006 11:00pm
Multimedia
4
Connect Hard Drive
to receiver’s
USB port
Select Yes
to reformat
the Hard Drive
Press DVR and
select USB Storage
Follow the
on-screen prompt
to activate
the feature
Purchase an
external USB 2.0
Hard Drive
The attached USB storage device needs to be
reformatted to support DISH Network DVR
functionality. All existing data on the device will be
erased.
Do you want to reformat the device?
865
865
Warning
USB Storage
4